Superdetailing: Things I’m SkippingI laid out the criteria I was using at the start of this section on superdetailing.
The criteria were:
Three foot rule,
Important in photos,
and Do-able.
With that in mind, here are some details I did NOT add- and the explanations.
– Pipes around the boxy cover in front of the cab. I’ve already mentioned this was not do-able without removing it.
– I also mentioned the push pole. Because the chain is over scale, I had to pick one or the other and chose the chain. And besides a scale push pole would highlight that the chain is over scale. The chain looks wonderful by itself.
– Open cab roof vent. The cab is a hot place and like almost all steam locos, there’s a hatch which you almost always see open on this Shay.
This Shay has a hatch, but it is a square piece of brass soldered to the roof. If I were to model this, I would need to remove the current hatch, cut a hole for the opening in the roof, create a frame below the hatch in the roof, create a new thinner hatch, and then mount it properly.
I decided against this and worried such a detail might be too delicate anyway.
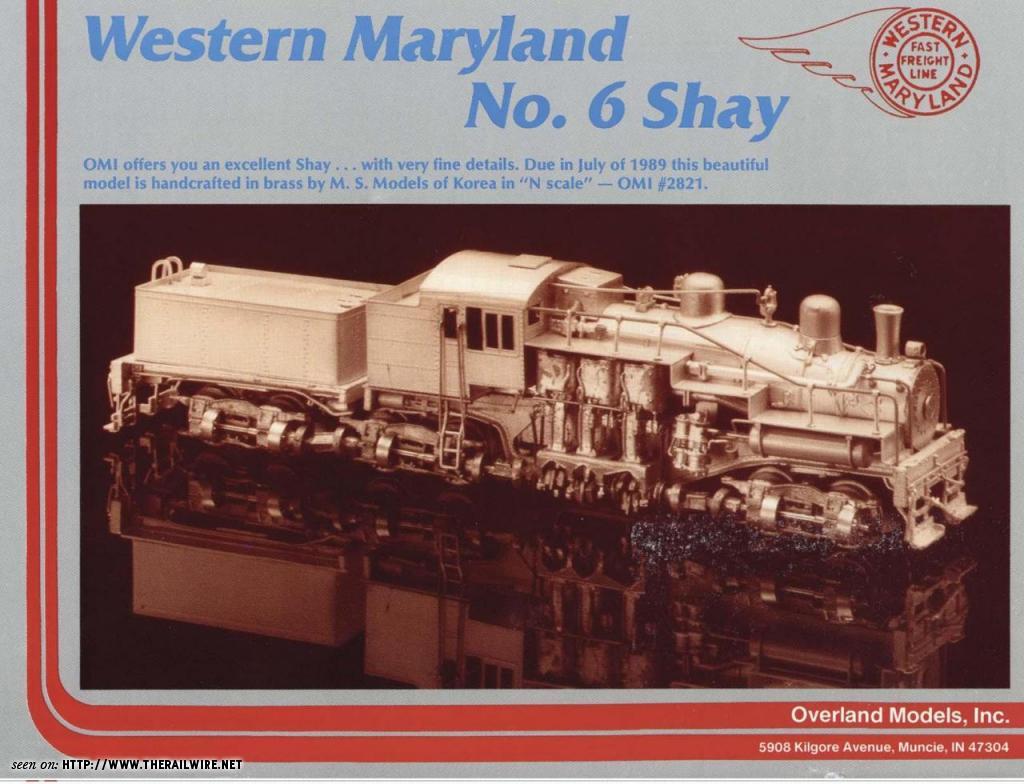
– Gear Caps. Now this one was a tough decision. The sample model in OMI’s ad has caps on the gear areas on all the trucks- except the one that goes behind the ladder.

The prototype uses them too- though sometimes some of them are left off. However, the spinning little pyramid gears on the lineshafts are ALWAYS covered (I assume for safety and to keep rocks and trash out).
Now, in my parts bag from a previous Shay creation, I actually had some of these gear caps. I wouldn’t be surprised ifs OMI provided these in a supplemental parts bag originally.

So I thought long and hard about using these.
There are a few problems.
First of all, there’s the question of where and how to mount them. Each truck could have four- one on either side of each axle bearing.
Here are the four spots.

On the real Big Six, these caps are bolted to the frame- a luxury we don’t have.
On the truck frame casting, there are two raised flat places which are
ideal spots for soldering (see the green arrows). No problem here.
But the other two spots have no such raised flat place (red arrows). Soldering here would be a problem. It could get messy, and the cap might not look straight when finished.
In fact, go back and look at the ad and you will see some of them crooked.
And then there’s the bigger problem of maintenance if I DO decide to install these.
Here is a cap simply set in place.

It does look nice, but if this were soldered on…… how would I clean and maintain the lineshaft?
Fuzz and hair are the bane of our models in general- and a curse for this model in particular. When someone loaned me his Shay for evaluation a while back, one of the things I did was spend time picking hair and fibers which had gotten all wrapped up in the spinning shafts, degrading performance.
In fact, look at this photo. There are at least two fibers finding their way into this area.

If I were to install these caps, the look would be wonderful. But my only recourse for cleaning would be complete disassembly of the truck so that I could get at these shafts from the back side.
These trucks have TINY screws (M1.0 or smaller) and everything is very delicate. I really don’t want to be regularly taking them apart for cleaning. The risk of something going wrong (and being un-fixable) is too great for me.
So no caps.
– Rear Tender Posts. Barely at the three foot rule on the model, but clearly present in photos are two little posts which sit on the tender roof in the rear almost at the corners. They are flattened. I have no idea what they do.
You can see them in this photo below. They are actually pretty prominent. Once again, if someone knows what these are, speak up. I’m clueless.
http://scriptunasimages.smugmug.com/photos/332647863_4YmTq-M.jpgThey would be make-able. I would take small brass rod and flatten one end. The problem is mounting them. It would be really hard to get a soldering iron tip way back there on the inside.
Normally this would be installed in the construction phase with the holding the tender roof only, before the sides are added.
And even still on this model as I find it….
Many people wouldn’t even be able to do it anyway since there is a big lead weight sealing the hole in the middle of the tender body underside.
I’ll be removing that weight. But even still, this detail is just too hard to solder. So I’m leaving them off.