Hi everyone.
One of the Trainboard members was looking for information on putting a LokSound in a Kato PA-1. I hadn't done this before, but then I remembered that several years ago, I bought two Kato SP PA-1's, planning to convert them into NKP Bluebirds. That plan got shelved when BLI announced its NKP PA-1 units. But I decided to pull out one of the Kato units and see if my original plan for doing this would work. It did.
Here's the video with the final result:
And here is how I did it.
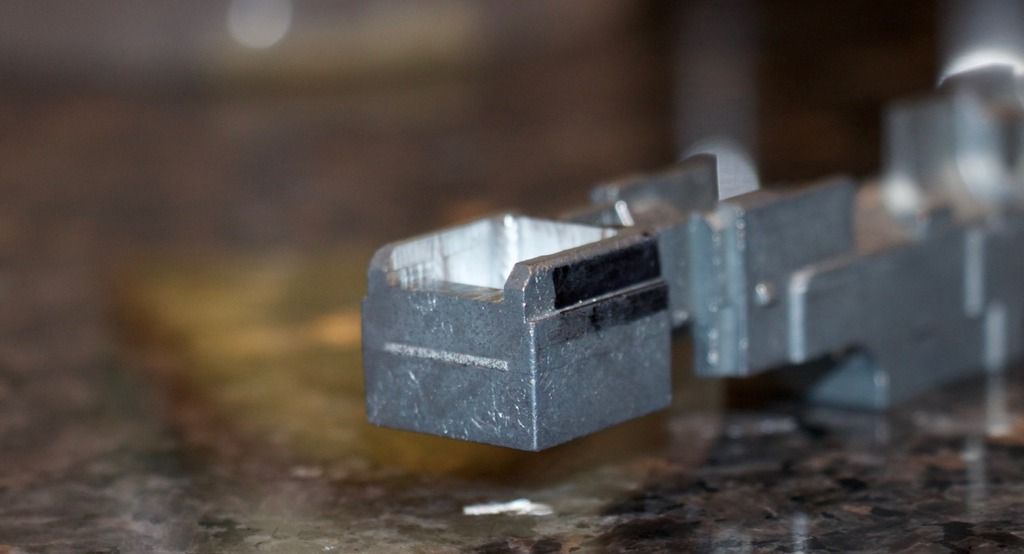
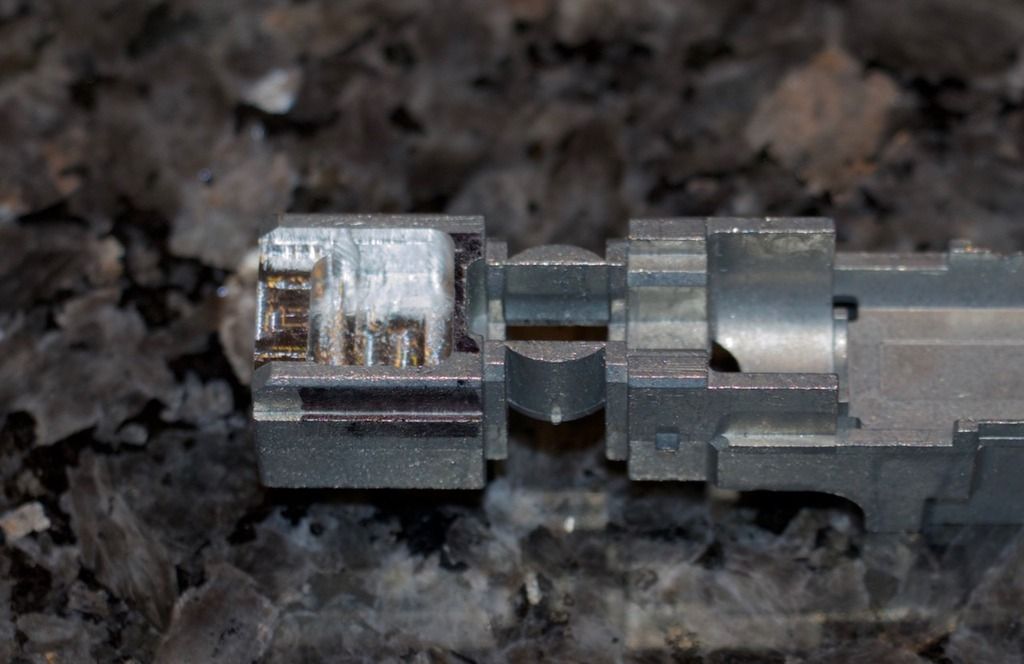
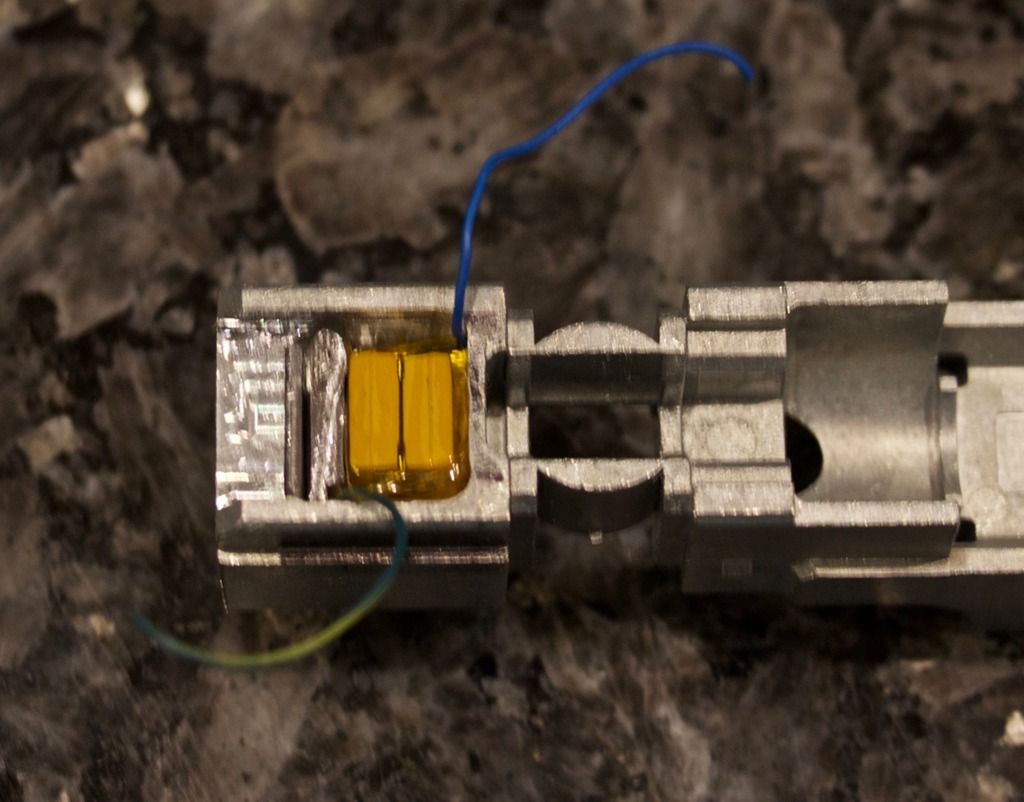
The main problem with the PA-1 is that there isn't enough room to mount the decoder on top of the chassis without some significant frame milling. The whole center section of the frame is taken up with the motor and flywheels in a plastic housing, and there just isn't enough clearance to fit a LokSound on top of the plastic housing. There also isn't any obvious place to mount a speaker or keep-alive capacitors. So I decided to mill out the back of the frame so that I could mount the "thick" part of the LokSound back there, and while I was doing that, I decided to also mill out a "well" where I could stash two keeper caps.
Here are two photos of the milling I did to the rear part of the frame and a photo of two keeper caps in the "well"(I milled the well a bit big, so I stashed some pieces of sheet lead behind the caps to fill in the extra space):
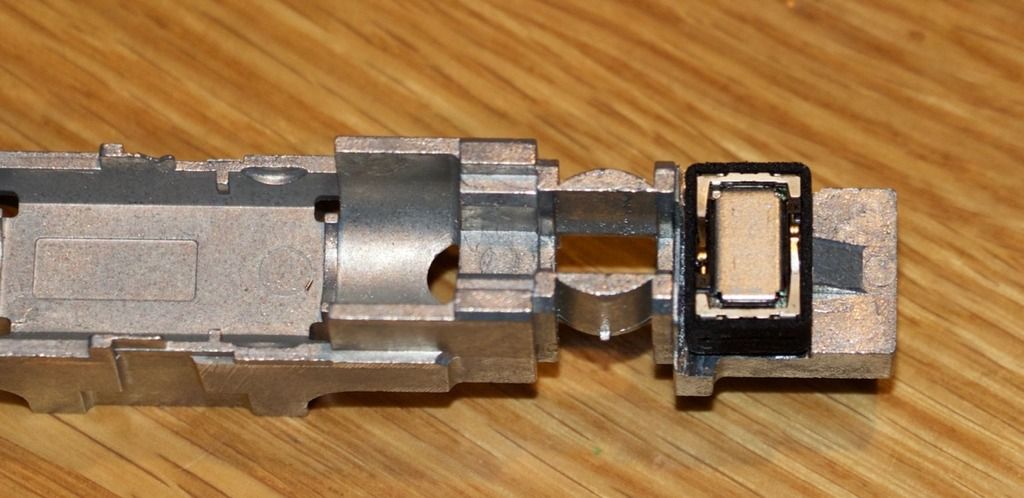
And what about the speaker? The only place left for it was the front, in the cab area. So I milled out a spot on the front of the frame to fit an 8x12 speaker in one of the Keystone Details enclosures. I used one of my old stash of Star Micronics 8x12mm speakers mounted with the diaphragm facing down so that I could wire the speaker from on top. Here are photos of the milling I did to the front of the frame, along with photos of a "test fit" of the speaker/enclosure:


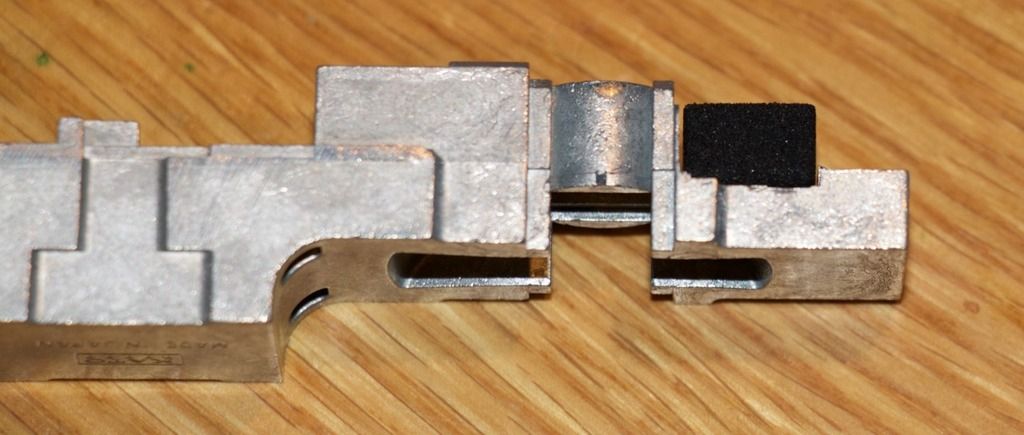
At this point, it was time to reassemble the mechanism and start installing the decoder. Here's a photo of the reassembled mechanism. I added two strips of .020 styrene that I taped down with kapton tape to both protect the flywheels from the wires that would come later and to hold the power pickup strips in place. The speaker has also been glued in place on the frame. I also cut off the power pickup strip "guide tabs" on the rear plastic clip so that the front of the LokSound could fit more closely to the frame.

Next came the actual decoder install, and the preliminary wiring. Here's a photo of the decoder installed, with all the wiring done except the lights. I've anticipated the light installation by using a small piece of circuit board with two 1K, 1/8w SMD resistors (the board has the copper cut through from left to right to create two separate "circuits" - one for the yellow wire, which will eventually power the Mars light, and one for the white wire for the headlight). This part of the install was pretty straightforward - the "thick" part of the LokSound sits over the milled-out area in the back of the frame, with the thin front part sitting on top of the rear plastic clip. Black wire is soldered to the left pickup strip; red wire to the right. Gray wire goes to the left motor terminal (I had to trim these back a bit to make sure they didn't touch each other) and the orange wire to the right. The negative lead of the keeper caps is soldered to the negative keep-alive pad at the front of the LokSound, and I've spliced the positive keeper cap wire to the blue wire, then taped all the wires down with kapton tape.

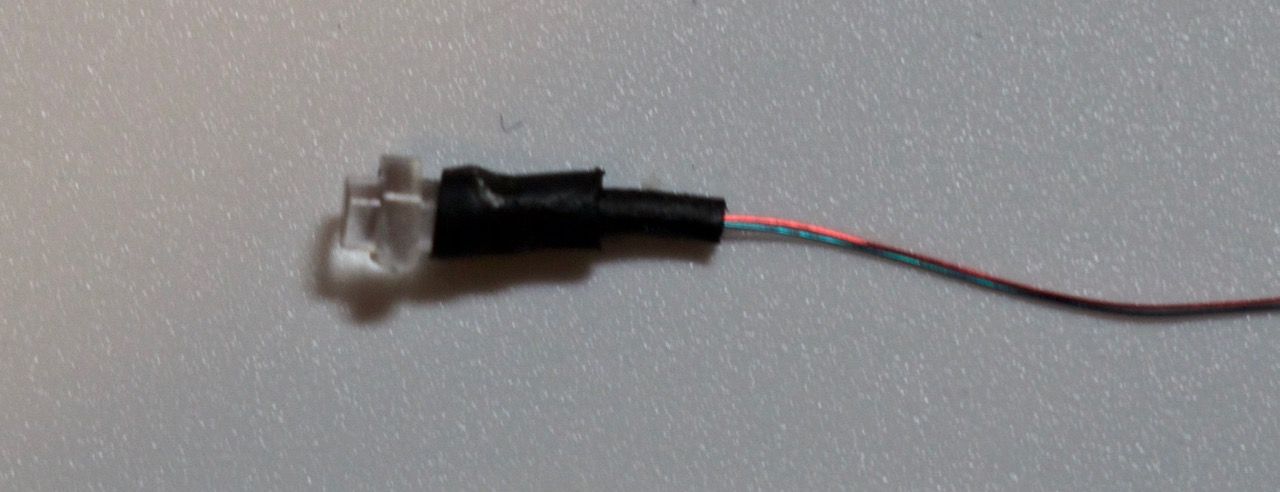
Now for the lighting. I wanted to separately light the Mars light and headlight, so I removed the lighting assembly and cut the light pipes to separate the headlight insert from the Mars light insert. Then I glued a 603-size SMD LED to each light insert, using some heat-shrink tubing as strain relief and to protect this assembly, and then glued the light inserts back into the shell. Here are two photos, one showing the headlight assembly after I had glued the LED to the back and added some heat-shrink tubing, and the other showing the Mars light back in the shell.

Then I just soldered the positive leads from the LED's to the blue wire, and the negative leads to the other side of their respective dropping resistors, put the shell back on, and programmed the decoder with the ALCo 244 prime mover.
The whole installation took me about five hours from the time I opened the Kato jewel box, including the time I spent taking photos. So not too bad.
If anyone would like to buy a nice Kato SP PA-1 with LokSound, let me know - I really don't have any use for this unit on my own layout, so I'll probably list it for sale in the Trading Post area.
John C.