Hello all.
I've been reading a bunch of your layout threads here and it has motivated me to start my own.
My layout will be based on a hypothetical situation where BC Rail took over operations of CP Rail's Esquimalt & Nanaimo Subdivision, on Vancouver Island. BCR had plenty of four axle power and experience running on light rail branch lines. The Island had most of the same resources and types of customers as BCR already served so rolling stock wouldn't be an issue. They also had experience with rail-marine operations, and possessed the RDCs for the passenger run (which VIA would be happy to abandon). Finally BCR had existing tourist passenger trains. Several attempts at tourist lines had been made on the Island but ultimately failed for one reason or another. BCR with their extensive experience and quality equipment, could make it work for sure. Mmmmm. Royal Hudson over the Malahat (even though in reality it wouldn't make the curves and would likely fall through the bridges.)
Modelling:
The goal is to create long runs of single track main line so I can watch my trains travel through the forest. Train lengths will be 5 to 20 cars with sidings to accommodate 10 car trains. The only trains that would be maximum length would be the train to and from Port Alberni, and my collection of passenger trains so meets would have smaller trains taking the siding allowing the longer train to run through (and my collection of passenger trains wouldn't be part of an opps session).
I plan to model representations of:
-Victoria, including compressed Store Street trackage (including associated switching industries), passenger station built in '85, Johnson St Bridge, the Cn interchange and a compressed version of the Russel's Roundhouse.
-A Malahat mountain crossing scene featuring the only tunnel on the line, a full scale custom built Niagara Canyon bridge, and if space permits a slightly compressed Arbutus Canyon bridge
-The City of Duncan which will be represented by the station, siding, possibly a propane dealer, Top Shelf Feeds, the Cowichan River crossing, and the Hayward wye
-The Lake Cowichan Subdivision beginning at the Hayward wye, a CN trestle crossing scene (CN won't be modeled as an operational part of the layout but will be represented) and the town it self represented by a station, siding, and an interchange for logging traffic.
-Nanaimo Welcox yard compressed but built following yard track diagrams, and including a wye and rail-marine operation - with the intent to eventually build a full scale model of Carrier Princess
-City of Nanaimo represented by a siding, station, and a couple of switching industries such as a Superior Propane dealer.
-Parksville represented by a station, siding, associated industries like National Silicates, and a wye.
-Extensions for the run to Courtenay and the branch to Port Alberni starting at Parksville. Both of these lines will end with either a runaround or a loop track and the destinations won't actually be modeled. I don't have the room to model the industrial complex in Port Alberni but having the branch will give me the ability to build the trains at Welcox and run them to staging for turning and return. Same thing with Courtenay only with much shorter trains.
Operations:
The layout will be run most often on my own but will be designed for the odd time that there is more than one operator.
For the most part I will operate the trains as they did on the prototype, with most freight trains originating in Welcox and running to Duncan, Victoria, Port Alberni, and Courtenay. Passenger trains will run from Victoria to Courtney, and while not representative of the time period, possibly also from Duncan to Lake Cowichan just for fun. Power would primarily be 4 axle locos per the prototype. An S-13 for Victoria (I'll use a leased CPR SW9 or BC Hydro SW9 until an N scale S-13 comes about), C420s and RS18s for the Welcox yard, and C425, M420, M420B, and RS18 for power on freights. Even though 6 axle locos couldn't make the curves on the island, and in all likelihood would have crushed the bridges, I plan to run them too because I have modeled them and I think they are awesome.
Construction:
My plan is a 3 deck around the wall type design with a helix joining the three decks. The helix will be a 24" radius and as such will have quite a long run of track in it. While it may go unused most of the time, I'm considering going to double track in the helix to reduce congestion at that point. That being said, each helix will only be about 3 or 4 turns so it might just add congestion having the extra turn outs at the entrances and exits. I'm undecided about this.
A disproportionately large portion of one section of the layout will be dedicated to the Welcox Yard. I want it to be large enough to assemble and stage the trains, but never to be full of trains. It needs to be sufficiently large enough to have that partly unused feel that you always see in pictures of the prototype. Plus I love yards and I'm only going to have one so why not go all out? It will include compressed representations of the "A" outgoing yard, "B" incoming yard, and "C" assembly tracks for the ferry. It will also have the outdoor service facilities. Welcox will be the first part of the layout built and will allow me to play with my trains as I build the rest of the layout. Actually, the FIRST piece of the layout built will be the Niagara Canyon Bridge. I know that's not a great place to start since it'll be ten years before I build that section of the layout, but thanks to help from Scott, I have artwork for the etchings so I feel the time to move on this is now! I'll likely integrate that model into the layout elsewhere just so I can see trains on it, or maybe store it in the crawl space, but at any rate, it's getting built first and I'm really excited about it. But I digress, back on topic.
The three levels of the layout will need to spaced quite close together. I'm 6 ft tall and a good friend of mine, who will be operating with me most often is about 5ft8. I plan to put the top level at about nose level for him, with approximately 12" separating each level so we're not kneeling to operate the bottom level (although it may require sitting on a stool, haha.). With the exception of key scenes, each level will only be about 8 inches deep so the height is not an issue as far as reaching in to the levels. Shallow shelves will also allow me to make faster progress with scenery, concentrating on the right of way as the model, and limit my need for home made conifers to the hundreds of thousands, instead of millions, haha. Major areas of operations, like Welcox and Victoria, will have either no track above/below, or just a 8 inch shelf so that the featured area of operations isn't eclipsed by the level above. Care will be taken not to place major industries above or below these areas of congested operations as well to prevent problems there.
Bottom Level:
Level one will be about waist height. Victoria will be the only major area of operations on the bottom level so the operator there can sit on a rolling stool. The Malahat crossing will also be on the bottom level which will allow me to use open space below to model convincing deep canyons at the bridge crossings. Duncan will finish the main run on the bottom level and end at a two sided wye which enters the next room for the scenic run to Lake Cowichan, or enters the helix for the climb to Nanaimo. While prototype wye was three sided, trains didn't go from Victoria to Lake Cowichan and I won't be turning trains here. Using a two sided works because having only 12" between levels makes it impossible to properly model a full wye in this spot and not have it look like it's in a cave. It'll present more like a siding or a spur.
Middle Level:
Level two will be about mid chest height. As you exit the helix you enter a 3 sided wye which breaks of to either the Welcox yard or the city of Nanaimo. Welcox will be over the scenic run to Lake Cowichan. Out of Nanaimo trains will run over top of the Malahat crossing making their way to Parksville to enter the helix again. The wye will actually be located away from the helix so I can have it in a corner out in the open and properly model it. The most time standing in one spot operating trains on my layout will be the yard operator at Welcox. The planned height of mid chest height and a depth of about 2 ft will be a comfortable position to work on this section.
Top Level.
Level three will be just below my chin height. (my shorter friend will need a stool, sorry Danea). Exiting the helix sets you off either towards Port Alberni or Courtenay. On the prototype there was a three sided wye here but at eye level it won't really be visible, and would be too deep to use and maintain so I'll represent it the same way I did on the lower level with just a single switch. Again no traffic went north off the of the Port Sub so it works for operations. The top level will be a scenic delight with river crossings, forest, and possibly the series of trestles at Cameron Lake on the Port Sub. Switching will be limited or non existent on the top level and will simply allow me to watch my trains run through the forest at a height just below eye level. It'll give the trains a place to go and to stage for the return trip and switching at Welcox. Thats enough for me.
I'm very busy with my jobs and family so my modelling time at home is limited. Most of my modelling is done during slow periods at night while I'm on shift. You can get a lot done when it's 4am and nothing's going on. I probably shouldn't say that too loud but I trust you guys, haha. I plan to build layout design elements in small blocks, two or three feet at a time. A bridge scene, a station scene, etc and then integrate them into the layout with scenery as they become complete.
Train control will be DCC, however it will take me years to convert my fleet so I will have a switch to allow me to use a DC control when I want to run my DC locos, however the layout will be wired for DCC with no blocks outside of those needed for power districts (likely one for each level).
Turnout control will be manual either from knobs on the fascia or control on the layout it self. I haven't decided. Likely knobs in the yard so I don't knock my trains off the rails and ruin details. It for sure won't be automatic as I need to keep the bench work as thin as possible and with the number of turnouts in just the Welcox yard, the prospect of buying that many Tortoise motor scares me.
Track will me Micro Engineering Code 40 with Fast Tracks hand laid turnouts. Number 10s on the main line and number 7s in the yards or other tighter areas. The exception is the helix with will be Atlas Code 80 flex.
Room lighting is to be fluorescent with plans for layout lighting in the form of LED strips under each level. The top level will have a valance for the lighting and also serve to attach plastic painters sheets that will prevent dust collection on the completed sections of the layout during times that it's not in use or being worked on.
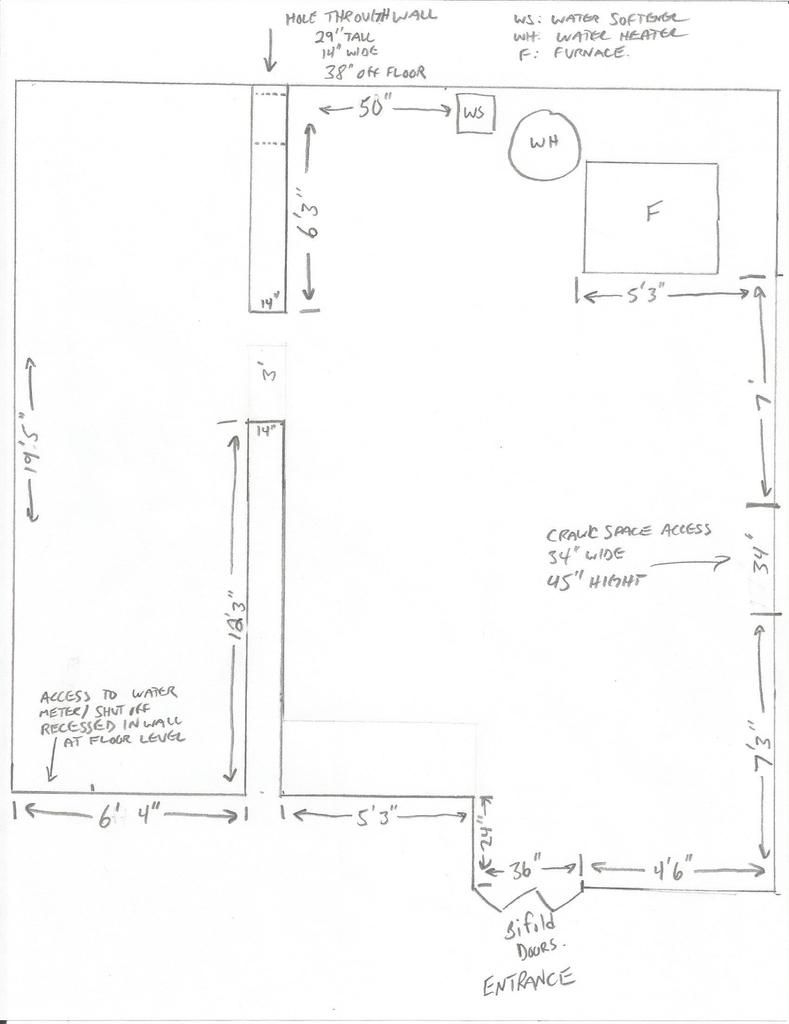
I'm not a computer drafting guy so I've hand drawn the room with dimensions and will soon post a basic drawing of how the plan will work.
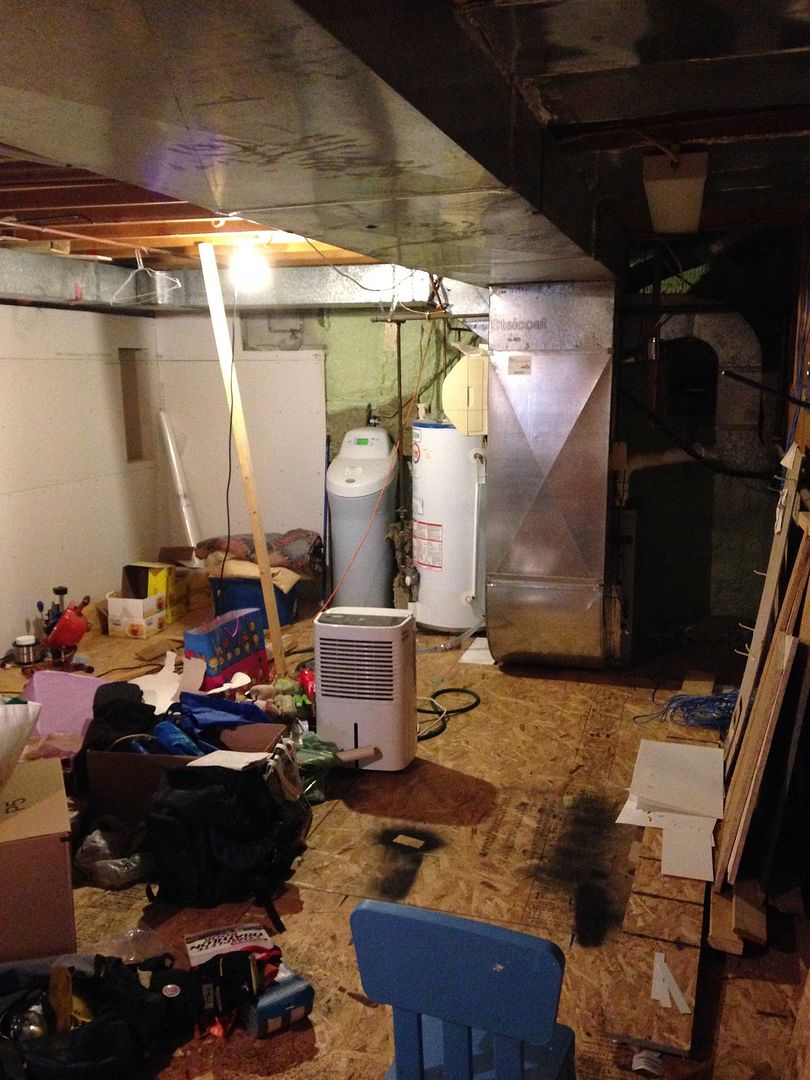
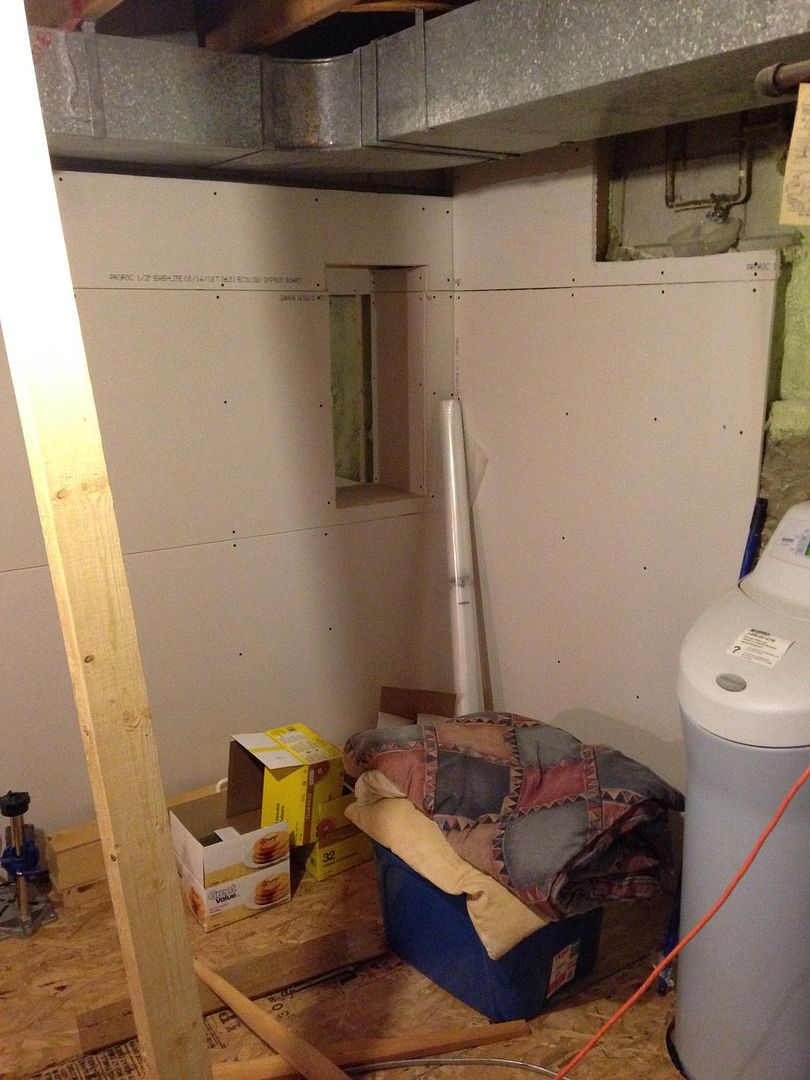
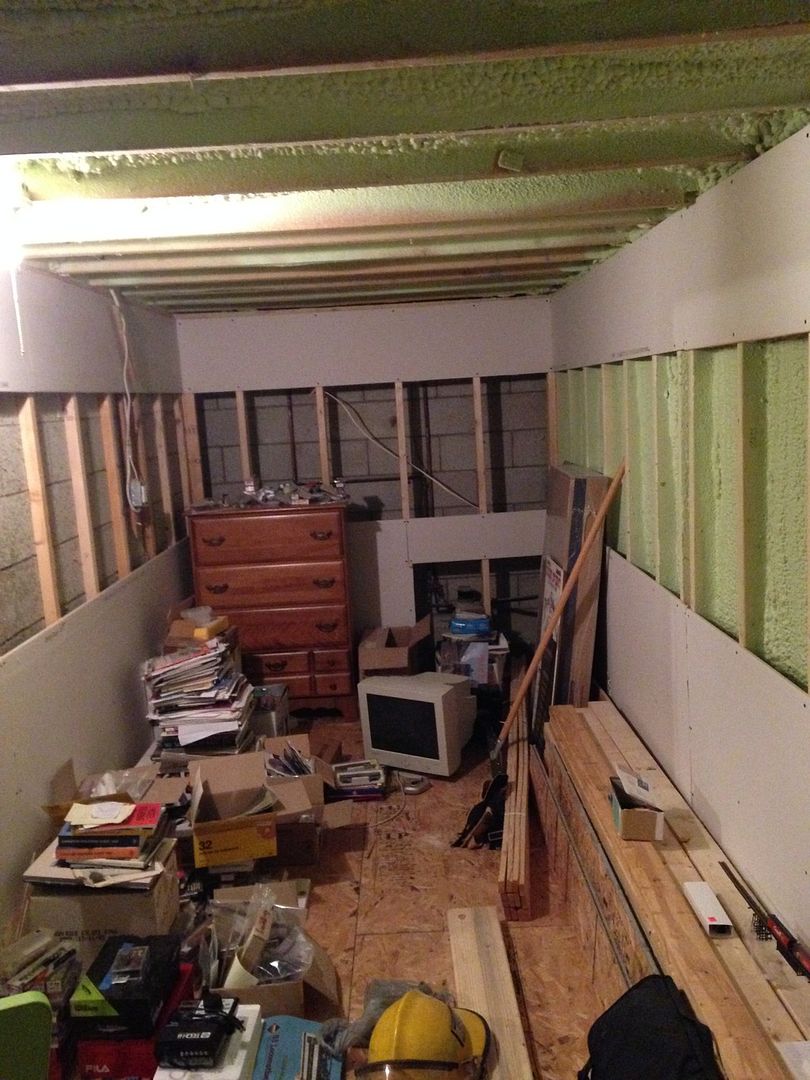
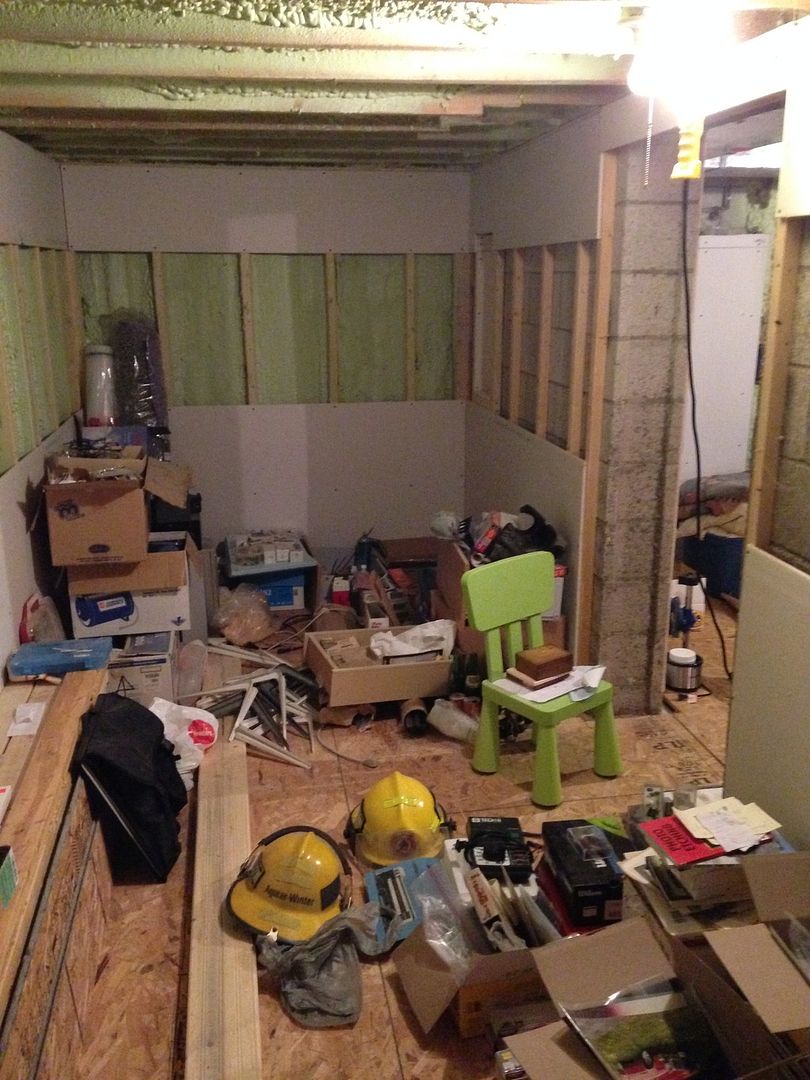
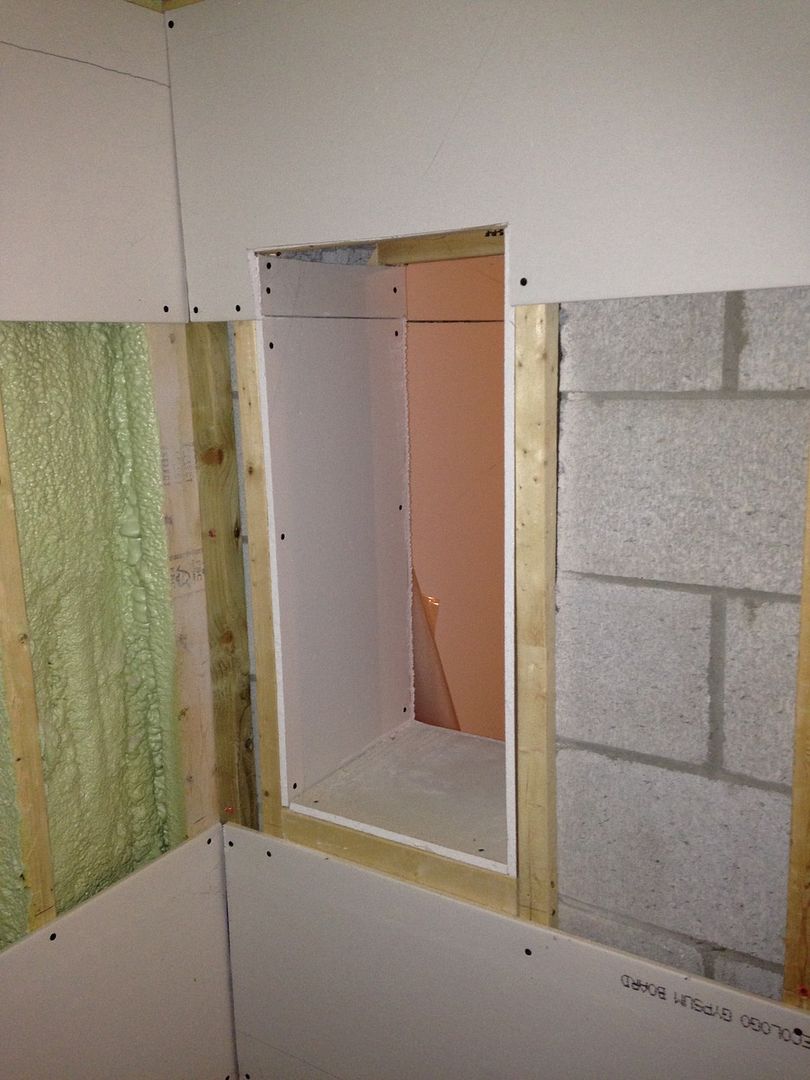
I've also included some pictures of the room. It's under construction with major things like moving the water softener, framing, and sub-floor complete, as well as a knock out in the cinder block wall for trains to enter the helix. It's very messy right now but believe it or not, clean enough for me to work on the next stage, which is wiring the room. It's closer to being done than it is to being started!
Room drawing with dimensions
Looking in from the corner to the right of the entrance
The corner where the helix will go, showing the hole in the wall for passage into the next room.
Inside the second room, Welcox will take up the entire wall on the right.
Same room from the other end. The hole for the helix is at then end there on the right
Close up of the hole
Thanks for your interest. I hope I can post new information often enough to keep you interested. As I go along any suggestion or criticism will be appreciated and considered. This is my first layout and I know it's very ambitious. The plan will change 100 times by the time it's done (or by the time I die - Which ever comes first.) I'm looking at it as many small layouts that will morph into a finished product as I go.
Craig