Author Topic: Looking for tips for realistic river/creek/streams  (Read 5017 times)

0 Members and 1 Guest are viewing this topic.

primavw

  • Crew
  • *
  • Posts: 143
  • "Life begins at the end of your comfort zone"
  • Respect: 0
    • Nittany and Lock Haven HCD Layout
Looking for tips for realistic river/creek/streams
« on: February 08, 2014, 09:32:28 PM »
0
I have done a bit of searching on railwire, google and youtube and haven't gotten much in the way of a how-to. I have seen the WS videos on how-to for realistic water and I sort of see that as a "good enough" technique.

I have started a creekbed on my layout and am searching for the best way to go about prepping for the "water" stage. I have see some of the breath taking results from Mark Dance, etc and would like to know what you folks have had success with.

I am working off a photo of the Little Juniata River during summer to get inspiration for the creekbed's colors, but I want to do this right. Being that this river tends to run faster I don't plan on tinting the water material or painting its surface. Obviously N scale presents a unique approach because the details in the creek bed tend to be a bit smaller. Obviously with clear water the details can make or break the scene So what do you do?
Modeling The Dark Horse


YouTube Channel:
https://www.youtube.com/user/gogetta2ohsc

robert3985

  • Crew
  • *
  • Posts: 3126
  • Respect: +1503
Re: Looking for tips for realistic river/creek/streams
« Reply #1 on: February 09, 2014, 02:04:37 AM »
0
I've used a couple of techniques for small rivers that have worked quite well.

The first technique was to not create an actual river "bed", but I used Foamcore for the "bed" and built up the river's edges from plaster and real rock rip-rap.

I then airbrushed the colors of the small river (the Weber River in Weber Canyon) using reference photos I took of the spot I was modeling.  Although the Weber River is clear in the Summer, Fall and Winter, it gets reddish brown during the Spring runoff.  I was modeling the early Summer, so it was clear by that time.  There were lots of rocks in the stream at the location I was modeling (Wilhemina Pass and Devils Slide), however, the river fills up with freshwater weeds, which are long (over 20' long) and wave along as the current passes over them.  The bottom of the river is also covered in weeds but a different kind and the impression you get when you look at the river is that the edges are "wavy" green, which fades to a greenish-black in the channel.  There's also a very thin edge where you can see the sand and stones along the sides, but it's a greenish tint...very light, which gets darker as it blends into the waving weeds, then it goes rather quickly to a greenish black. 

Where the river curves, the inside of the curve almost always has a sand/mud bar, and the outside edge of the curve runs along a steep embankment.  I modeled both of those items, and implied the sand/mud bar with a darker, greenish tinted color for the underwater parts.  I also airbrushed lighter "spots" in parts of the river where big rocks had fallen off the cliff and were under water or still sticking out.

All this painting was done on a perfectly flat surface, just implying the colors of the river with no depth whatsoever.

Next, I applied two coats of gloss gel, the first one was painted smoothly on, the second coat was manipulated so it had some ripples and waves in it, then I applied more ripples and waves around rocks and logs and bridge abutments.

Next, I mixed up a bit of Titanium White with more gloss gel (not opaque, but translucent) and started working on the white caps...building them up and letting each application dry.

Then I added some full-strength Titanium white to the really rough white caps and when that dried, I painted those flat white spots with a coating of gloss medium (not gel).

I was quite amazed at the depth your eye tricks you into thinking you see.  I had many comments from visitors and fellow modelers who swore that I'd used a fancy resin technique instead of just creating a rough shiny surface over paint.

Second technique was to actually make a river bed, paint it much like I did to the Foamcore river, but put a layer of Envirotex on it...about a 1/4" layer.

What I absolutely HATE about Envirotex (other than the smell) is how it creeps up on to rocks, twigs and river banks, so I did just the bare minimum of scenicking along the river sides, but I did insert big rocks where appropriate, and build actual sand/mud bars that got covered up with the resin.

Envirotex self-levels so you have to keep adding it until it's at the level you want.  It will also find any little hole and leak like crazy all over your floor, so make sure you've got the holes plugged. 

You inevitably get a lot of bubbles when you pour it.  You can use a propane torch to lightly (very lightly please) apply a flame close to, but not touching the still liquid resin.  The bubbles come right up and disappear.  Another method is to use a long straw and blow on your still liquid river.  This works well too, except it stinks and you get spit on the surface of your "water".  Don't worry, it doesn't affect the hardening process.

After the resin has cured to a glass-like smooth surface, add your thin river banks (right over the resin that has crept up the sides) and paint the boulders in the water which will be nearly encased with the creeping resin.

After your river banks are dry, do all of what I wrote above to the glass smooth surface of your river, using gloss medium, glossy gel medium (thick and thicker) or WS "Water Effects" for big rapids and waves.

This makes for a really excellent watery look for rivers and lakes.

Here's a photo of my Weber River I did for my first Wilhemina Pass/Devils Slide attempt over Foamcore with various thicknesses of gloss medium:


Here's another view:
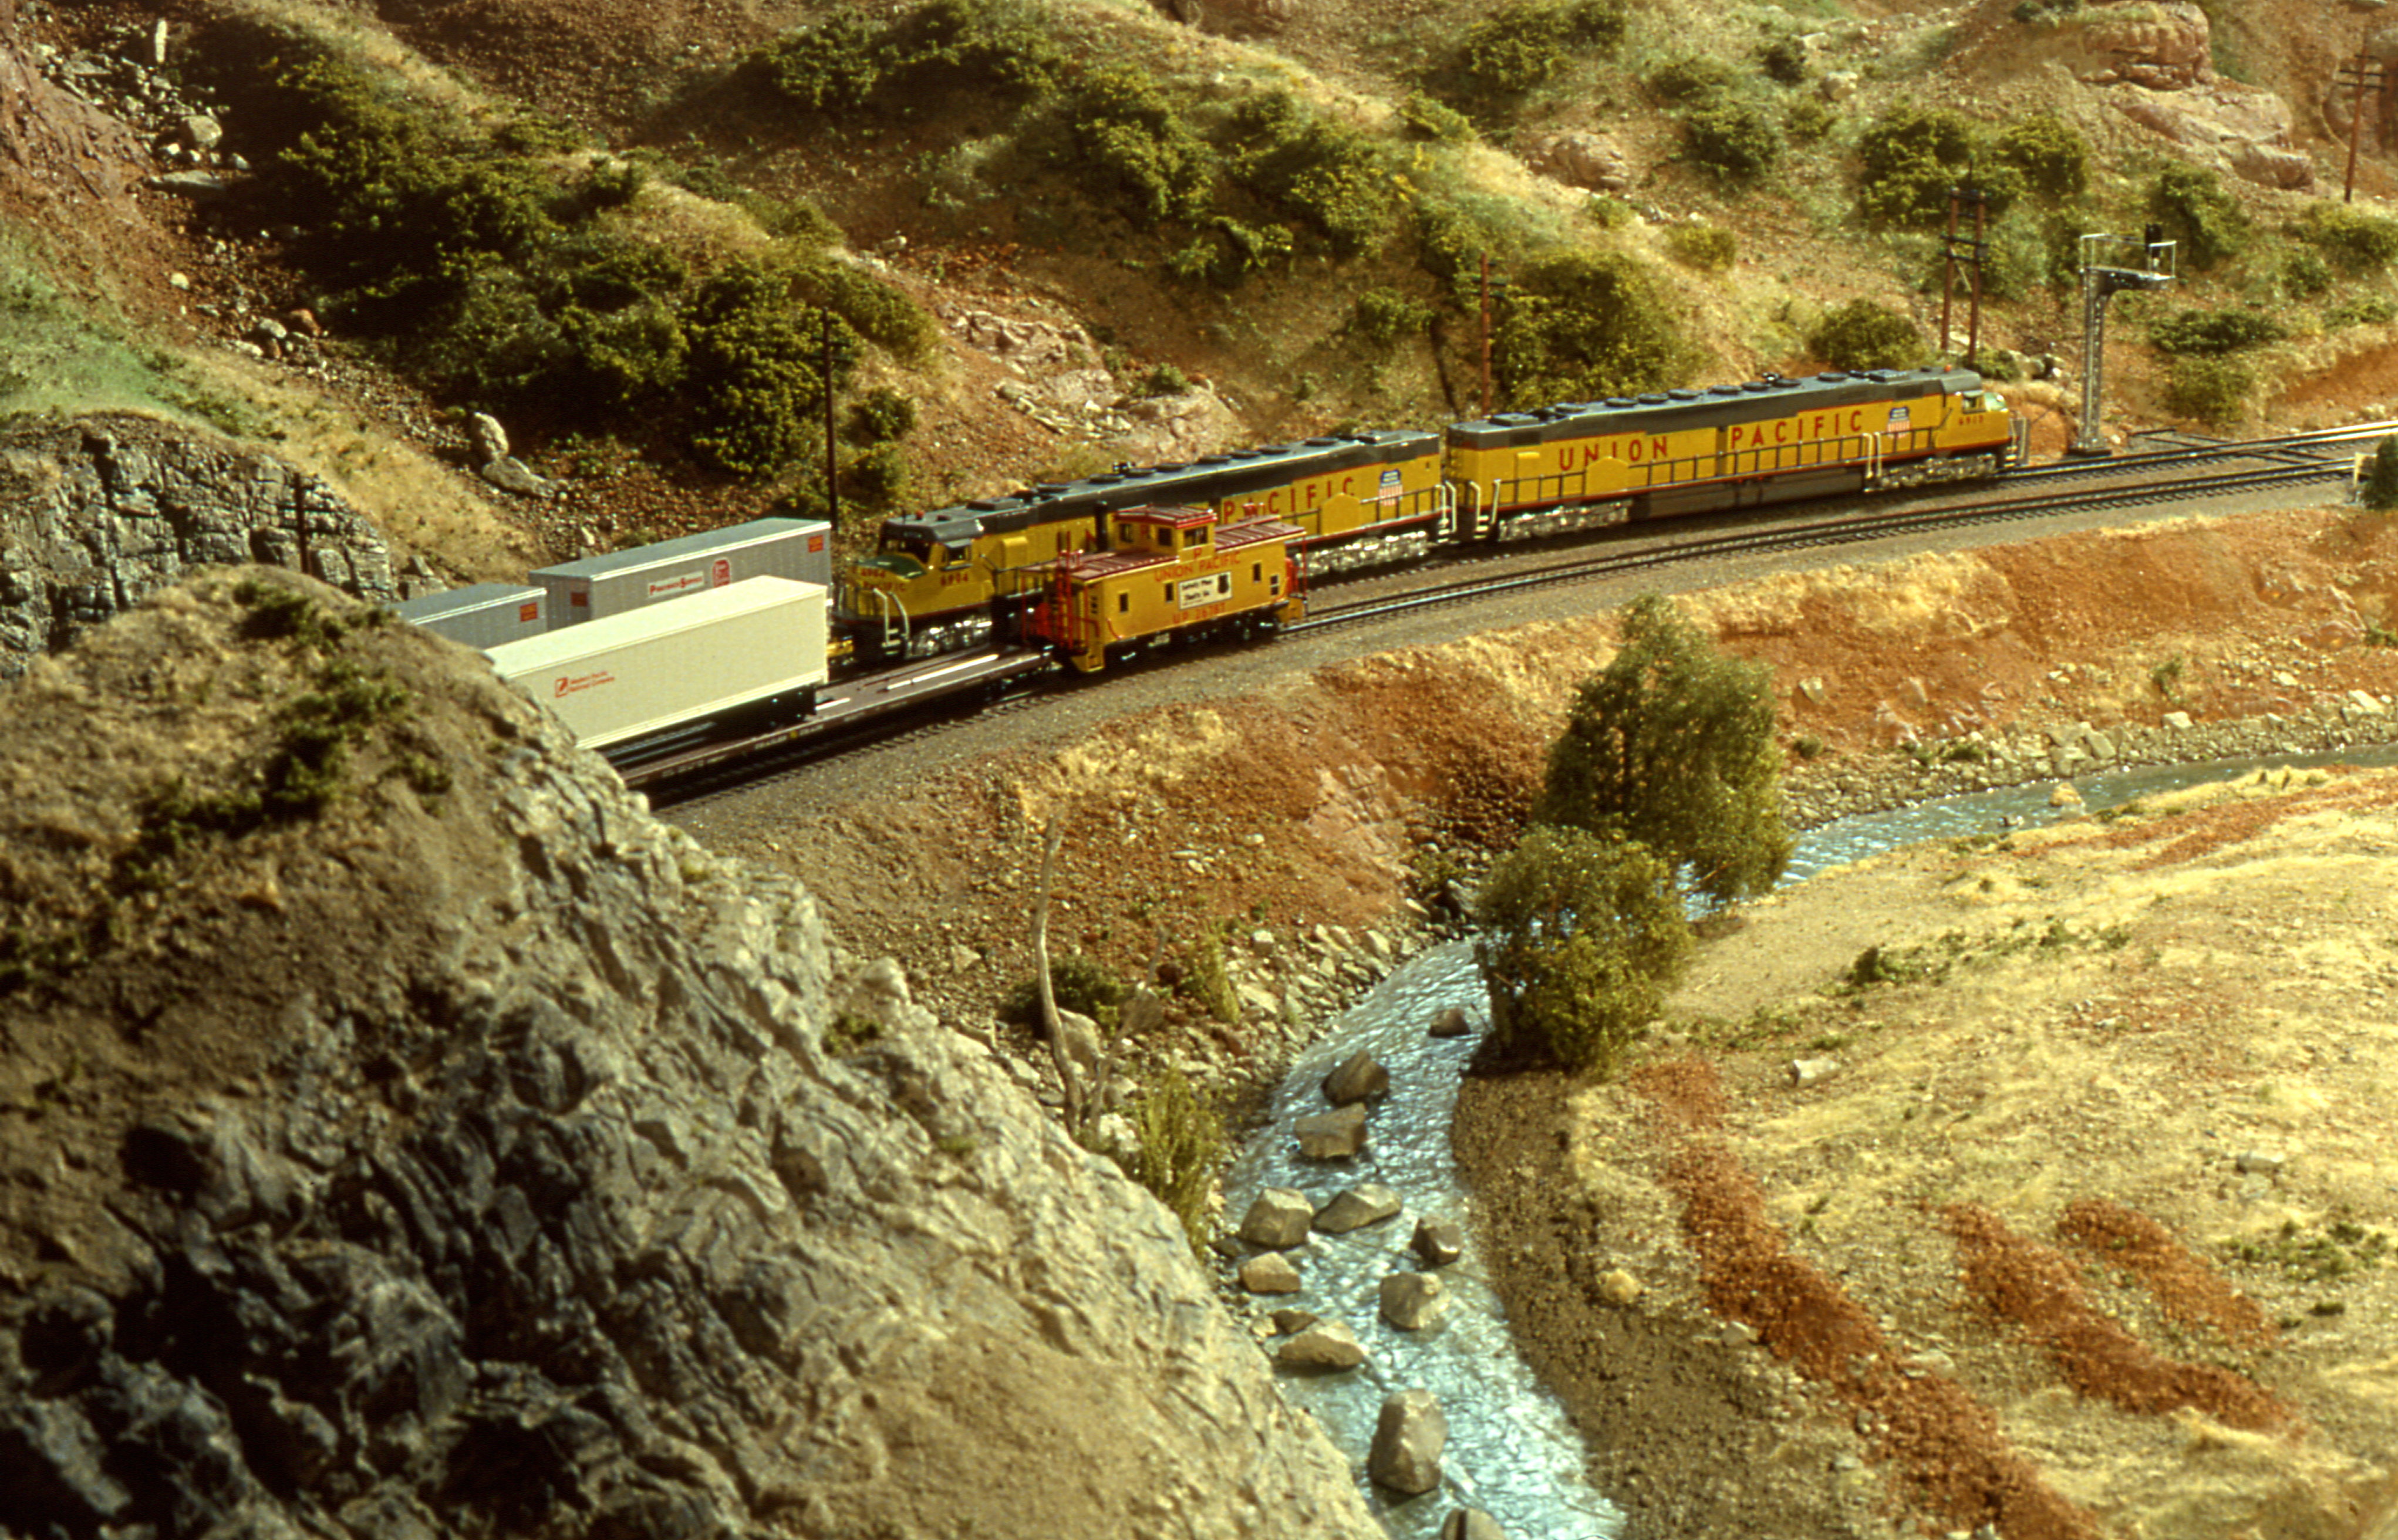

Here's a distant shot of the river on the Ntrak 2000 modules done using a layer of Envirotex with gloss medium of different viscosities texturing the surface:


Here's a photo of a small river I did for my friend Nate's Riverside scene on his home layout.  This was done using gloss medium and WS Water Effects over a flat Foamcore base:
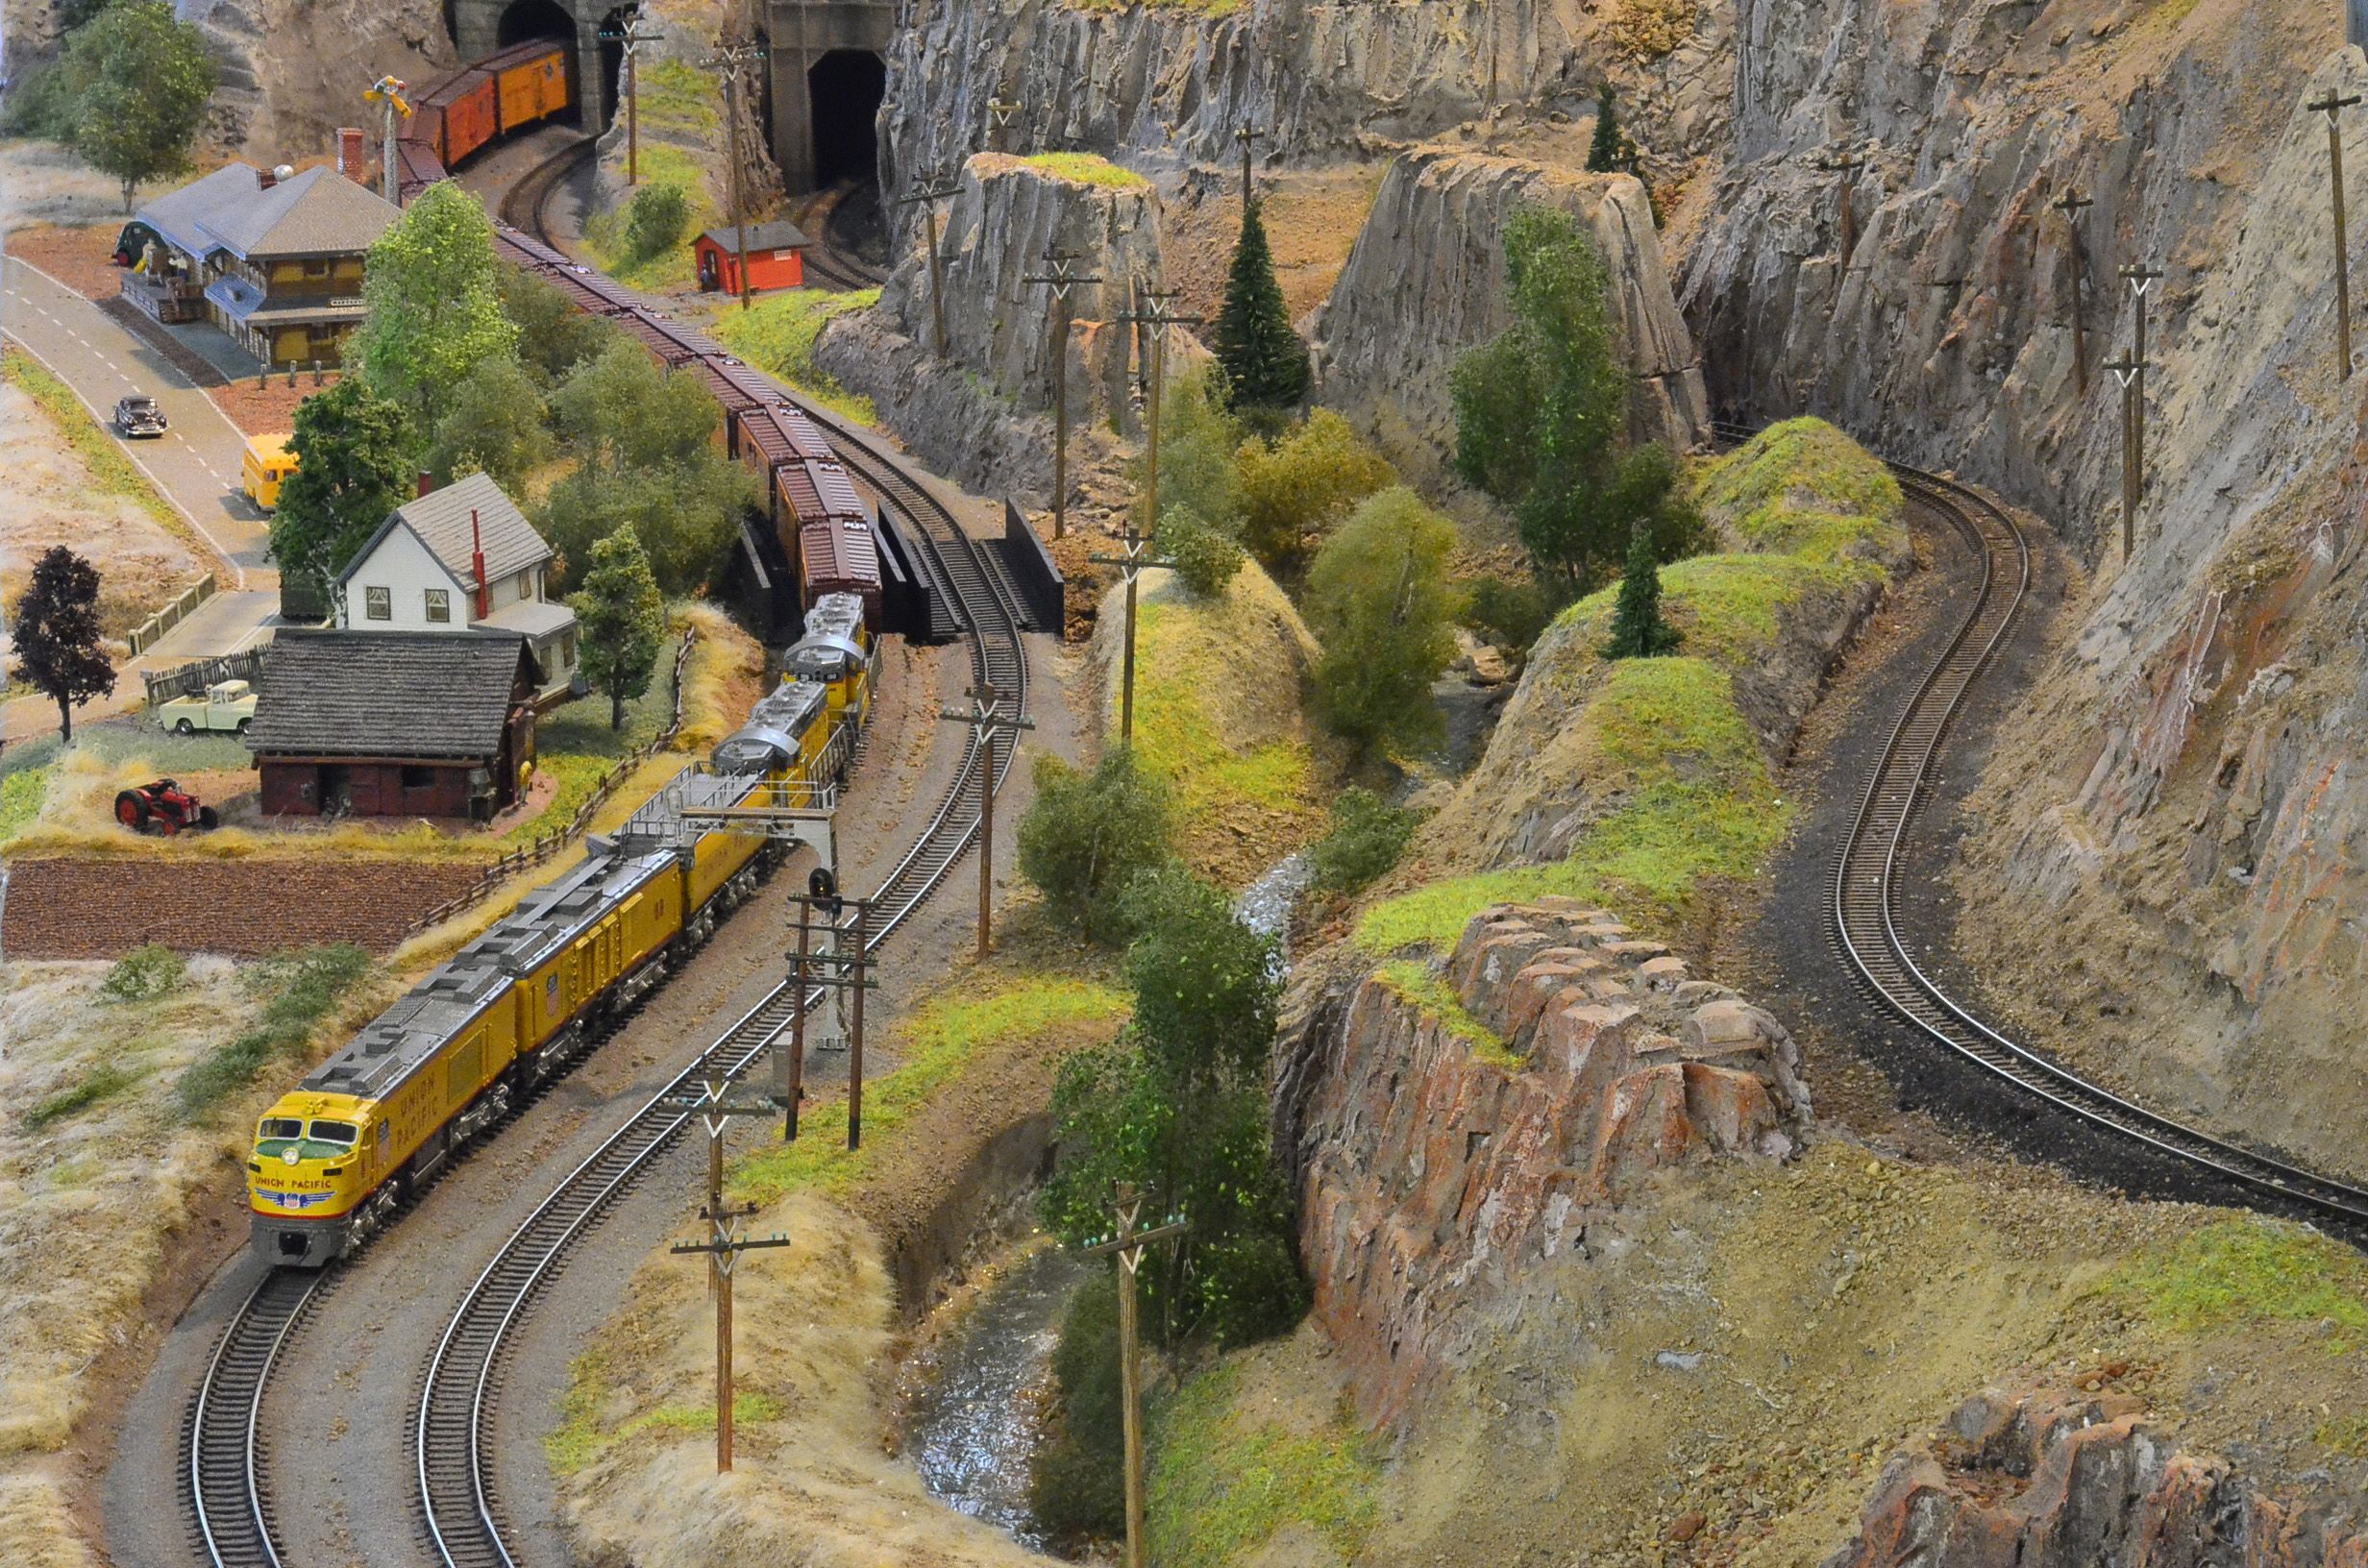


I haven't done raging rapids or waterfalls yet.  There are some real experts here that may show their work if that's what you want also.

Just like most of what I do, I approach everything I build for my model railroad as a model, which gets researched and photographed before I start building...including the rivers.  If I'm asked to build scenery for someone else, it usually ends up looking like what I've researched.
« Last Edit: February 09, 2014, 02:23:03 AM by robert3985 »

DKS

  • The Pitt
  • Crew
  • *
  • Posts: 13424
  • Respect: +7026
Re: Looking for tips for realistic river/creek/streams
« Reply #2 on: February 09, 2014, 02:09:39 AM »
0
This thread offers some tips on modeling water.

tom mann

  • Administrator
  • Crew
  • *****
  • Posts: 10917
  • Representing The Railwire on The Railwire
  • Respect: +1014
    • http://www.chicagoswitching.com
Re: Looking for tips for realistic river/creek/streams
« Reply #3 on: February 09, 2014, 09:02:34 AM »
0
When I got to the river on my z scale diorama (inspired by John Cubbin's work), I put down a layer of gloss medium on top of the scenery (dirt and rocks) and followed that with Magic Water.  The gloss medium helped contain the Magic Water so it would not leech up the river bed. When the Magic Water was dry, I added another layer of gloss medium to create the illusion of moving water.

If I had to do it again, I would tint the Magic Water with a muddy raw umberish color.  I know you say you won't do this, but I've only seen perfectly clear water in the Caribbean.   :D


In this photo, you can see in the upper left that I added some clear caulk to create a waterfall.  This didn't turn out, and eventually peeled off the caulk.


DKS

  • The Pitt
  • Crew
  • *
  • Posts: 13424
  • Respect: +7026
Re: Looking for tips for realistic river/creek/streams
« Reply #4 on: February 09, 2014, 10:09:41 AM »
0
I know you say you won't do this, but I've only seen perfectly clear water in the Caribbean.

+1

basementcalling

  • Crew
  • *
  • Posts: 3543
  • Gender: Male
  • Respect: +751
Re: Looking for tips for realistic river/creek/streams
« Reply #5 on: February 09, 2014, 10:41:42 AM »
0
Work from photos.

Be sure your boulders are planted in the bed so they don't appear to "sit" on the water.

Check out the American Whitewater site if you want decent photos of swift water to try water falls or rapids.

Don't let the "water" creep up the banks. This ruins any water scene in my opinion.
Peter Pfotenhauer

davefoxx

  • Crew
  • *
  • Posts: 11675
  • Gender: Male
  • TRW Plaid Member
  • Respect: +6802
Re: Looking for tips for realistic river/creek/streams
« Reply #6 on: February 09, 2014, 11:45:00 AM »
0
Then there's this thread from our Interactive Scenery Clinics here on TRW several years ago.

DFF

Member: ACL/SAL Historical Society
Member: Wilmington & Western RR
A Proud HOer
BUY ALL THE TRAINS!

robert3985

  • Crew
  • *
  • Posts: 3126
  • Respect: +1503
Re: Looking for tips for realistic river/creek/streams
« Reply #7 on: February 09, 2014, 01:18:27 PM »
0
I've had good luck with tinting muddy "water" using Envirotex and enamel based paints.  I built the rivers on Lee Nicholas' Utah Colorado Western in HO scale using several pours of Envirotex where I postulated the river getting muddier as it progressed downstream.  At one point there's an industry dumping raw waste into the river and that was very neatly accomplished using the enamel based paints with the darker polluted water slowly dissipating downstream.

It doesn't take much enamel based paint to "tint" your water, so be conservative.  I'm not sure if acrylics will work or not, but for sure, enamel paints do work, so that's what I go with.

If you want more implied depth, do shallow multiple pours (after each layer has cured) of between 1/8" and 1/4" with the first pours having more tint than the later pours.  One of the fun things I did on Lee's layout was to paint "fish" behind rocks, under downed trees, etc.,  by painting them as silver "slashes" on the hardened surface of one pour before pouring on the next.  They're not too obvious, but certainly can be seen if pointed out or by some sharp-eyed observers.  That's the spot you'd want to place an angler on the shore.

Roger Holmes

  • Crew
  • *
  • Posts: 1235
  • Gender: Male
  • Respect: +595
Re: Looking for tips for realistic river/creek/streams
« Reply #8 on: February 09, 2014, 03:54:48 PM »
0
I use a technique which I had written up in the August 2005 RMC.  The cover shot was taken on my friend John Evan's HO layout after I did his river.  John has done the photos for everything we've had published.


Here's the same technique on my N scale layout.  My crappy photo, not John's.


Basically, after creating a smooth riverbed, spray black down the middle, feather in stripes of olive green an either side of the black stripe  and medium/light brown at the  outer edges.  Add any riverbank detail now. Same technique as everybody has mentioned.  I live in Central Illinois where every body of water is muddy due to soil run-off from the farm fields.  Other than the Bahamas the only other clear water I have seen is in the streams of Vermont and New Hampshire.  My river is a product of modeling what I normally see.

After the spray paint has fully dried, spread gloss medium on top with a wide brush.  Wait a few minutes then dab with balled up Kleenex.  Gloss medium wants to self level so it was tricky to get it at the moment between when it was too wet and would just flatten out and the moment when the Kleenex sticks leaving shards of tissue.  The solution was to borrow the wife's hairdrier and dab the Kleenex ball in one hand and dry quickly with the hair dryer in the other.  Work in roughly 8 X 10 inch sections.  I have tried using a wide brush to stipple the surface rather than using the Kleenex ball but the brush was too vigorous and entrained a lot of tiny bubbles.  We'll leave that to Don Ho  :facepalm:

If it doesn't work the first time there is no problem adding another layer.  Also, I have noticed that over time that the gloss medium dulls down.  If your texture is pronounced enough, a thin layer of gloss medium on top is all it takes to renew the shine.  If your texture is finer like on our N scale models, it's easy to add a new texture layer on top using the same technique and it will look brand new for another 4-5 years.

Best regards,

Roger

There are 10 kinds of people in the world.  Those who understand the binary system and those who don't.

Bsklarski

  • Crew
  • *
  • Posts: 673
  • Gender: Male
  • Respect: +6
    • B&M Conn River Line
Re: Looking for tips for realistic river/creek/streams
« Reply #9 on: February 09, 2014, 04:31:17 PM »
0

If I had to do it again, I would tint the Magic Water with a muddy raw umberish color.  I know you say you won't do this, but I've only seen perfectly clear water in the Caribbean.   :D


+2. Yes. This is where my happy place is from October to May. Going on a cruise once a year helps!

Brian Sklarski
Engineer, New England Central Railroad

https://www.facebook.com/pages/Boston-Maine-Conn-River-Line/173358446076160

primavw

  • Crew
  • *
  • Posts: 143
  • "Life begins at the end of your comfort zone"
  • Respect: 0
    • Nittany and Lock Haven HCD Layout
Re: Looking for tips for realistic river/creek/streams
« Reply #10 on: February 09, 2014, 05:00:14 PM »
0
This is the photo I am working from:


So maybe a slight green tint?
Modeling The Dark Horse


YouTube Channel:
https://www.youtube.com/user/gogetta2ohsc

Bsklarski

  • Crew
  • *
  • Posts: 673
  • Gender: Male
  • Respect: +6
    • B&M Conn River Line
Re: Looking for tips for realistic river/creek/streams
« Reply #11 on: February 09, 2014, 05:25:26 PM »
0
Depends on where in the country you model. There are some really blue rivers in VT North of White River and there are some muddy rivers near me. Depends on water level and if it has rained recently. You need to check out the river you want to model and go from there.
Brian Sklarski
Engineer, New England Central Railroad

https://www.facebook.com/pages/Boston-Maine-Conn-River-Line/173358446076160

Chris333

  • Crew
  • *
  • Posts: 18398
  • Respect: +5671
Re: Looking for tips for realistic river/creek/streams
« Reply #12 on: February 09, 2014, 05:48:27 PM »
0
This is just a sceniced base with gloss medium brushed on. Early coats got some brown/black/dark blue washes.


DKS

  • The Pitt
  • Crew
  • *
  • Posts: 13424
  • Respect: +7026
Re: Looking for tips for realistic river/creek/streams
« Reply #13 on: February 09, 2014, 05:51:09 PM »
0
This is the photo I am working from:


So maybe a slight green tint?

In many cases where bodies of water are photographed at a low angle (that is, not from above), water acquires its color through reflection of the surroundings. Most "blue" water is blue by virtue of the sky. Other factors that affect water color include depth, underwater surfaces like rocks or algae, particulates in the water such as silt, impurities including tree sap and tar, and man-made pollutants. In the reference image you posted, there are two effects at play: the olive green coating on the underwater objects, and the brighter green of the surrounding vegetation that's being reflected. When choosing colors for model water, it's important to make distinctions as to what may be creating various color effects. It's quite easy to overdo tinting. Best to do a test on a small throw-away scrap of scenery. Also note that a highly reflective model water surface will act just like its real life counterpart and pick up colors from its surroundings, so there is no need to introduce any color to create this effect (the most common mistake in modeled water: making it bright blue).

Here's an example of a dead flat surface that was painted to suggest depth and then coated with thick gloss gel to create waves. Note how the surface picks up natural-looking highlights; nothing special was done to create this effect.


It mimics real life quite well.


Here are a couple of other water-related threads:

https://www.therailwire.net/forum/index.php?topic=29485.0

https://www.therailwire.net/forum/index.php?topic=29432.0
« Last Edit: February 09, 2014, 06:05:28 PM by David K. Smith »

Ian MacMillan

  • Global Moderator
  • Crew
  • *
  • Posts: 12034
  • Gender: Male
  • Learn to use the god damn search feature!
  • Respect: +166
    • Conrail's Amoskeag Northern Division
Re: Looking for tips for realistic river/creek/streams
« Reply #14 on: February 16, 2014, 12:44:17 PM »
0
On the SIB I used good ol' fashioned 2 part Envirotex. I built my base, added my scenery and then sealed it with matte medium. I then poured the river in 3 layers and then let it dry for a week. Looks great and holds up well.


I WANNA SEE THE BOAT MOVIE!

Yes... I'm in N... Also HO and 1:1