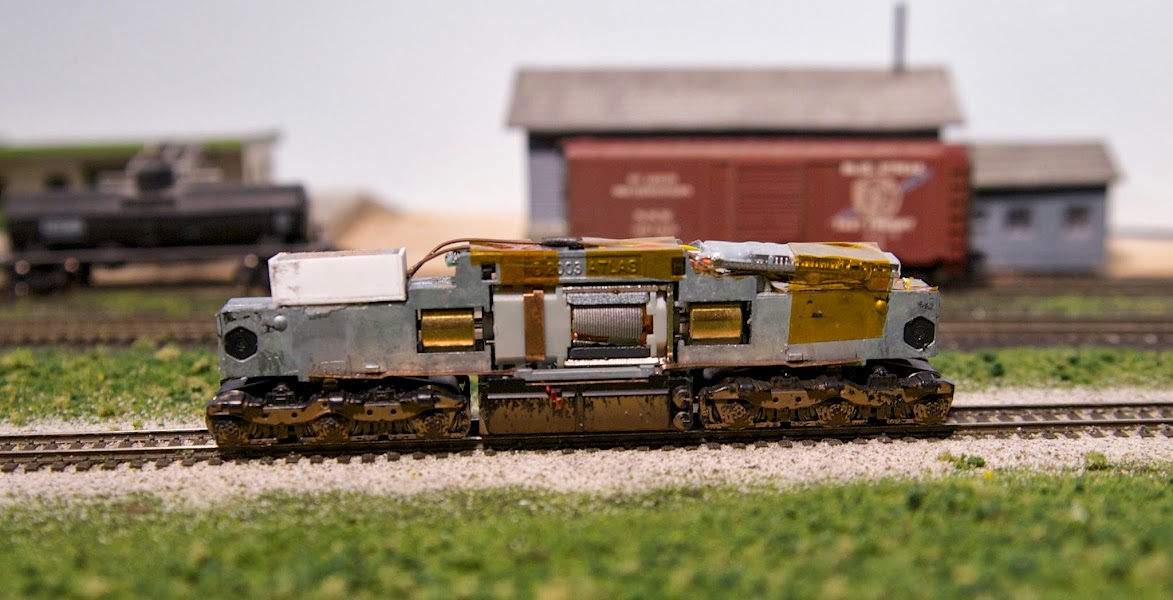
A couple of folks have asked for photos of my sound install in an Atlas (China) SD9, so here they are.
The layout and procedure is pretty much the same as what I used for the RS-11 and GP7, so I'm not going to repeat the full tutorial here. See my RS-11 post for the full-meal deal. The SD9 is easier, because it is a longer locomotive and therefore needs very little in the way of frame milling. The inside of the shell is also a bit wider (I measured 10.5mm), so very little sanding of the inside of the shell is necessary to accommodate the 10.6mm-wide LokSound. I used a sunny white SMT LED from Richmond Controls for my headlight (again, I don't use a rear light because I run these in 2-unit consists, so I never have occasion to use the rear light; but it would be quite easy to wire up a 3mm LED in the rear behind the speaker given the length of this locomotive; I'd "flatten" the LED by grinding down the sides, then use a dab of CA to secure it, and run the wires under the speaker back to the "channel" in the center of the frame where all the other wires are, and hook it to the blue and yellow wires; don't forget a 1K dropping resistor). The ESU LokSound micro is in front, the speaker is at the rear, and I drilled a bunch of #80 holes between each "fan blade" in the four fans at the rear for sound egress, just like with the GP9/RS-11.
Here are the photos. First, a side view of the overall layout:

Next, a top view:

Finally, a shot of the very front of the chassis showing the SMT LED sitting just in front of the LokSound decoder.

The sound file is the same as for my GP9's - the EMD 567 V-16 non-turbo (the SD9 had exactly the same prime mover as the GP9). Happy to provide more detail to anyone who wants it - just PM me or e-mail me directly at jdcolombo at gmail.com
John C.