Author Topic: Best Of New Brass EP-2 assembly & Mod clinic  (Read 107530 times)

0 Members and 1 Guest are viewing this topic.

u18b

  • Crew
  • *
  • Posts: 3709
  • Respect: +1955
    • My website
New Brass EP-2 assembly & Mod clinic
« on: October 27, 2013, 05:13:29 PM »
0
Greetings all.

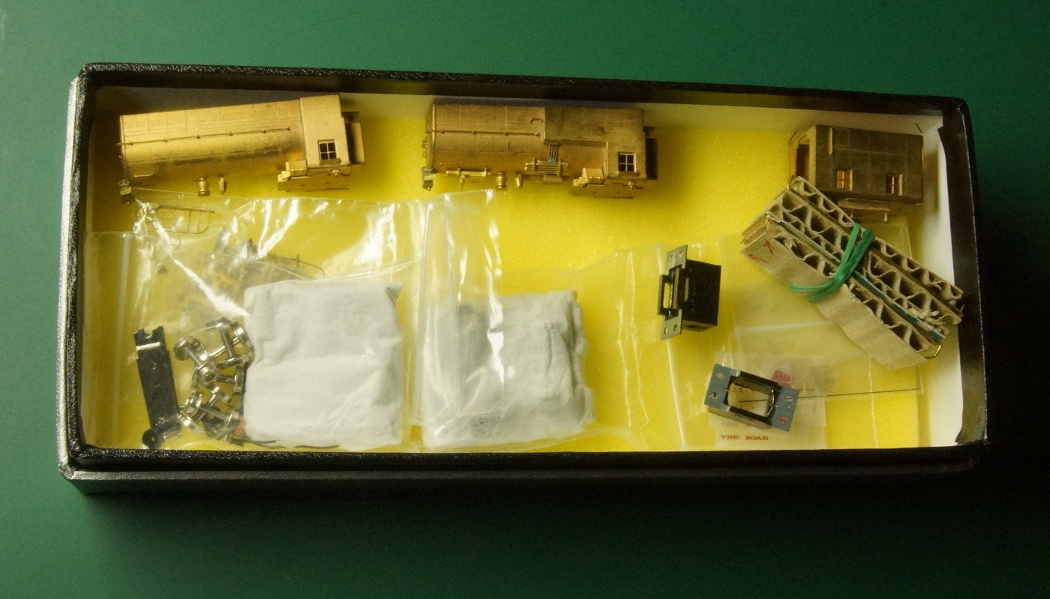
I decided to post a detailed description of the building of the all-new KMT brass EP-2 bipolar.

These are really fabulous models, but I encountered several problems along the way.
In fact, I more or less re-designed the drive train.

So if you have/want an EP-2, some of this will help you (many of these procedures will work for the old NJ Custom Brass model).

But even if you don't have one, there may be a modelling trick or procedure that may be helpful to you one day.

Here was the original thread where I described the externals of this new brass model.
www.therailwire.net/forum/index.php?topic=30820

So let's get started!


« Last Edit: November 07, 2017, 12:08:37 PM by tom mann »
Ron Bearden
CSX N scale Archivist
http://u18b.com

"All get what they want-- not all like what they get."  Aslan the Lion in the Chronicles of Narnia by C.S.Lewis.

u18b

  • Crew
  • *
  • Posts: 3709
  • Respect: +1955
    • My website
Re: New Brass EP-2 assembly & Mod clinic
« Reply #1 on: October 27, 2013, 05:39:45 PM »
0


OK, I have a new brass loco in kit form.  Unfortunately it is not a "shake the box" kit.  Some modeling skill is required to assemble.


First, we are going to focus on the front truck assembly.  This is an idler truck that picks up electricity from the other rail (from the main frame which picks up juice from a rail).
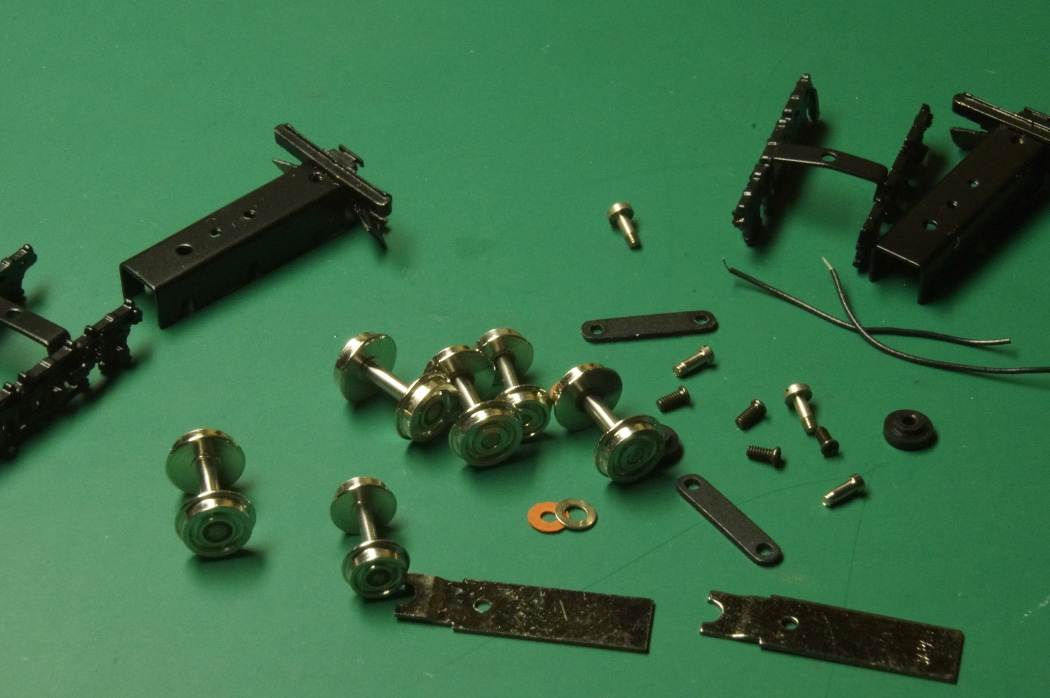


The very FIRST change I'm making to to REDESIGN the electrical transmission.  KMT designed this model just like the NJCB EP-2 from 1983.  They had a jumper wire that is soldered to the frame of this front truck and then rises through a hole in the main loco frame to be soldered to a motor pole.
But if you own or have dealt with the old 1983 model, then you know that a fatal weakness of this model is that this wire BREAKS!

Sooooo.... Do away with jumper wire to front truck.

Also do away with gigantic diode matrix for headlight.  I will install micro LEDs in this loco.


Take the front truck main frame.
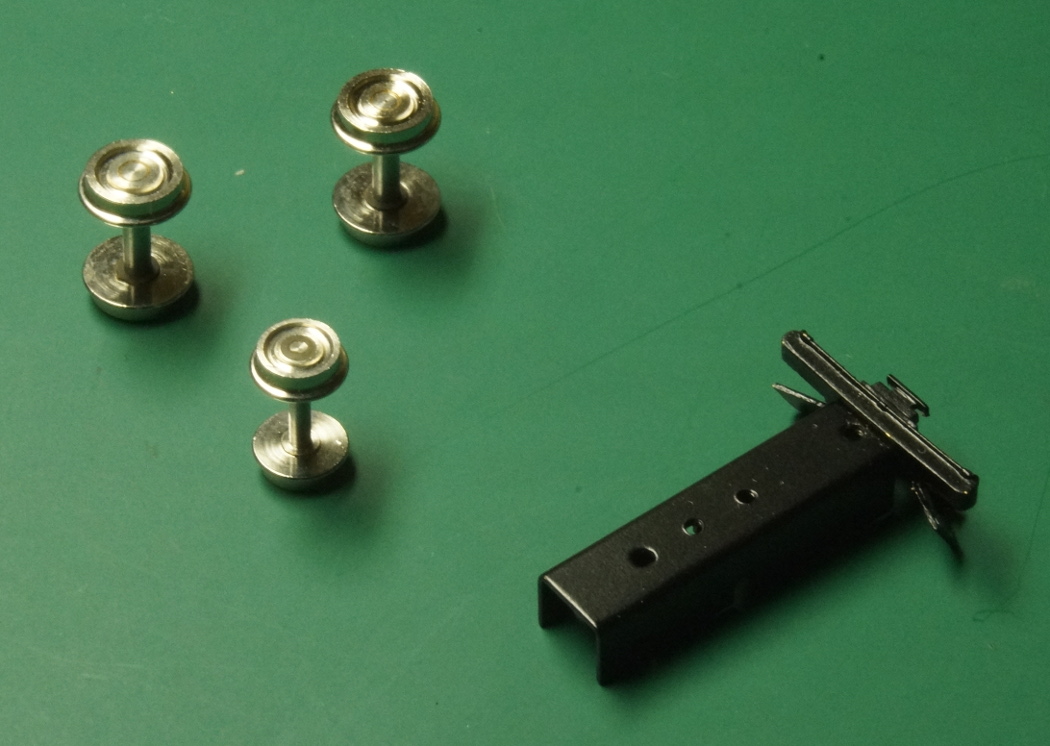

We are going to get the wheels into it---- but the frame is too tight and the wheels lock up.


Well, the big wheels lock up, that is.  The very front axle is smaller and it fits right in.
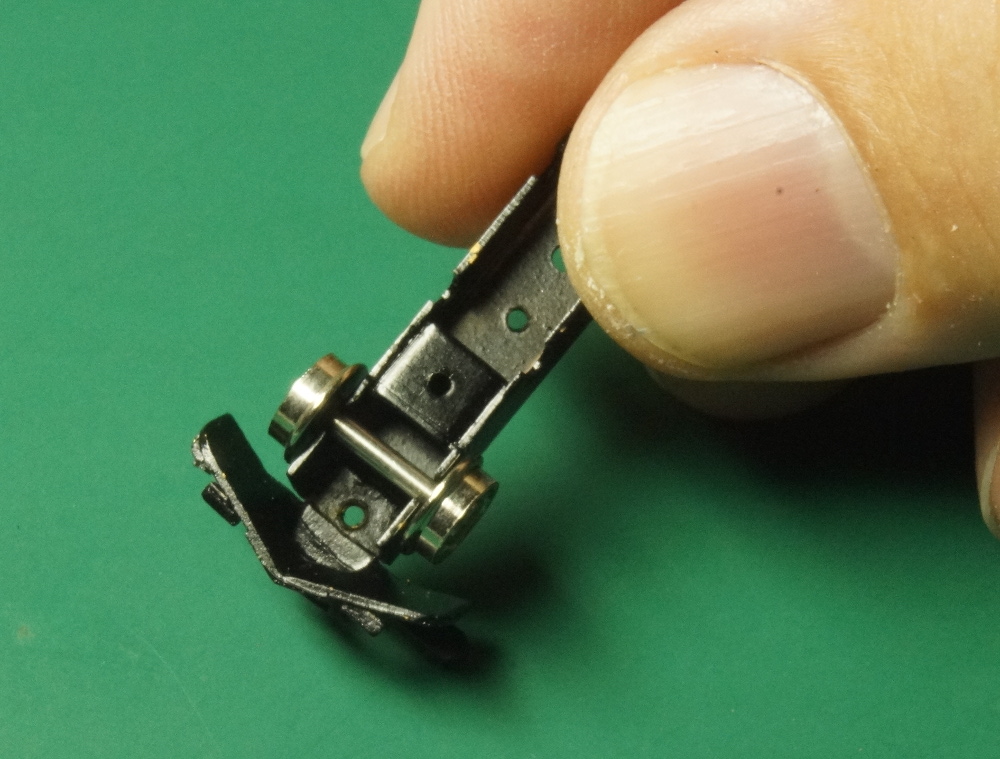


But since the big wheels are too tight, take a tiny tiny round file and gently spin it in the axle.  We don't want to gouge out metal, just open up the slot a bit.  Do it from both sides so your work is even.
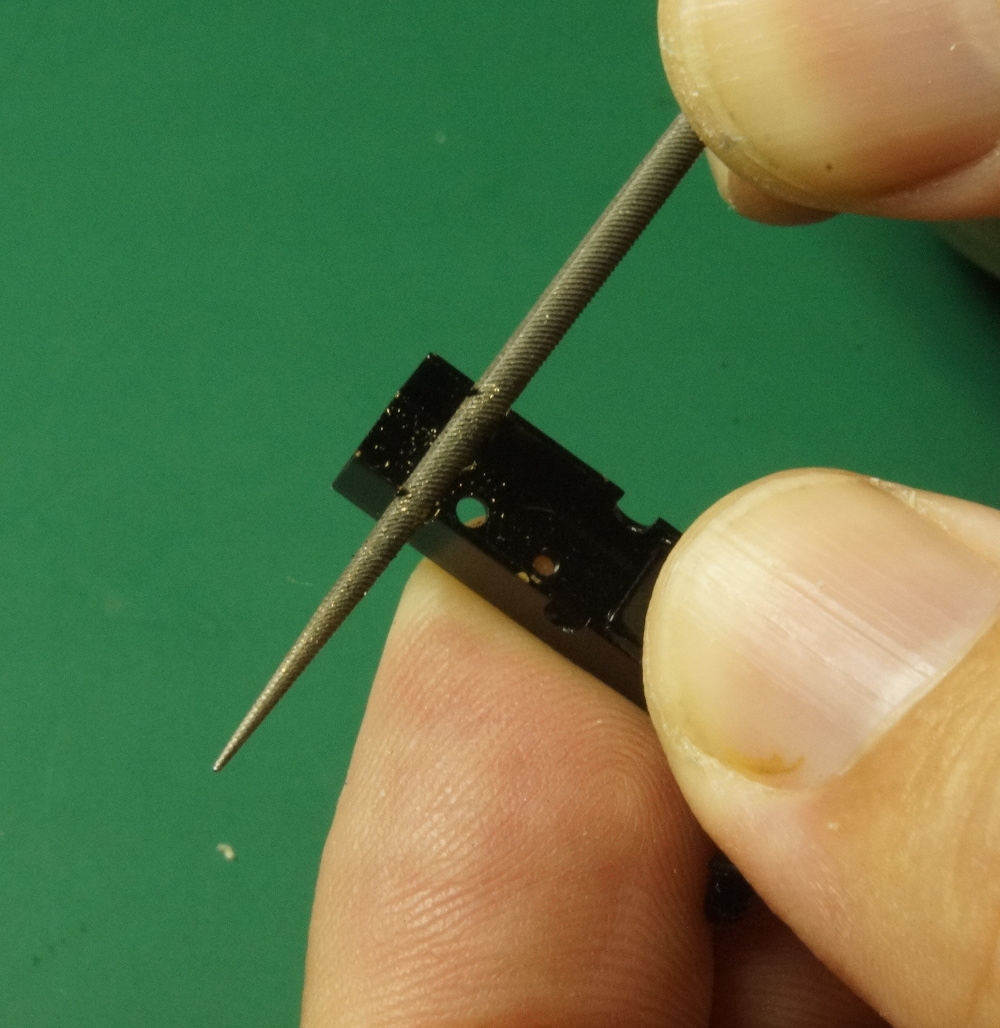


Not only does it open up the slot a bit, but HEY!  The metal is all bright and shiny with all paint gone from the contact surfaces.
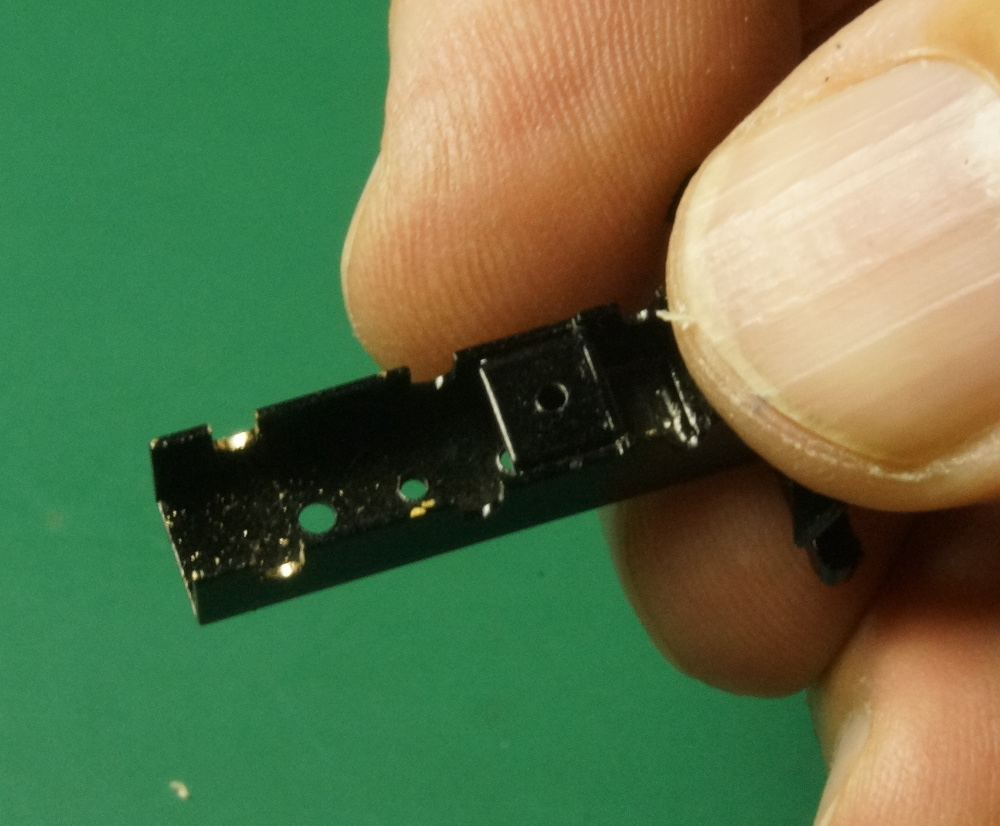


Work a little at a time and don't do too much at once.
Test an axle and see if it is free spinning.  If so great, if not, spin the file a little more until it is.
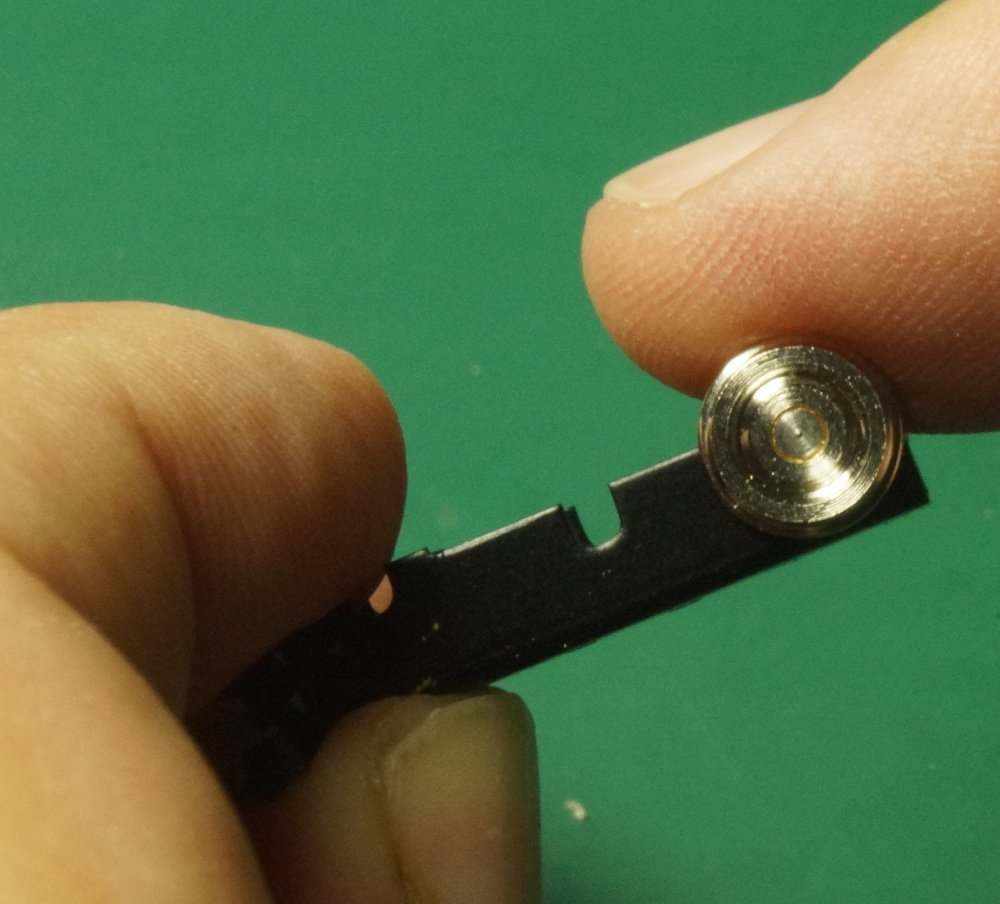


Repeat for all the axles.  Be sure to just scrape the paint off the front axle too.


Now, a special tool was required for this project.
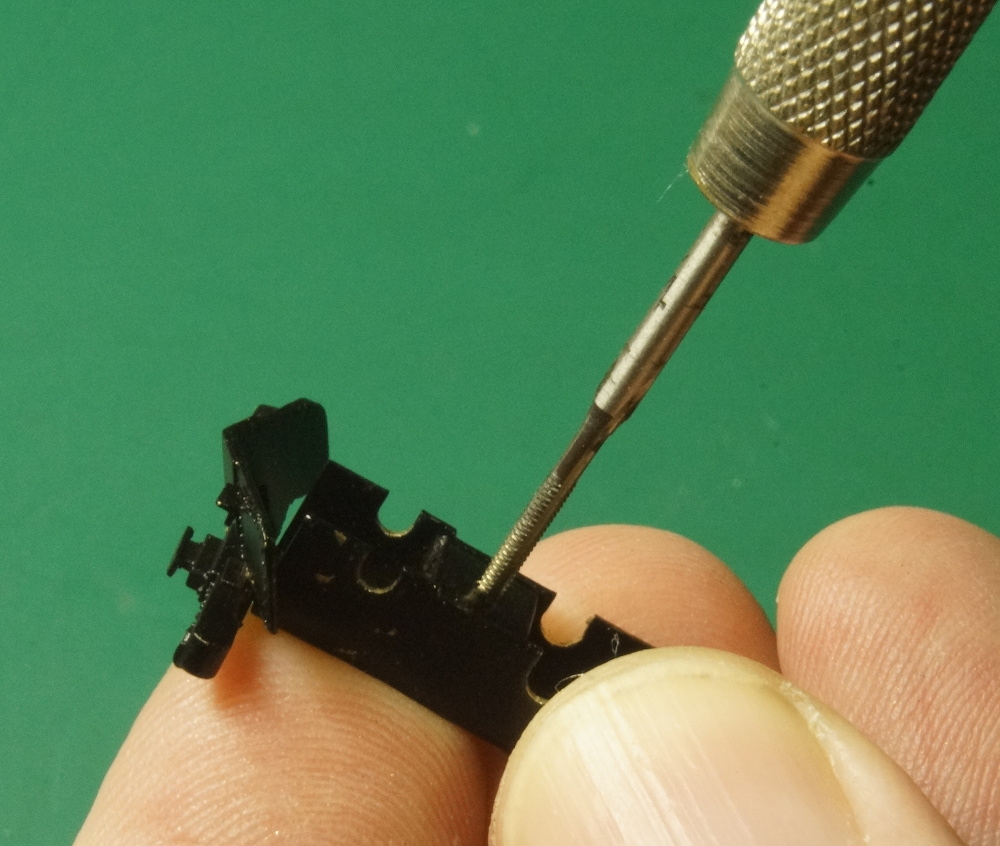
I needed a specail tap that fit the screws provided.
I bought this off ebay from a Chineese seller.
It is a metric M1.4mm x .30mm pitch tap.

It is smaller than 00-80 and bigger than 00-90.

I found it helpful to run the tap through any screw holes to clean them out and freshen them up.  Sometimes the paint is thick or there may be a burr.

There are three screw holes on this frame.

Now I can assemble all the axles.
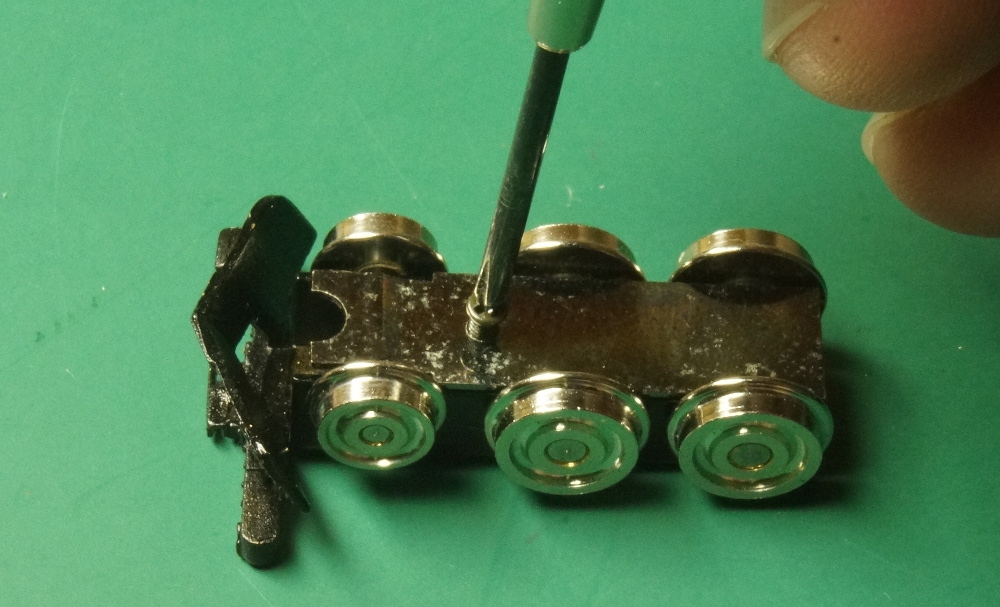

Make sure all the insulated wheels are on the same side.

The bottom cover plate has a hump in the front.  install with the hump down so that the front smaller axle has more free room to float.

Test it on a piece of track.
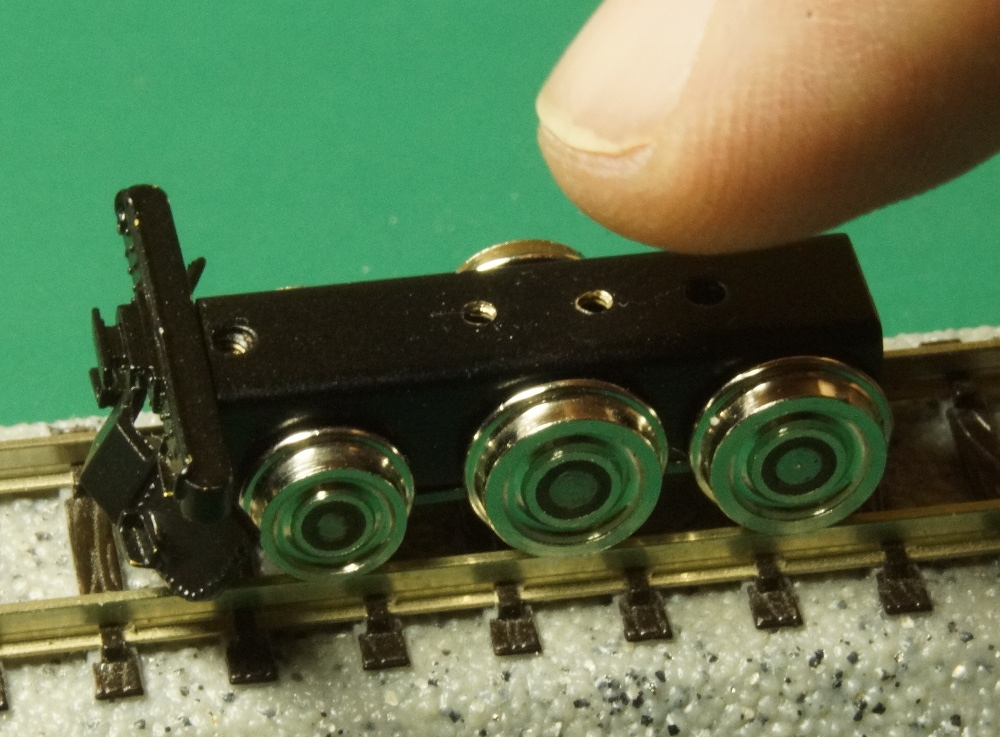

It is VERY free rolling.
Note all black insulation at the center of the wheels.  This is the insulated side.

Repeat for the other truck but make sure the insulated wheels are on the OTHER side.

More to come later.


Ron Bearden
CSX N scale Archivist
http://u18b.com

"All get what they want-- not all like what they get."  Aslan the Lion in the Chronicles of Narnia by C.S.Lewis.

u18b

  • Crew
  • *
  • Posts: 3709
  • Respect: +1955
    • My website
Re: New Brass EP-2 assembly & Mod clinic
« Reply #2 on: October 27, 2013, 09:35:47 PM »
0
Now time to make the first design change.

I thought-- how can I get electricity up to the main frame without a stupid jumper wire that will break eventually.

Solution- why not do what Trix does.

Those of you familiar with the Trix FM switcher or the U28C know that the truck has a wiper and the frame has a pc board pad,  THAT is what I think would help this.

Disassemble everything down to the bare frame again and scratch off some paint just ahead of the last hole.

That photo shows that we have to clear the plastic insulating bushing.

Ready for soldering once the bushing and screw are removed.


Flux the scratch and place some solder on it.  It will get HOT so here I'm using some wood to support it. Also, the frame will act as a heat sink and suck heat away from the iron for a second.  Be patient and let it get hot all over so the solder flows evenly.


Now we need a spring plate wiper.  I like the consistency of the Atlas VO1000 pick up strips.  Not too heavy-- not too light.  Flux and Tin the end.


Now solder the strip to the truck frame.

Let everything cool down.


Now file the solder blob fairly flat.  But not too flat-- it must remain strong.


Now bend the pickup upward.


Trim the excess.  Cut right past the end of the frame.  Make a slight curl at the tip for smoother operation.


Totally clean everything up.  Reassemble the wheels as before.

Now add the sideframes.  But notice the top edge of the springs are not level with the truck frame.  In this shot you can just see how they get lower toward the rear/right.


Bend the sideframes gently until the springs are parallel with the frame.
Here are two trucks.  The insulated wheels are on OPPOSITE sides.   That way, since the trucks are going to be reversed to each other when the whole loco is assembled (as in this photo) then the insulated wheels will be in the SAME side.


« Last Edit: October 27, 2013, 11:25:09 PM by u18b »
Ron Bearden
CSX N scale Archivist
http://u18b.com

"All get what they want-- not all like what they get."  Aslan the Lion in the Chronicles of Narnia by C.S.Lewis.

u18b

  • Crew
  • *
  • Posts: 3709
  • Respect: +1955
    • My website
Re: New Brass EP-2 assembly & Mod clinic
« Reply #3 on: October 27, 2013, 09:39:19 PM »
0
Front truck is finished (except for couplers).

Time to move to the main frame.... coming soon.
Ron Bearden
CSX N scale Archivist
http://u18b.com

"All get what they want-- not all like what they get."  Aslan the Lion in the Chronicles of Narnia by C.S.Lewis.

u18b

  • Crew
  • *
  • Posts: 3709
  • Respect: +1955
    • My website
Re: New Brass EP-2 assembly & Mod clinic
« Reply #4 on: October 27, 2013, 10:07:31 PM »
0
OK.  Here is the main frame.  Note- that ladder is VERY fragile.  Never handle the frame in the coming steps while touching that ladder.


There are large holes and small holes.  The large holes are pass-through holes.  The small holes must be tapped for screws.


Always use oil when tapping metal.


You have to apply downward force while turning.  In this situation, make sure to hold by the inner fat brass piece- not the thin outer walkway.  Also, try to keep the tap as perpendicular to the plate as possible.


Once you go all the way through.... there will be a lot of debris on the tap.  I have found it wise to NOT run all that junk back through the hole when backing out the tap.  I brush the junk off and THEN back the tap out.


The end is very delicate and tricky.  The thin walkway will pop loose if not holding the middle.  Notice I'm not quite perpendicular in this shot.


here another view of how delicate this end is.


OK.  Were finished with our tapping.  All burrs have been filed away and the whole thing is cleaned up.
Time to get ready for the PC board.  I screw in two screws so that they stick downward.  They will form a backstop.


« Last Edit: October 27, 2013, 11:27:19 PM by u18b »
Ron Bearden
CSX N scale Archivist
http://u18b.com

"All get what they want-- not all like what they get."  Aslan the Lion in the Chronicles of Narnia by C.S.Lewis.

u18b

  • Crew
  • *
  • Posts: 3709
  • Respect: +1955
    • My website
Re: New Brass EP-2 assembly & Mod clinic
« Reply #5 on: October 27, 2013, 11:01:52 PM »
0
Now, Time to move to the PC board to bring some of all this together.

I ordered thin PC board - one side plated from Digitrax.  This one is 14 mil thick.  The catalogue listed some thinner-- but not in stock.  14 mil worked OK.


Next mark at 11mm from the edge.  Work on the back fiberglass side.


Now take an Xacto knife and score the back.


Bend the piece back and forth to break loose.


Now, on that same strip broken off, mark another 11mm.


Break it off.  We now have an 11mm square.


Use a file to smooth the rough edges on the fiberglass.  It needs to be perfectly flat on the back side.


This is a little tricky.  Use a file and try to cut the metal off the edge without damaging the fiberglass.  Work a little at a time and check your work.


Here is the finished product.  We've made an insulated edge.


Test fit.


While holding the board in its place, mark the big hole that it is partially covering.


Use a round file to file where the marking was.  This opens up a hole for the jumper wire.  It probably doesn't even need to be as big as shown here.


Drill a hole in the corner-- not too close to the edge.  A screw will go through the board here.


Put the board where it goes and mark the hole just drilled.  Mark the brass underneath.


There is my black mark.  Use a #59 or #60 drill for the hole.  Then tap it for the metric screws.


Using a screw, test fit again.  Yay! Getting close.  But we can't stop here because we would have a short.  The main frame (and the screw) go to one rail and the pad goes to the front truck and thus the other rail.


Use a motor tool with a very fine bit and cut the metal to form an island.  Don't cut so deep that you go through the fiberglass.  The island must be big enough for the whole head of the screw.


Now sand the metal side VERY lightly with VERY fine paper.  We want it bright and shiny.  The board either has oxidation or a coating.  We need to remove it.


OK.  This step is finished.


This is what we have been trying to accomplish.  A MUCH better design that a horrible jumper wire.


« Last Edit: October 27, 2013, 11:31:02 PM by u18b »
Ron Bearden
CSX N scale Archivist
http://u18b.com

"All get what they want-- not all like what they get."  Aslan the Lion in the Chronicles of Narnia by C.S.Lewis.

u18b

  • Crew
  • *
  • Posts: 3709
  • Respect: +1955
    • My website
Re: New Brass EP-2 assembly & Mod clinic
« Reply #6 on: October 27, 2013, 11:09:33 PM »
0
Whew.  That's a lot for the first posting.

Now back to modelling.
And photographing
and editing.......

 :scared:

Sorry for the many spelling errors.  I just corrected as many as the board would let me.
« Last Edit: October 27, 2013, 11:31:57 PM by u18b »
Ron Bearden
CSX N scale Archivist
http://u18b.com

"All get what they want-- not all like what they get."  Aslan the Lion in the Chronicles of Narnia by C.S.Lewis.

delamaize

  • Crew
  • *
  • Posts: 2400
  • Gender: Male
  • Prairie Line Native
  • Respect: +547
Re: New Brass EP-2 assembly & Mod clinic
« Reply #7 on: October 27, 2013, 11:12:43 PM »
0
you got my attention, thats for sure.
Mike

Northern Pacific, Tacoma Division, 4th subdivision "The Prarie Line" (still in planning stages)

mmagliaro

  • Crew
  • *
  • Posts: 6368
  • Gender: Male
  • Respect: +1871
    • Maxcow Online
Re: New Brass EP-2 assembly & Mod clinic
« Reply #8 on: October 27, 2013, 11:49:32 PM »
0
Splendid work and photos!   Although I like the idea of getting rid of the jumper wire,
I'm a bit leery of having a copper contact surface.
The wiper is phosphor bronze, but the PC board plating is copper, and I fear that it will oxidize
and cause pickup problems later.

But regardless, very nice, neat work and engineering!

nkalanaga

  • Crew
  • *
  • Posts: 9896
  • Respect: +1446
Re: New Brass EP-2 assembly & Mod clinic
« Reply #9 on: October 28, 2013, 12:35:24 AM »
0
"why not do what Trix does."  Not bad for a design that's almost 50 years old, is it?  They probably had the best pickup around until the modern split frame designs came out.  I did manage to wear the wiper out on one F unit, but a piece of brass strip worked fine as a replacement.  Today the Atlas pickup strips are even better.

Very clever improvements!
N Kalanaga
Be well

peteski

  • Crew
  • *
  • Posts: 32957
  • Gender: Male
  • Honorary Resident Curmudgeon
  • Respect: +5340
    • Coming (not so) soon...
Re: New Brass EP-2 assembly & Mod clinic
« Reply #10 on: October 28, 2013, 01:41:40 AM »
0
Splendid work and photos!   Although I like the idea of getting rid of the jumper wire,
I'm a bit leery of having a copper contact surface.
The wiper is phosphor bronze, but the PC board plating is copper, and I fear that it will oxidize
and cause pickup problems later.

But regardless, very nice, neat work and engineering!

Max, my latest way to take care of this type of a problem (on any metal surface), is to polish the contacting surfaces with a metal polishing compound. I use Top Brite. It seems to leave a thin protective layer (probably petroleum of some sorts) which seems to drastically reduce oxidation.  I've been doing that to the contacts on Kato locos (both the flat contact strips and the sideframe nubs which contact those strips).
. . . 42 . . .

Chris333

  • Crew
  • *
  • Posts: 18396
  • Respect: +5667
Re: New Brass EP-2 assembly & Mod clinic
« Reply #11 on: October 28, 2013, 02:18:48 AM »
0
I wish all locos came as kits  :D

peteski

  • Crew
  • *
  • Posts: 32957
  • Gender: Male
  • Honorary Resident Curmudgeon
  • Respect: +5340
    • Coming (not so) soon...
Re: New Brass EP-2 assembly & Mod clinic
« Reply #12 on: October 28, 2013, 03:17:42 AM »
0
I wish all locos came as kits  :D

That would be nice (as the price would hopefully be lower than a RTR model).  But I take apart most of my freshly purchased model locos anyway, so I sort of end up with a kit.  ;)
. . . 42 . . .

u18b

  • Crew
  • *
  • Posts: 3709
  • Respect: +1955
    • My website
Re: New Brass EP-2 assembly & Mod clinic
« Reply #13 on: October 28, 2013, 08:34:50 AM »
0
Hahaha.

By the time you got finished with Fox Valley, it WAS a kit!

Ron Bearden
CSX N scale Archivist
http://u18b.com

"All get what they want-- not all like what they get."  Aslan the Lion in the Chronicles of Narnia by C.S.Lewis.

u18b

  • Crew
  • *
  • Posts: 3709
  • Respect: +1955
    • My website
Re: New Brass EP-2 assembly & Mod clinic
« Reply #14 on: October 28, 2013, 10:58:12 AM »
0
Now I encounter a problem.

The screws that KMT gave me are not the ideal size.  A few are short, but most are way too long.

And right here, I'm adding a screw that was not original.  Notice how it sticks up so high from the floor.


Here is a trick I do to shorten screws.  Many of you know about this trick, but maybe it will be new for some of you.  I've been doing something like this for years with 00-90 and 00-80 screws.

First I made a jig for this project.  Two pieces of brass soldered together.  Each side makes the thickness of two screws I need.  The shorter area on the left is ideal for the PC board, and the motor mount.  The slightly longer on the right is better for the gearboxes.  Drill holes and tap for the screws.


Run screws into the jig.


Now use a motor tool to trim the steel screws down.  I use a ceramic disc with diamond dust on it.


Here is a before (left) and after (right) shot.


There.  That is much better.


Now, I also run my screw into the jig and file the head of the screw down.  Low profile is good.  All I need is enough of the star slots to get a good bite with a Phillips screwdriver.


« Last Edit: October 28, 2013, 11:00:41 AM by u18b »
Ron Bearden
CSX N scale Archivist
http://u18b.com

"All get what they want-- not all like what they get."  Aslan the Lion in the Chronicles of Narnia by C.S.Lewis.