The following is a copy and paste from my website here....
https://1fatgmc.com/RailRoad/3D-Printer-2/page-66.html =========================================================================
============= Work Station ==================
WARNING: Before going on the following has worked for me and I feel safe doing what I'm doing but you have to determine what works for you. Also my printer is in the shop and it is 27' x 40' with 10 foot ceilings so a lot of air volume. If you are printing in a 10' x 10' room your results and what safety precautions you want to take might be different.
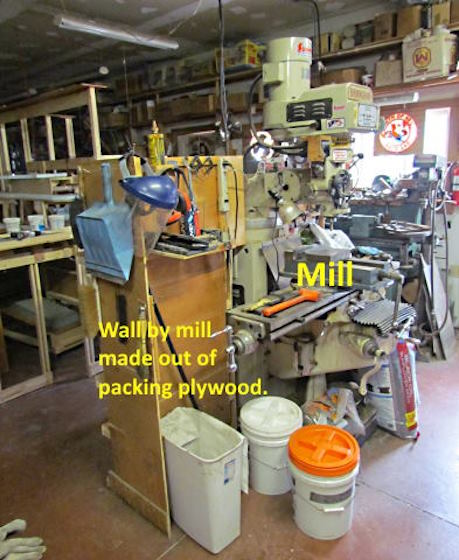
The shop is large but still something is in about every square foot of it so finding a place to build a work station wasn't as evident as you might think it should be. I had made a wall by the mill out of some 'free' thin packing plywood and there was a little room on the other side of that wall I decide I could use.
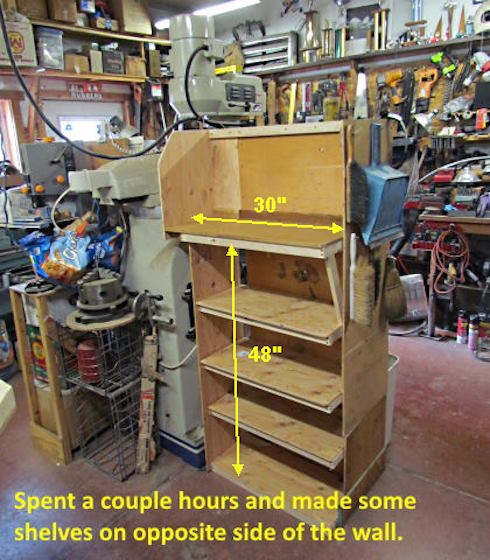
Building some shelves went pretty quick using the wall as the main element of the shelves. Built them using 1 x 2's and some plywood left over from the layout build. I made sure the first shelf below the top one was far enough down that the 'wash-n-cure' bucket would fit there and adjusted the other shelve' heights for other items I wanted to store.
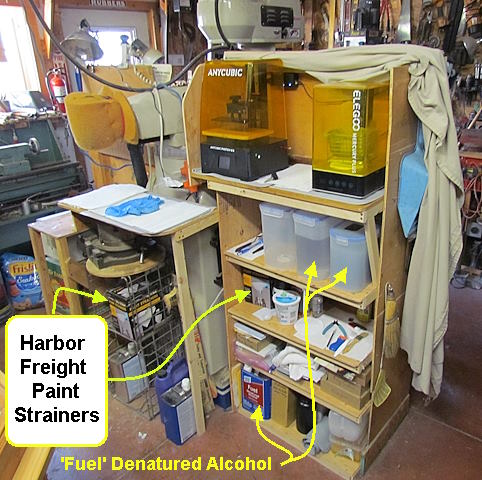
I put together another small workplace just to the left of the shelves. The workstation for me is key to making using the resin printer as easy or easier to use than the filament printer. The filament printer requires more adjustments and small maintenance over time than what I've found with the resin printer.
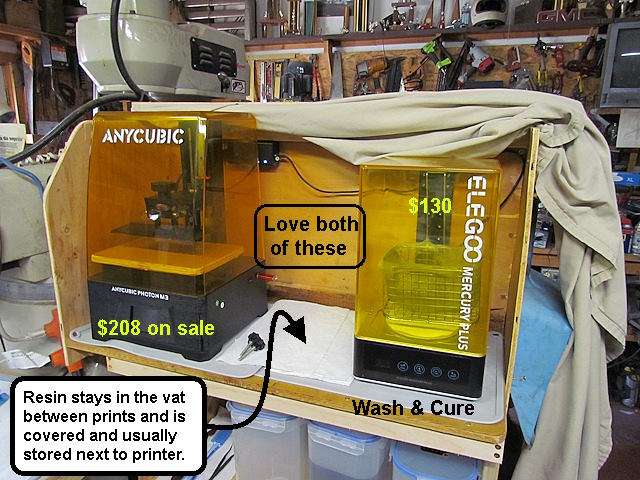
I found the Photon M3 on sale for $208 and bought it as it has a 6 inch long build plate and haven't regretted the purchase. I think it is hard to go wrong with about any name brand resin printer at this point. They have all come a long ways.
Having a wash and cure station though is the biggest factor for me in enjoying resin printing. I put off resin seeing how you had to wash the print in steps in trays with brushes all the while smelling whatever it is you are cleaning with. Then having to figure out a way to cure it. If I didn't have the wash and cure I'd quit resin printing. For me it is as simple as that.
With it when the print is done I remove it from the build plate, wearing gloves, and with the tool shown further down. That takes a couple minutes. I put it in the cleaning basket and put that in the wash and cure bucket with the denatured alcohol and I'm done with dealing with anything that has resin on it. With a wash and cure station that is the extent of dealing with the resin print after it comes off the build plate.
I bought the Elegoo at the time since it was a little cheaper than the AnyCubic. Now you can find both for about $100. Get one and don't look back it makes all the difference in the world, at least for me it does.
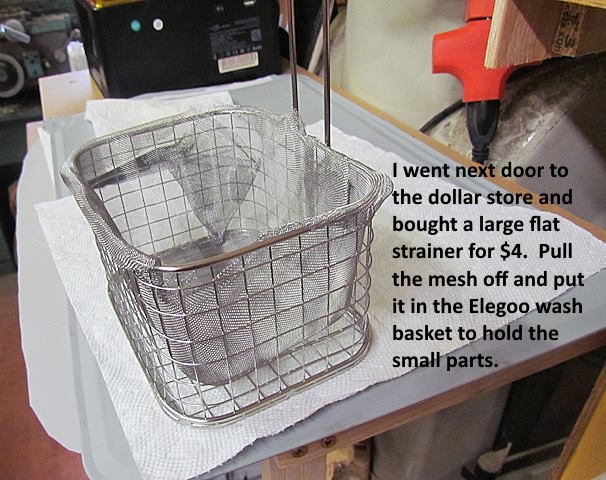
I was printing some very small gears for a Bachmann DDA40X and they would just fall out the bottom of the cleaning basket so went to the Dollar Store next door and bought a strainer for $4 and took the mesh off and put it in the basket. Works great and I leave it in there all the time.
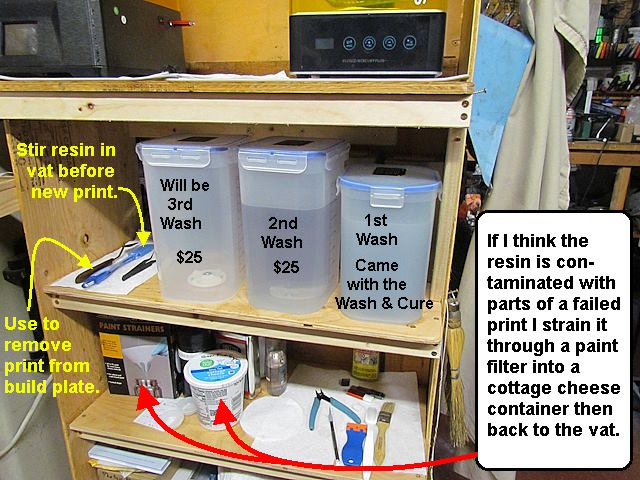
I use denatured alcohol (marked Fuel at Ace) for cleaning and works great for me and is easy to find. I bought a second bucket and recently a third one. This helps in that the alcohol will get contaminated with the excess resin on the print fairly quickly. Some pour that into a temporary container and the put cleaner alcohol in for the final clean cycle. I bought a second bucket so I only need to wash in the first one for 3-4 minutes. Replace that bucket with the second one and move the basket with the print to it and wash for another 3-5 minutes. That is it the print is washed and you didn't have to do anything.
I take the basket and carefully blow it down with a compressed air line (you don't need that). Next with the bucket off the wash and cure station put the little turntable on and hit the button to change it to 'cure' and I usually cure the 'Build' resin for 3 to 3 ½ minutes. That seems to work so far for most prints.
In less than 15 minutes after taking the print off the build plate it is ready to do any finish filing/sanding and/or painting you want to do to it. You had gloves on for a couple minutes and the rest of the time where doing something else as the wash and cure went through its cycles.
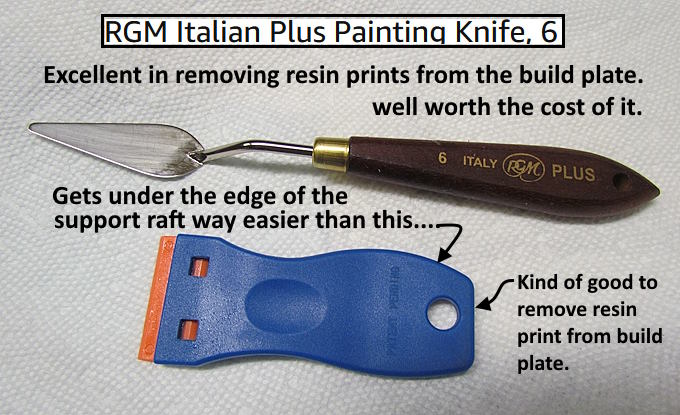
If you are doing resin printing and don't have a painting knife like above get one. I got one some time ago but keep using the razor blade tool above and it worked but once I tried the palette knife I doubt I'll ever use the razor blade tool again.
You can find them many places got mine ( HERE ) and worth every penny. I can remove prints in seconds now where sometimes I struggled to do it with the plastic razor blade.
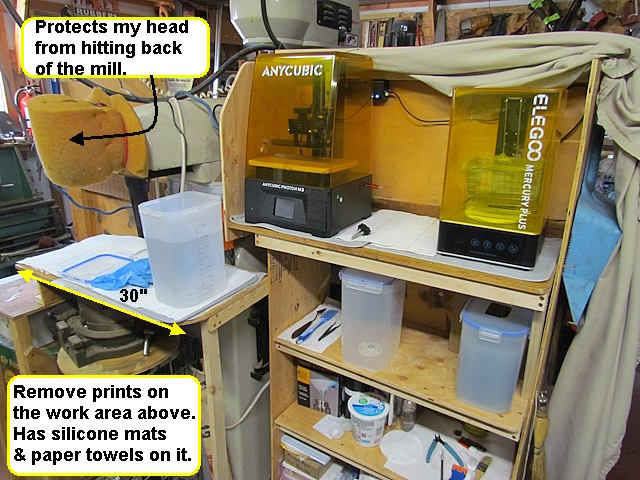
The small workspace to the left has a silicon pad on it in case of a spill (hasn't happened) and I keep paper towels on it. I remove my prints from the build plate there and it is handy to use when changing out the denatured alcohol containers with the wash and cure.
After running my head into the back of the mill a couple times I put some padding on it.
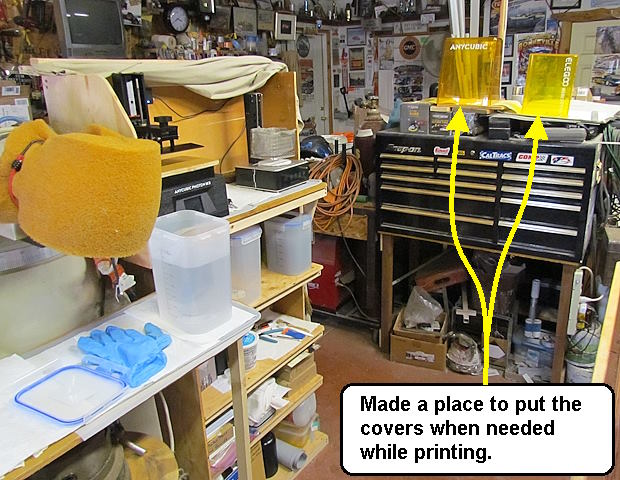
I was lucky to also have a place to put the covers which have to go somewhere for a minute or two during the printing process.
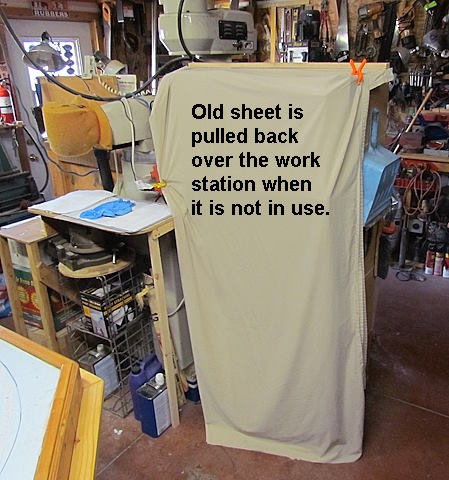
When I'm done I pull the cover back over the workstation. I'm glad I spent the day building it and wasn't moving everything on and off a workbench. I actually look forward to resin printing and set up like I am enjoy it and wish I would of taken the printer out of the box when I got it not a couple years later.
Sumner