You can find the print files for this 'low bunk' car on thingiverse ( HERE ).===========================================================================
Some small changes to the detail as described in the preceding page were made. Also made some changes to the coupler pocket to make it a little stronger as a couple prints partially failed in one of the lower corners.
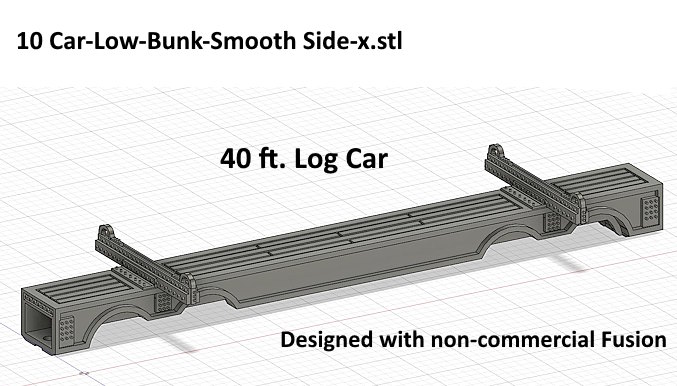
As I was writing this I noticed that the bottom row of bolts or rivets were missing on the plate at the front of the car. That was fixed but you won't see that fix on some of these images.
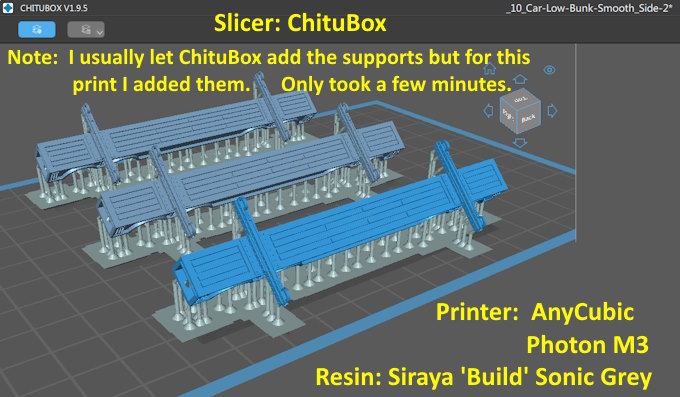
This is the first print where I placed all of the supports. I didn't like how they were automatically place by ChituBox around the coupler boxes and a few other places like the sides of the car on the side facing down above. It took less than 5 minutes to place them. Once placed you can then use the 'copy' command to generate how many other prints that you want.
When the print is done I do a first wash in denatured alcohol for 3-4 minutes with the wash-n-cure station. Then I switch to the cleaner container of denatured alcohol for the second 3-4 minute wash. Then I blow the parts dry and depending on how big/thick they are do a 3-4 minute cure (3.5 min for these).
I love the Elegoo wash-n-cure station since I don't have to mess with trying to hand clean the prints. Not sure if I'd do resin printing without it. I have a lot more on my printing station and the wash-n-cure
( HERE ).
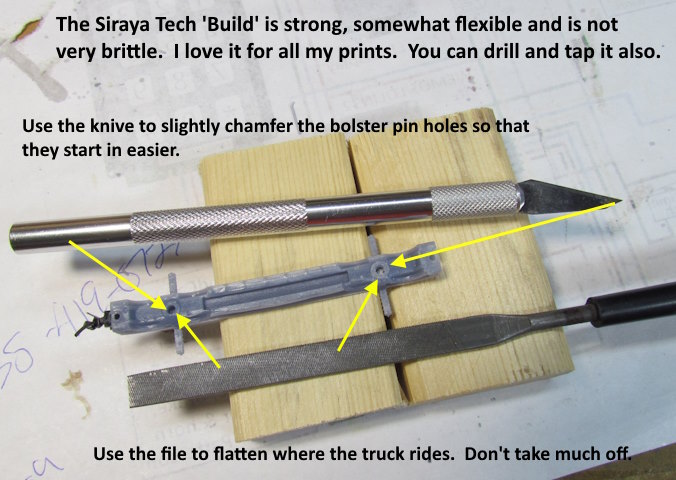
I haven't had to do much cleanup on these prints after the supports have been removed and that takes less than 5 minutes.
You want to flatten out where the trucks sit under the car. Don't get carried away, just a little file work will flatten them. Also take a knife and run it around the holes that bolster pins go in. Chamfer the top of the holes just a bit helps when you push the pins in.
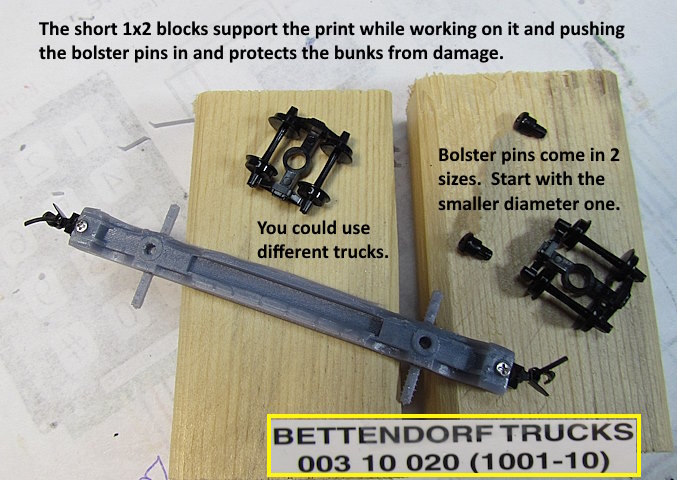
If you don't use something like the blocks shown above to support the care while working on it the tops of the bunks on the ends will probably be damaged. The support also helps while you are putting the coupler screws in and the bolster pins. Put the bunk in the space between the two blocks.
I chose Micro Trains Bettendorf trucks. They come with two bolster pin diameters. Start with the smaller one. After running the knife blade around the hole I've had no problem using the smaller pins that come with the trucks. With the blocks supporting the car you can use some pressure pressing the pins in (at least with the 'Build' resin).
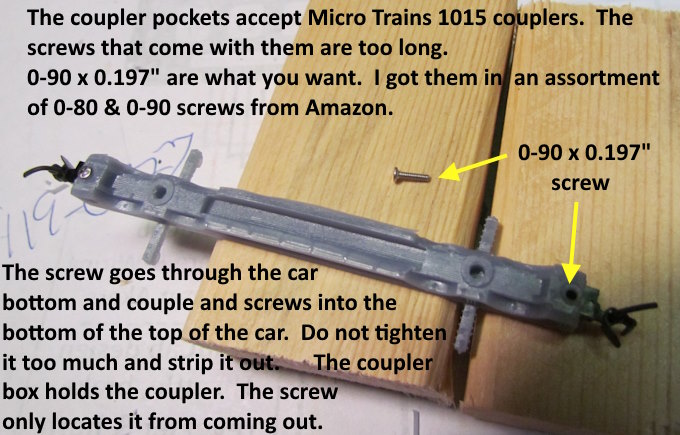
The screws that come with the Micro Train 1015 couplers are too long and will go through the bottom of the top of the car and stick out. You want to use 0-90 x 0.197 length screws for this. I got an assortment of 0-80 & 0-90 on Amazon and I think also eBay at one point.
The hole in the bottom of the coupler pocket is large enough the screw will slide through it and also the coupler. Then screw it gently into the top of the car body. Don't force and strip the threads the screw is creating out. The screw doesn't have to hold the couple up like in some cases as the pocket does that. The screw only prevents the couple from sliding out. Snug is good enough on the screw tension.
With my printer I haven't had to clean the inside of the coupler box up. The coupler slides in and is snug in the box.
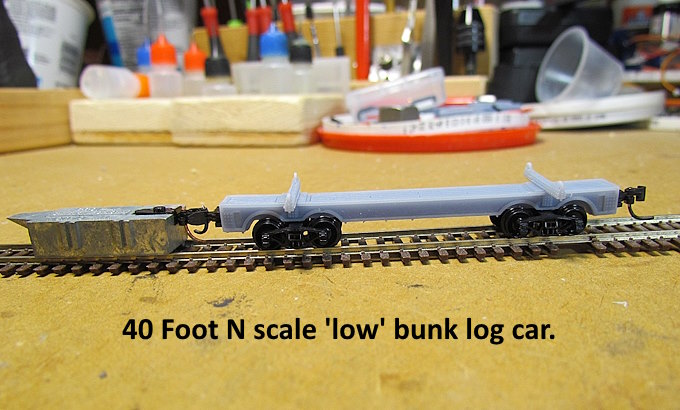
I feel I have the car/coupler height 'close enough'. With the box there is no way to change that.
I have some Z scale couplers ordered. With more thought I don't think I'll use them as I want the car to be as close to compatible as possible to the other equipment. Keep in mind that this wasn't meant to be a perfect or close to perfect scale model of a log car. For me I only need it to represent one and have taken a lot of license in designing it.
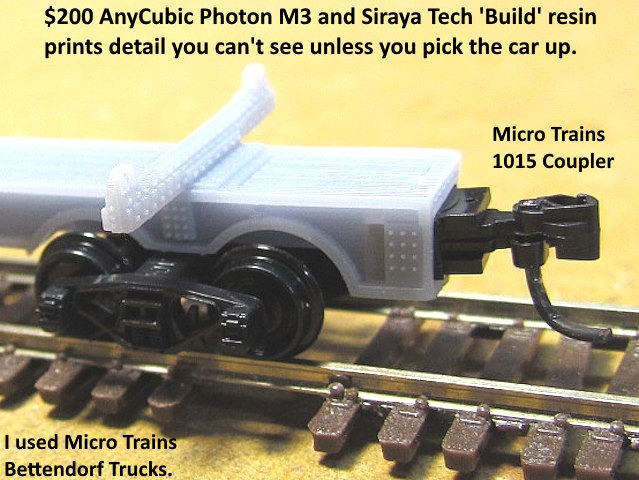
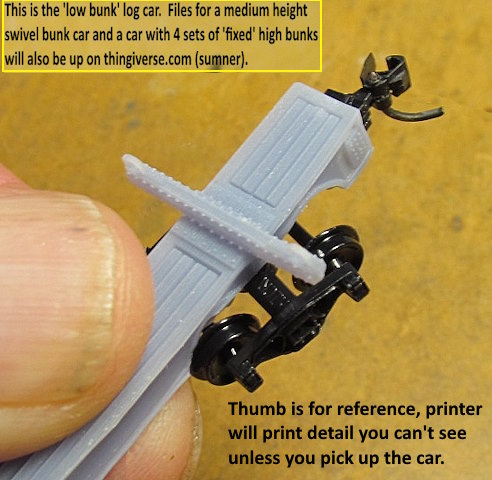
I realize that higher and higher resolution printers are coming but wonder how many of us they benefit. I'm impressed with the detail in the car show above but on the layout you can barely see it from 12-14 inches away. I'm more interested now in build volume as long as I can get this detail.
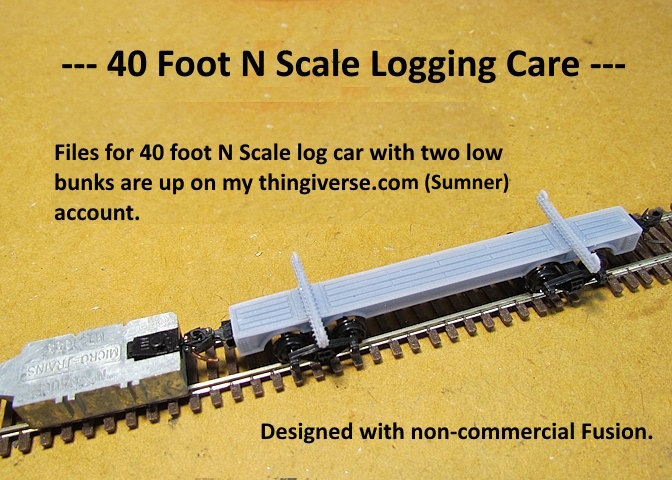
If you are doing CAD work and not happy with the program try Fusion. It is free if you aren't doing commercial design work and one can create designs really quick with it. Start slow and build on learning other features. I designed a lot of things right off the bat by learning what is in the video
( HERE ). Learn what he shows you in that video and you can design a lot of things using those tools. I only use 15-20 fusion tools to design all that I design.
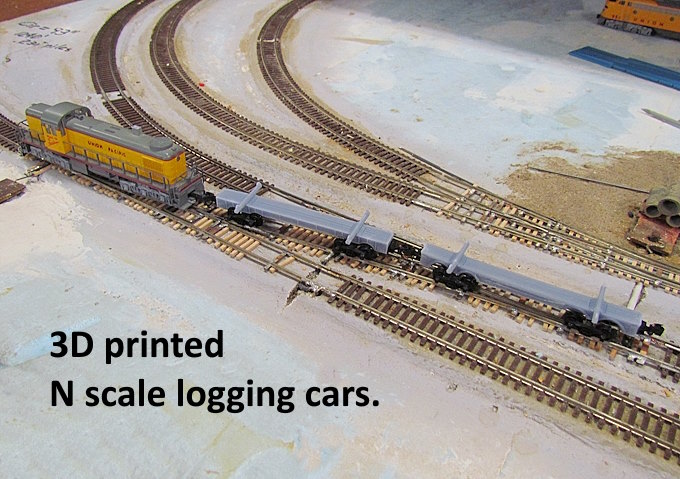
I put a couple of the earlier designed and cars on my small test layout for a test run. I pulled and pushed them through some of the turnouts without a problem. Not sure if all that will be true if there were 10 to 20 of them together. There is a little room for strips of lead weight in the bottoms at the moment which might help and with log loads things might prove to be better or not.
=============================================================
You can find the print files for this 'low bunk' car on thingiverse ( HERE ).=============================================================
A link to this whole build
( HERE ).
Sumner