Author Topic: Kato #4 switch  (Read 936 times)

0 Members and 1 Guest are viewing this topic.

Paradise275

  • Crew
  • *
  • Posts: 374
  • Respect: +14
Kato #4 switch
« on: September 01, 2022, 02:47:19 PM »
0
HI.
There used to be a lot of problems with the Kato #4 switch. Has it been improved? They used to cause a lot of derailments.

Rick

TVRR

  • Crew
  • *
  • Posts: 173
  • Respect: +4
Re: Kato #4 switch
« Reply #1 on: September 01, 2022, 03:11:36 PM »
0
Never have had any issues with #4s or 6s. Been using for 15 years or so.
Modeling Southern and N&W in the southeast.

atsf_arizona

  • Crew
  • *
  • Posts: 738
  • Respect: +112
    • My PBase Photo album where my Model RR pictures are
Re: Kato #4 switch
« Reply #2 on: September 01, 2022, 06:42:40 PM »
0
Hi,

There is some simple tuning with Kato #4 switches that will remove the vast majority of derailment problems.  See my Pbase.com/atsf_arizona album here:

https://pbase.com/atsf_arizona/kato_4_turnout_tuning&page=all


The info:

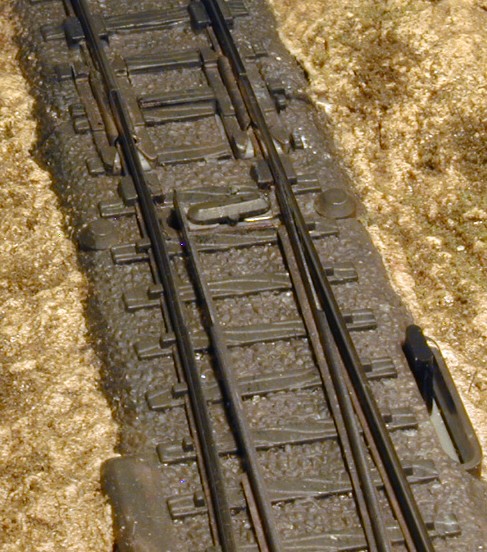
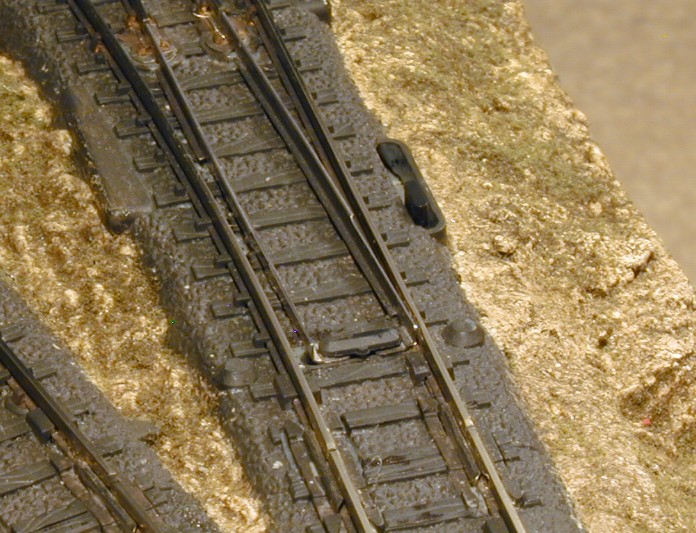
These photos show simple tuning modification to #4 Kato N scale turnouts, to alleviate common problem where N scale equipment will pick the points on the #4. This simple modification prevents derails and the point picking.

The problem, which has been known for years, is that the end of the #4 turnout's point is not, well, a point, but is cut off square. Also, there is no 'notch' for the points to sit into. So we do two things: 1) file a notch in adjoining stock rail for the points to sit into 2) sharpen the points. It goes very quickly and is very easy to do.

To carve the notch in stock rail, I put the points in the straight position, then use a small thin file and carve a notch in the adjacent stock rail. This provides a place for the points to 'sit' into, and thus provides a smooth path for the wheels/flanges. In the following photos, you can see the smooth path that this simple filing creates.


Some photos:


At the above https://pbase.com/atsf_arizona/kato_4_turnout_tuning  album, I also added some photos from Tudor on Trainboard.com, his photos further illustrate this modification.  He's also got a few nice photos about adding electrical feeder wires from underneath.


Check out this Pbase photo album to see all the photos:  https://pbase.com/atsf_arizona/kato_4_turnout_tuning

Hope this helps!
John Sing
Venice, FL
http://pbase.com/atsf_arizona
https://web.archive.org/web/20151002184727/home.comcast.net/~j.sing/
========
Modeling the Santa Fe's Peavine Line (Ash Fork -> Phoenix, Arizona) during the 50s and 60s

fhmac

  • Crew
  • *
  • Posts: 32
  • Respect: +6
    • Frank's Photo albums
Re: Kato #4 switch
« Reply #3 on: September 07, 2022, 11:12:31 PM »
+1
How to "fix" the kato #4 turnout:
Frank

u18b

  • Crew
  • *
  • Posts: 3712
  • Respect: +1956
    • My website
Re: Kato #4 switch
« Reply #4 on: September 08, 2022, 11:09:01 AM »
0
Also, if you go way WAY back to the original run, the markings on the underside were backwards.

In other words, if you wanted the diverging route power routed or always on.... the markings were switched.

Though unless you buy used, you would probably not encounter this.   Kato fixed it in the next run.
Ron Bearden
CSX N scale Archivist
http://u18b.com

"All get what they want-- not all like what they get."  Aslan the Lion in the Chronicles of Narnia by C.S.Lewis.