Author Topic: Commentary (need feedback from steam guys) - 2-8-0 Imported for HALLMARK MODELS  (Read 4212 times)

0 Members and 1 Guest are viewing this topic.

mmagliaro

  • Crew
  • *
  • Posts: 6368
  • Gender: Male
  • Respect: +1871
    • Maxcow Online
When I see with a dial indicator that there is .060 side movement and there is only oneplace that a wheel gauge will fit there is some thing WRONG! I removed the drive axle with wheels and rolled them across a flat surface,
The drivers should maintain at 90 degrees to the flat surface- not so, you could see with your eye there was a real bad problem.
Believe me I looked at all ways to correct before the press came out.
Sat on the work table for several days at a time before trying some thing else only to come back to the same conclusion.

Jerry,
This helps a lot.  You didn't explain that you did this in your original diagnosis.

Boring out the driver hole a little, and then setting the axle in there with epoxy is a good idea.  With only .001" bore-out, you won't really have to worry about the driver ending up "off center" on the axle.  A .001" error is so small that it won't matter.  Heck, the commercial drivers probably aren't concentric on the axles to within .001" anyway.

A jig to set them square while the epoxy dries - yes, I've done this exact thing with my home-made drivers.
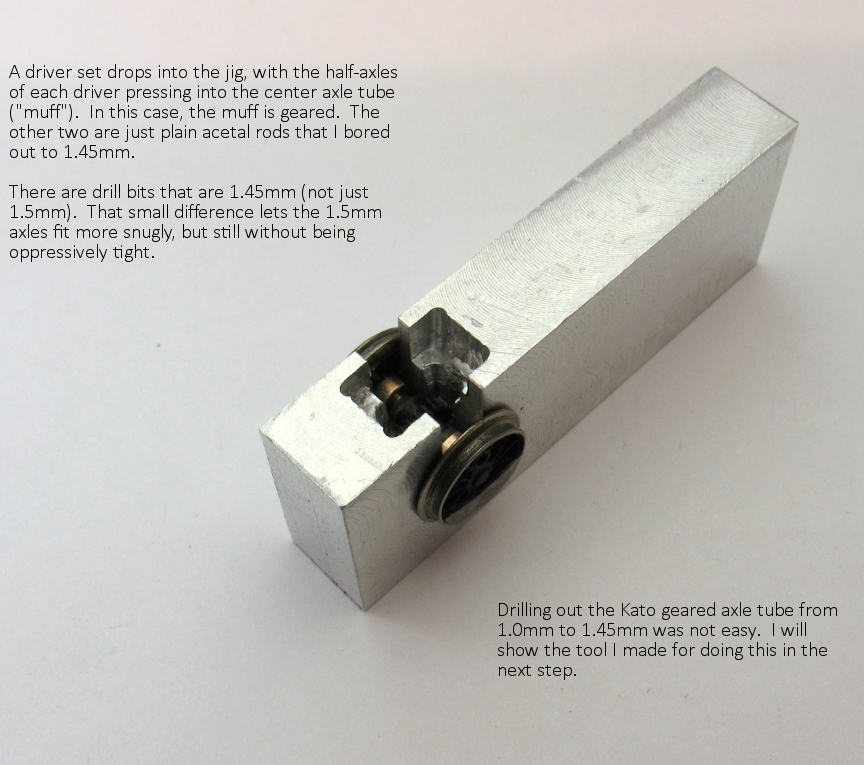
It looks like this:
(just a block machined to the correct width, with a space for the axle gear to go)

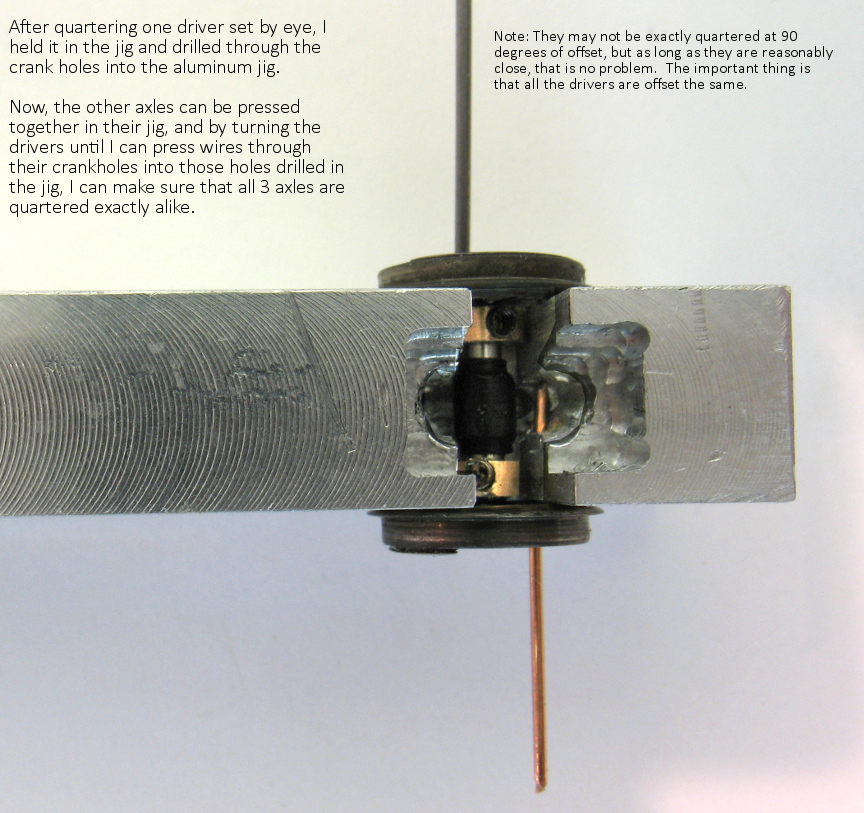
And you can drill two holes in either side of the block to set the quartering.  You can drop one of the other wheelsets in the jig, and just drill through their crankpin holes with a pin vise to get the holes in the jig at the correct place so that your new driver will match.


woodone

  • Crew
  • *
  • Posts: 799
  • Gender: Male
  • Respect: +33
Well I tried just about every thing that I could think of that would cause this much side to side problem.
I took all of the drive rods off- Wheels still wobbled! The bearing that you were talking about, the cover plate sets down on top of the flat spot on the bearings, only .003 clearance, Axle does not move up or down, expept of the .003 - nor for or aft.
My big concern right now is the shaft wants to follow the old hole and goes on the shaft crooked. This is why I think that boring the hole or is a must. The axle jig is the least of my worries. I need to be able to center the wheel, so it is floating and centered when going onto the axle, at the same time it is 90 Degrees to the axle, plus get them in quarter. Still working on ideas for that.
Thanks for the input.   

woodone

  • Crew
  • *
  • Posts: 799
  • Gender: Male
  • Respect: +33
e_https://www.thhttps://www.therailwire.net/forum/gallery//page_copy.pngerailwire.net/forum/gallery//page_copy.pngcopy.png5.jpeg[/img]
jig for boring .
Then the jig for holding axle .
I first made a jig to bore the drivers. then a jig to hold the axle while I installed the drivers.
 [img]https://www.therailwire.net/forum/gallery/5/2189-120518110321.jpeg[


woodone

  • Crew
  • *
  • Posts: 799
  • Gender: Male
  • Respect: +33
well I guess that failed??
 guess this is why I don't show photos too often- Takes me forever to figure out how to make that [ Guests cannot view attachments ] happen
well I don't know what is going on but it seems that I can't get the photos from the gallery to attach to my post.
Got way too much work to do to mess with this right now. maybe latter,

peteski

  • Crew
  • *
  • Posts: 32965
  • Gender: Male
  • Honorary Resident Curmudgeon
  • Respect: +5344
    • Coming (not so) soon...
e_https://www.thhttps://www.therailwire.net/forum/gallery//page_copy.pngerailwire.net/forum/gallery//page_copy.pngcopy.png5.jpeg/img
jig for boring .
Then the jig for holding axle .
I first made a jig to bore the drivers. then a jig to hold the axle while I installed the drivers.
Code: [Select]
[img]https://www.therailwire.net/forum/gallery/5/2189-120518110321.jpeg[
 

Not sure where those crazy codes above came from, but the one on the bottom of your post is correct (you just somehow cut off the end of it.  The /img  piece.  I added it and here you go.  But to be fair, those crazy codes partially messed up the message formatting.


I'm not sure why you are having *SO* much trouble.  :?

And after all this, the item in question is out of focus in that photo.
« Last Edit: May 12, 2018, 11:51:51 AM by peteski »
. . . 42 . . .

woodone

  • Crew
  • *
  • Posts: 799
  • Gender: Male
  • Respect: +33
Peteski,
Like I have said before, computers are NOT my friend. I am blessed to be able to get one doing what I would like at times. It would be like me trying to tell you how to weld With 7018 low-hydrogen rod doing an up pass. Unless you have done it many times you will not be able to do it. No matter how I tell you or explaine it,  it takes time to learn.
I am trying to the best of my know how.