Author Topic: Making a Speaker Enclosure (photos)  (Read 5370 times)

0 Members and 1 Guest are viewing this topic.

jdcolombo

  • Crew
  • *
  • Posts: 2264
  • Respect: +973
Making a Speaker Enclosure (photos)
« on: November 21, 2013, 03:17:44 PM »
0
Several folks have asked me to describe how I go about making my sealed enclosures for the speakers I use in my sound installs, so for those of you who are interested, here goes a basic tutorial.

The process is pretty simple.  I simply construct a box around the speaker in question, using either styrene or lead sheet (I prefer lead sheet because it adds weight and because lead is so inert, but for my diesel installs, I used styrene).  In general, the thicker the material you can use, the better; the best speaker enclosures will not have any resonances, which means the stiffest enclosure you can make.  For my diesels, however, space dictated that the enclosure add no more than 1mm to the width of the speaker I used (the Knowles Fox, which is 9mm wide), so I used .020 styrene.

The first photo shows the basic materials: the speaker and two strips of styrene cut from a sheet to the depth you want.  For my diesel installations, I was limited to 6mm of depth overall (even that required milling down the frame just a bit).  So I cut the strips to 5.5mm; when I add the bottom to the enclosure (also of .020 styrene), the overall depth comes out to 6mm.  You will also need some gel CA cement; to attach the bottom, I used regular liquid plastic cement.


The first step in the construction process is to "rough up" the sides of the speaker to provide better adhesion for the CA cement.  I do this by rubbing the sides and ends of the speaker across some 200-grit sandpaper (I also lightly sand the styrene strip to give it more texture, too).  This photo compares the texture of the stock speaker (top) to the one I have sanded lightly (bottom).


Then, I solder wires to the speaker pads.  For this, I use scraps of wire I've cut off from prior decoder installs; thinner is better - the wire I used in this one is probably 32-gauge or smaller.
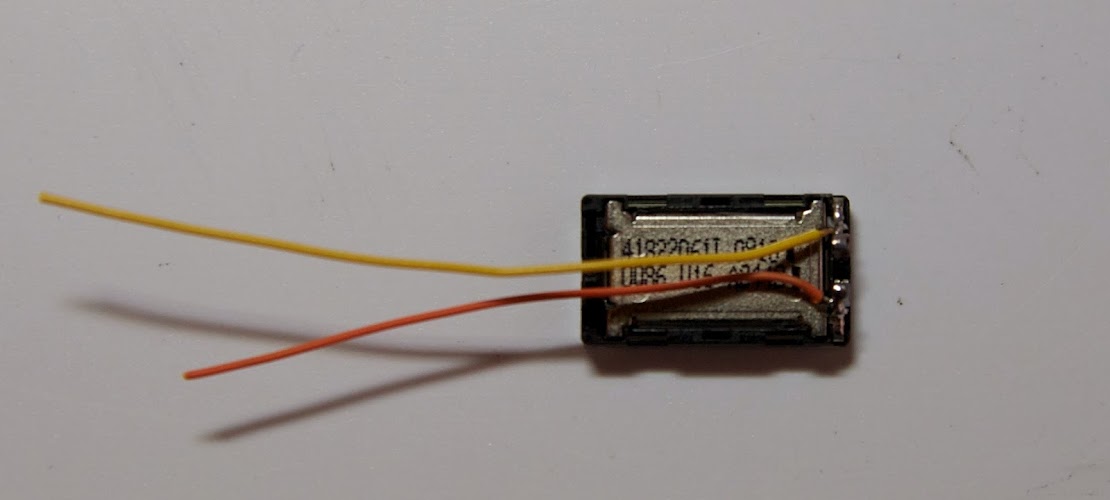


Now it's time to start the actual construction of the box.  I put a thin bead of gel CA across one of the long sides of the speaker, towards the top edge, and then press the styrene strip on the edge.  I usually put the speaker face-down on my work table, then press the strip along the edge to make sure the top of the strip is flush with the top of the speaker - but you'll have a few seconds to adjust before the CA sets.  You want the strip to overlap the short edge of the speaker just a bit, so that you can later cut that off flush for the short edges of the box.


Let the CA dry for a few minutes, then trim the strip flush with the short edge of the speaker, and repeat on the other side:
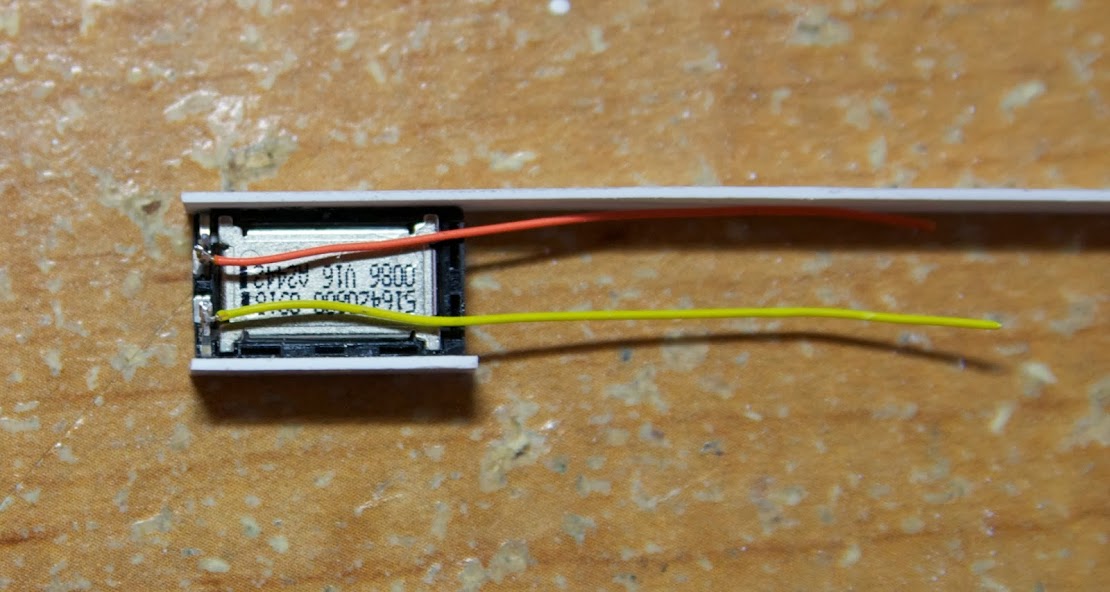


When you're done with the two long sides, things should look something like this:
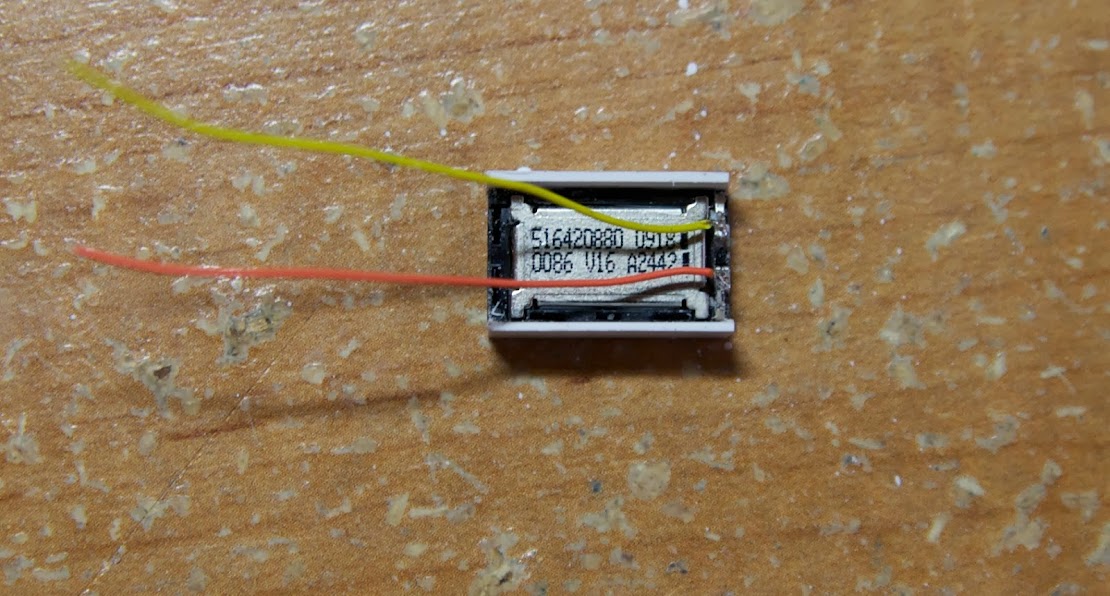


Now do the short ends: you want the short ends to overlap the styrene sides of the long ends in order to create an air-tight seal.  Put a bead of gel CA along the side of the speaker and the edges of the long side styrene strips, then press a strip of styrene to complete one side.  Make sure to overlap the long sides a bit to make sure everything is sealed up tight:


Let the CA dry, trim the ends of the strip flush with the long sides, and repeat for the other side.  You now have a box around your speaker.  But what about the wires?
Easy - drill a small hole (as small as you can use and still get the wires through) on the short side of your box:
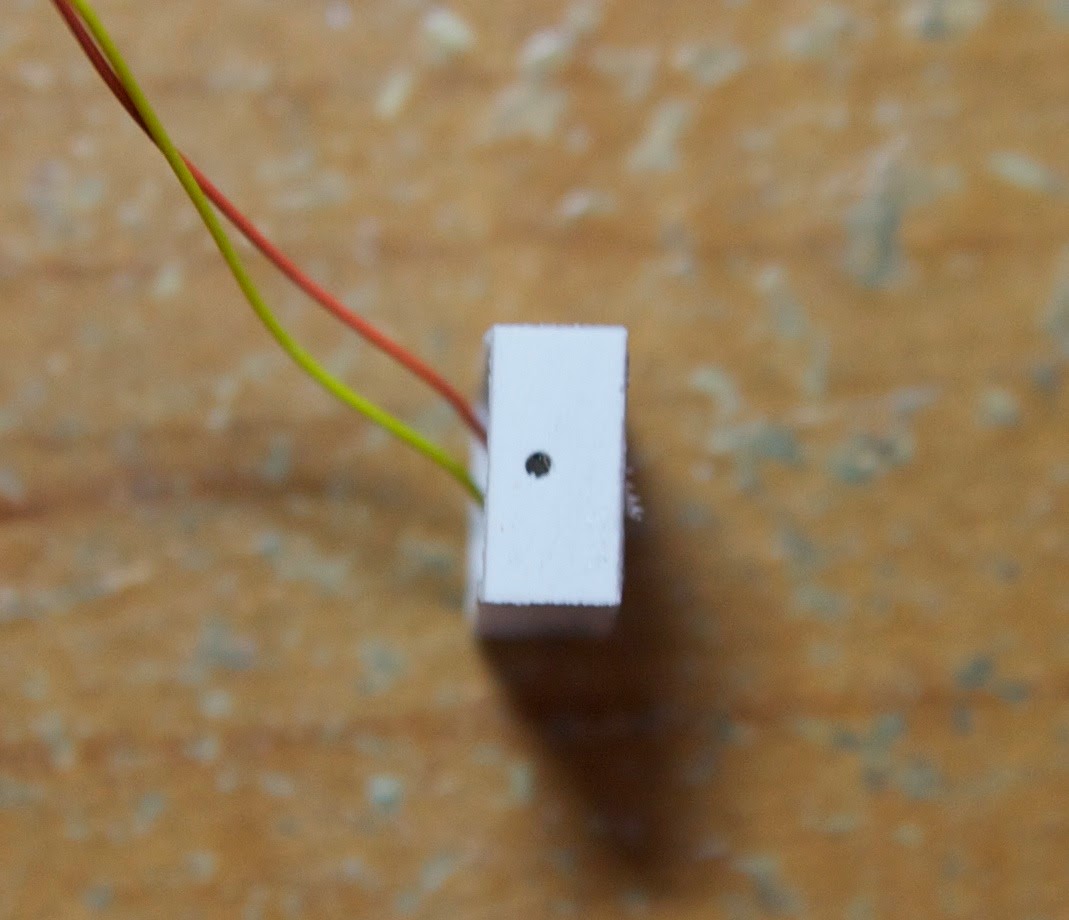


Then feed the wires through, and put a dab of gel CA around the inside of the hole to seal it.  When you are done, here's what you've got:


Let everything dry for 10 minutes.  Now attach the bottom.  If you are using styrene, this is pretty simple: put the speaker on the styrene sheet, use a brush to brush liquid styrene cement around all the edges, and let dry:


When dry, cut away the rest of the bottom sheet, and you have a nice, air-tight speaker enclosure:


Here's the final product:


The whole process should take about 30 minutes.

John C.

peteski

  • Crew
  • *
  • Posts: 32934
  • Gender: Male
  • Honorary Resident Curmudgeon
  • Respect: +5336
    • Coming (not so) soon...
Re: Making a Speaker Enclosure (photos)
« Reply #1 on: November 21, 2013, 03:30:24 PM »
0
Yup, just an air-tight 5-sided box.   Nice presentation JD!

Just as an interesting tidbit, the enclosures on some of the latest Zimo speakers are "printed" using a plastic filament-based rapid prototyping printer. In the past, those were injection-molded plastic parts.
« Last Edit: November 21, 2013, 03:58:22 PM by peteski »
. . . 42 . . .

Pennsy

  • Crew
  • *
  • Posts: 133
  • Gender: Male
  • Respect: 0
Re: Making a Speaker Enclosure (photos)
« Reply #2 on: November 21, 2013, 03:36:29 PM »
0
I agree. Great presentation, and I especially liked the photos.

thank you very much.

Jim

central.vermont

  • Crew
  • *
  • Posts: 2623
  • Gender: Male
  • Jon
  • Respect: +147
Re: Making a Speaker Enclosure (photos)
« Reply #3 on: November 21, 2013, 07:41:35 PM »
0
Very nice tutorial John!! Thank you for doing this.
Just one question. Who is your pusher for the speakers? I'd like to get a couple of them.

Jon

jdcolombo

  • Crew
  • *
  • Posts: 2264
  • Respect: +973
Re: Making a Speaker Enclosure (photos)
« Reply #4 on: November 21, 2013, 07:48:04 PM »
0
The speakers are from Digikey.  Go to their web site and do a search for "Knowles Fox". About $3 each.

John C.

carlso

  • Crew
  • *
  • Posts: 1118
  • Gender: Male
  • Respect: +502
Re: Making a Speaker Enclosure (photos)
« Reply #5 on: November 21, 2013, 08:45:51 PM »
0

John - nice presentation. Thanks

Carl
Carl Sowell
El Paso, Texas

avel

  • Crew
  • *
  • Posts: 136
  • Respect: 0
    • Layout Album
Re: Making a Speaker Enclosure (photos)
« Reply #6 on: November 22, 2013, 07:36:01 AM »
0
Nice tutorial and info
iamaman27 on the youtubes

Chris333

  • Crew
  • *
  • Posts: 18392
  • Respect: +5662
Re: Making a Speaker Enclosure (photos)
« Reply #7 on: November 22, 2013, 07:55:37 AM »
0
A 7th order isobaric box will really bring out the bass  8)

craigolio1

  • Crew
  • *
  • Posts: 2452
  • Respect: +1763
Re: Making a Speaker Enclosure (photos)
« Reply #8 on: November 22, 2013, 09:11:04 AM »
0
A 7th order isobaric box will really bring out the bass  8)

I agree.  You could do a clam shell with a nice .020 clear styrene window and blue LED inside.  I put spinners on a Gp38 the other day.

Craig
« Last Edit: November 22, 2013, 10:43:55 AM by craigolio1 »

Sokramiketes

  • Crew
  • *
  • Posts: 4971
  • Better modeling through peer pressure...
  • Respect: +1525
    • Modutrak
Re: Making a Speaker Enclosure (photos)
« Reply #9 on: November 22, 2013, 11:10:30 AM »
0
Ahahahahaha

lyled1117

  • Crew
  • *
  • Posts: 59
  • Respect: +11
Re: Making a Speaker Enclosure (photos)
« Reply #10 on: November 27, 2013, 12:19:53 AM »
0
I wonder if I could offer an alteration of your method that makes the speaker box simpler and faster to make. I don't have photos of the method, but I whipped off a quick cad drawing that I hope will explain it.  This is an above side view. Take a sheet of styrene as a base, it can be whatever size fits the job. Place the speaker on the sheet in the desired position. Place and glue the strip styrene being used for the sides such that the first edge is flush with the speaker edge. The second edge of the 1st piece should overhang the opposite edge of the speaker. This 2nd edge of the styrene can be ragged, it does not need to be square. Then butt a 2nd strip of styrene against the first as well as butted against the speaker (I left spacing in the drawing for clarity). Glue it in this position. Same story, it overhangs. Repeat for the third and fourth side. What you end up with is a box that ends up like the lower one in the image. When the glue is dry, trim the four overhangs to be flush. Assembly time is rapid, I do this in about five minutes. The major advantage is that one is not trying to cut strips to precise length with square edges on both ends. All you need is one of the two edges to be square. Make sense?  Hope this helps someone.

Lyle


« Last Edit: July 16, 2018, 04:04:44 PM by lyled1117 »

jdcolombo

  • Crew
  • *
  • Posts: 2264
  • Respect: +973
Re: Making a Speaker Enclosure (photos)
« Reply #11 on: November 27, 2013, 11:25:42 AM »
0
The problem with this is that you need some depth on the back side of the speaker to provide air space for the speaker back wave.  The trapped air acts as a spring to provide better cone excursion and damping.  Basically, what I do is build an "acoustic suspension" enclosure, which needs some empty space behind the speaker.

So placing the speaker directly on the back of the enclosure won't work for this -it needs at least a couple mm separation from the back.  It if you put the speaker face-down and glue the strips on the top edges, then flip and glue the back, it would work, and I agree would be faster.

For technical buffs, the acoustic suspension speaker design was pioneered by Acoustic Research in the early 1960's.  The AR3 speaker was considered revolutionary in its day because it provided very accurate sound reproduction in what was then considered a tiny bookshelf-sized box.  Advent also adopted the design, and the "small Advent" speaker was enormously popular.  Of course, to do this right, you need to design a box with very precise dimensions to match the volume of the enclosure to the speaker resonant frequency.  I don't claim to do anything like that; but the basic principle of using trapped air as a spring for speaker excursion and damping works even with our less-than-ideal environment.  But you do need SOME air. 

John C.
« Last Edit: November 27, 2013, 11:34:41 AM by jdcolombo »

lyled1117

  • Crew
  • *
  • Posts: 59
  • Respect: +11
Re: Making a Speaker Enclosure (photos)
« Reply #12 on: November 27, 2013, 01:49:46 PM »
0
OOPS!! I neglected adding that the side strips can be what ever height space allows in the locomotive. They can be several times the height of the speaker if space permits. I set the speaker on the deck for alignment purposes, but that doesn't have to be the final position. When I go to mount the speaker in the box I use a thin bead of something like RTV inside the lip of the box.

Lyle

« Last Edit: July 16, 2018, 04:05:26 PM by lyled1117 »

jdcolombo

  • Crew
  • *
  • Posts: 2264
  • Respect: +973
Re: Making a Speaker Enclosure (photos)
« Reply #13 on: November 27, 2013, 02:13:24 PM »
0
Yep, that works!

John C.

cnw mike

  • Crew
  • *
  • Posts: 73
  • Respect: 0
Re: Making a Speaker Enclosure (photos)
« Reply #14 on: November 27, 2013, 10:45:06 PM »
0
If you want this speaker, best order soon.

Quote
Manufacturer   KNOWLES
Description   SPEAKER - FOX
Manufacturer Part Number   2403 260 00086
Digi-Key Part Number   423-1177-ND
Status   End Of Life
Last Time Buy Date   01/01/2014
Substitutes   Please click here