I recently added to my track laying tools that you can 3D print or make by some other means.
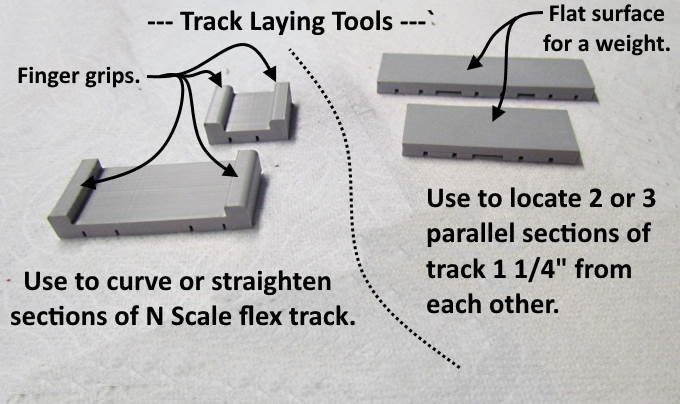
The tools above are broken down into two different types. The ones on the left help to shape N Scale flex track and work really well with ME code 55/80 track. See the following video to see just how fast you can shape the track into about any curve....
I've read where some aren't a fan of ME flex track as they feel it is hard to work with. My observations are that if you print one of these tools or make one from other means you will change your mind. A similar tool use to be commercially available but they are hard to find now unless someone has started making them again.
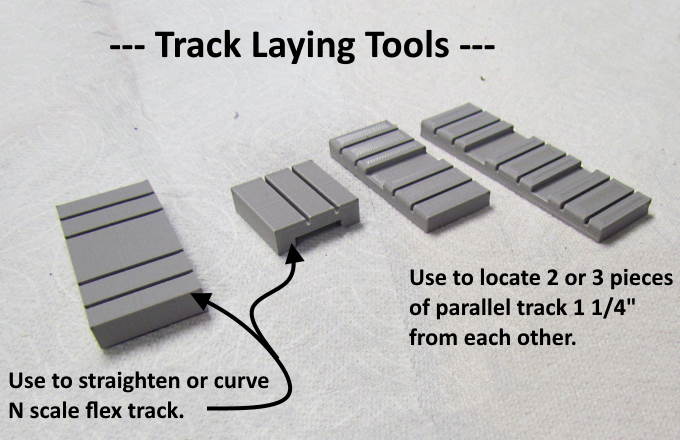
The tools shown above were designed to be used to locate tracks parallel to each other, 2 tracks with the one tool and you could use multiple 3 track tools to lay out a yard if so desired.
I now have these track aids with 1 1/8", 1 1/4", 1 3/8" and 1 1/2" track centerlines. More about them and links to the print files ( HERE ).
----------------------------------------- Next Up a Handy Compass --------------------------------
I got the idea for this next item from InvertLogic. Check out InvertLogic's YouTube channel (
https://www.youtube.com/c/InvertLogic/videos ) and here is his video that inspired making the tool below....
.
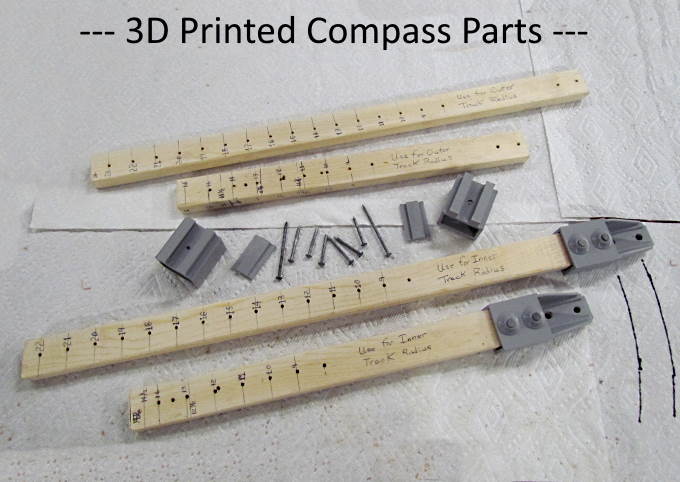
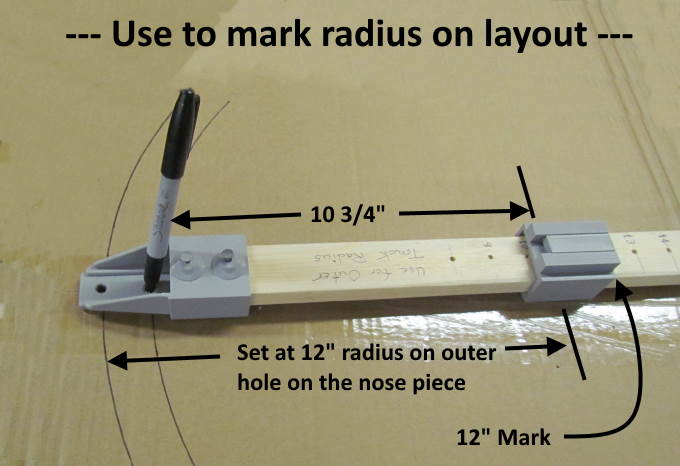
I designed the compass to work with a commonly found (in the U.S.) 1 X 2 (actually 3/4" x 1 1/2"). It has a slid on one end that pins into the 1 X 2 at any radius you want to drill a hole for. The other end has two holes in it that are 1 1/4" apart. If you put a felt tipped pen in the hole you can scribe a track centerline or two parallel ones 1 1/4" apart. If there was sufficient interest I could design prints for different centerlines.
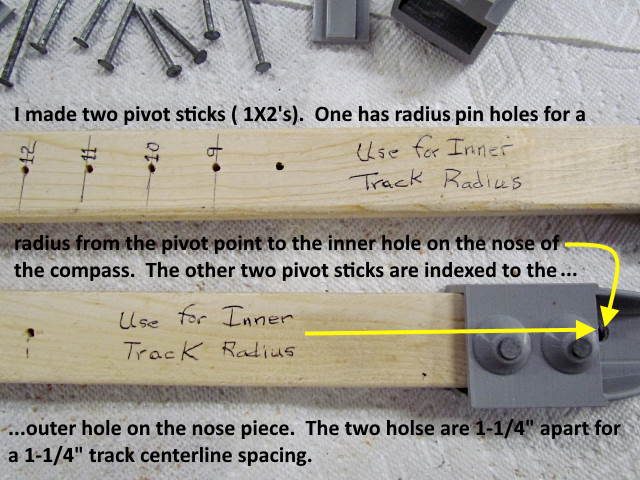
On the underside of the nose .....
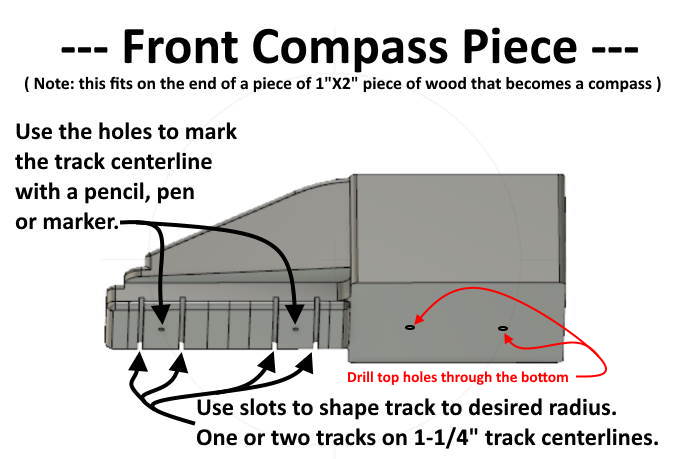
.... there are slots for shaping N scale flex track similar to the track shaping tool. This tool also works very well for shaping flex track.
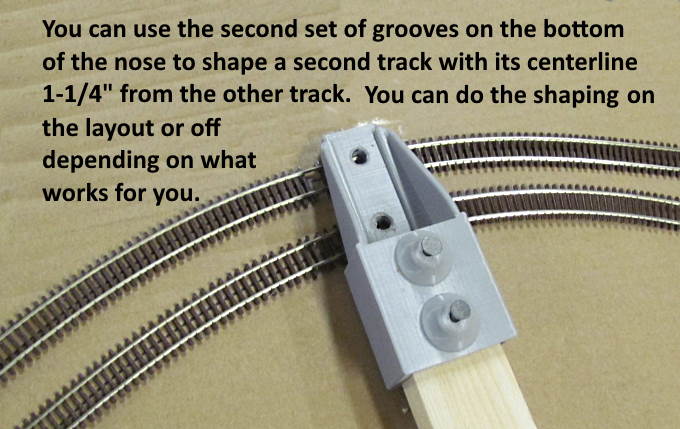
I'm using ME code 55 so have no experience with other brands but as the following video shows it is extremely easy to use on ME track....
[video=youtube;UOD6d8nzu-c]https://www.youtube.com/watch?v=UOD6d8nzu-c[/video]
To use the tool I'd recommending using it to get 'close' to the radius you want for one track or for a second parallel track. Then with the track centerlines marked on the layout put the track on the layout and do the final shaping with the hand track tool show at the beginning of this.
I personally shape the track to the track centerline and pin it in place with the post looking stick pins. When it is in place I'll pull the pins and spread DAP Dynaflex 230 sealant under the track and lay it down into the sealant/caulk. I'll use the track shaping tool one last time before pinning and weighting the track down overnight.
In conclusion the info and file links for the track forming tools are here....
http://1fatgmc.com/RailRoad/Trackwork/page-23.htmlthe info and file links for the compass are here.....
http://1fatgmc.com/RailRoad/Trackwork/page-25.htmlAlso a link to all my trackwork info here.....
http://1fatgmc.com/RailRoad/Trackwork/Trackwork-Index.htmlSumner