I converted an N scale Atlas model of the “View” series to one of the look-alike obs Pullman built at the same time, so to duplicate the fill-in cars used on the BL when a "View" was pulled for servicing. These are the old smoothside Atlas/Rivarossi 85-foot Observation cars churned out in the ‘60s and ‘70s, and though out of production, are still easily available cheap at swap meets and on internet sales sites. I used two of the Atlas cars, with one being the sacrifice body.
First, completely disassemble both cars and strip the paint from the bodies. If the car body you are using has a black roof, leave the paint on. Otherwise strip the roof section too.
Next, mark off in pencil the cut lines of the sections to remove from each car. On the sacrifice body, draw a vertical line at the rear edge of the first large window on the compartment side. The second vertical line goes along the rear edge of the paired small windows. On the project body, a vertical line goes just to the left of the small paired windows. Then draw the other one scale foot inside the front edge of the third large window from the front of the car. Make sure the lines are perfectly vertical.
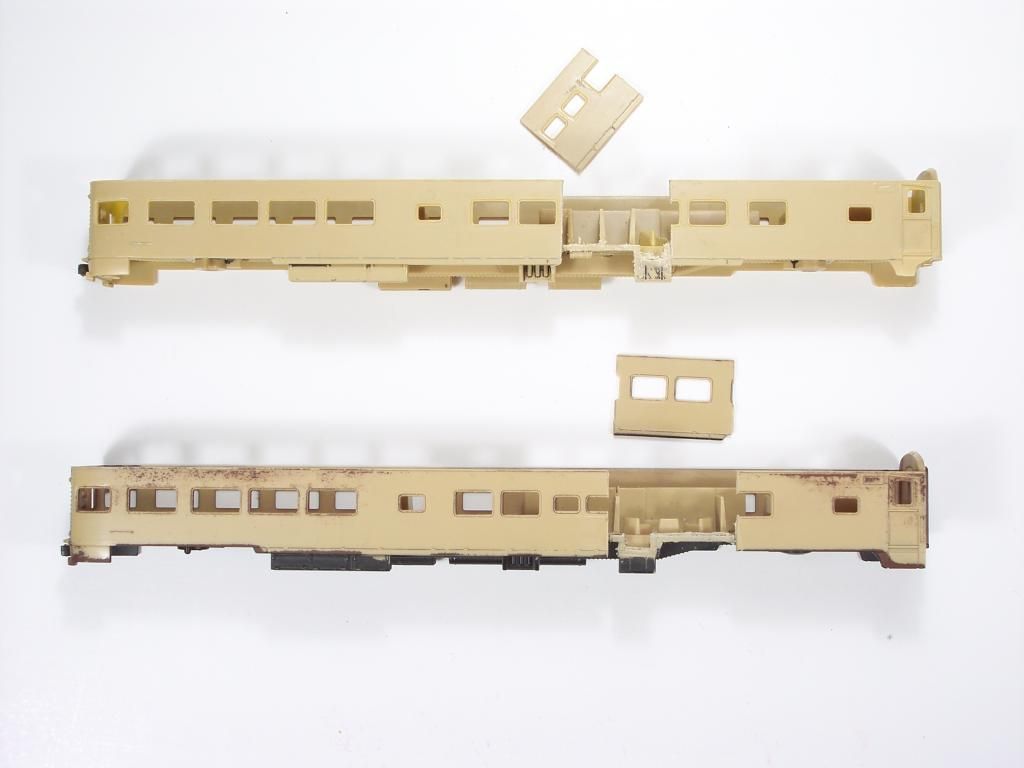
Using a hobby saw, first score and then cut through the car floors from below at these sections. Make sure the cut is flush against the insides of the car sides, and take care not to damage the underbody details. Alternate between cutting from underneath and inside the car to make clean cuts. Next, cut the car sides along the lines you drew. Cut to the inside of the project body lines, and to the outside of the sacrifice car ones.
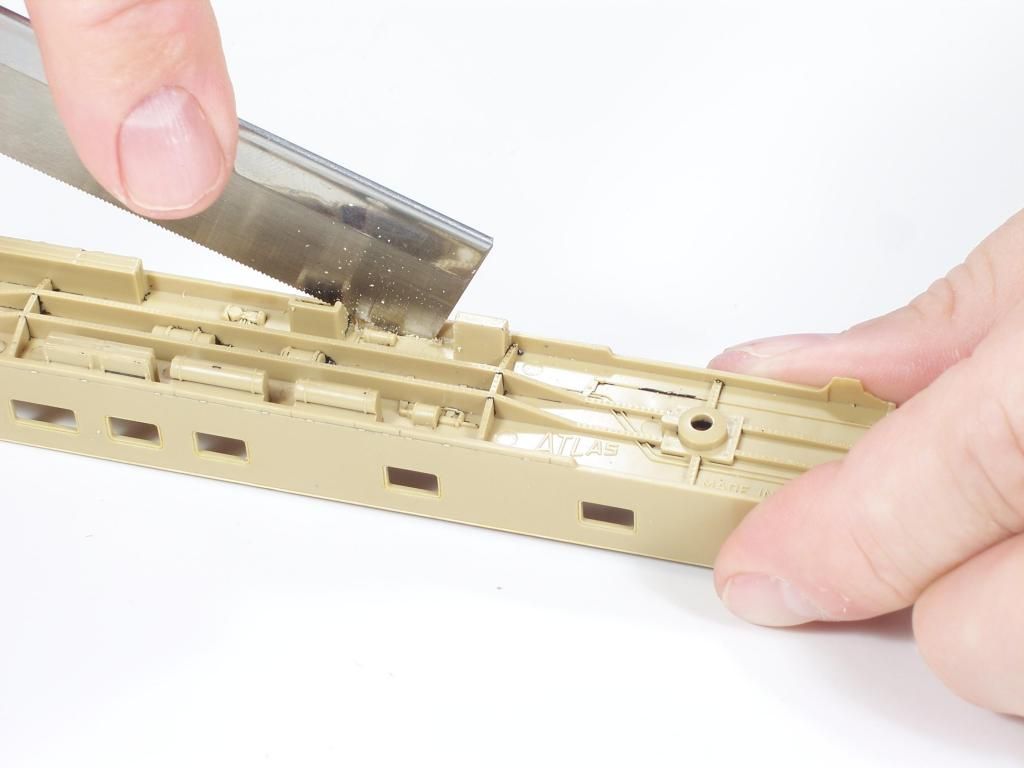
Discard the section you cut from the project body and splice in the one from the sacrifice car. If you cut as instructed this insert will be a little larger than needed. It should work out that the two large paired window sets are 2.5 scale feet apart. Trim to adjust. You’re going to wind up with a gap on the right side of the insert, part of the window opening. You will have to adjust this filler thickness to whatever cut size you made.
Glue a narrow strip of .020” styrene along the edge of the floor where you cut the wall out. The top should be no higher than 1/16th inch above the floor, and the bottom edge just short of the exterior wall. This is filler for the saw cut, to bring the insert section flush with the rest of the wall. Let dry completely.
Fit the section flush with the rest of the wall, so the windows are square and the top edges lines up. Glue it to the filler floor, but don’t glue the joints with the walls. Cut a .020” strip 1/32nd inch wide and about 6 scale feet longer than the section. This piece should fit between the floor and the bottom of the "glass" windows part of the roof insert. Glue this piece to the walls at the corner between the wall and floor along the back of the section with the extra ends glued to the car walls.
Carefully, apply a small amount of liquid cement to the interior of the joints of the section. You want solvent to seep into the joints and melt the plastic together without marring the outside of the wall. Let dry thoroughly. To strengthen this splice cut some small squares of .010” styrene and glue them over the joints inside the wall. Now you can plug that partial window opening with .020” styrene. Make sure the plug is flush against both the inside and outside of the car wall.
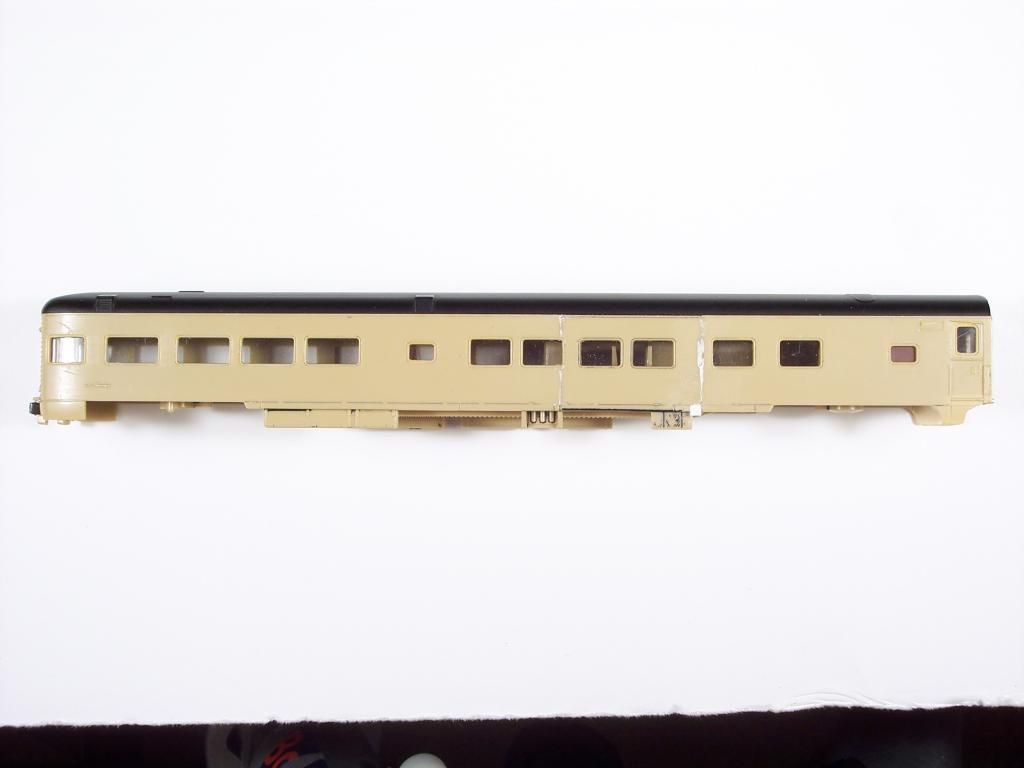
Depending on how tight you got the section to fit, and how you glued it, you may have raised melted plastic seams or slight gaps at the joints. Use your preferred method of hiding such seams, whether with body putty, sanding, chisel blade, etc. Set the body aside.
These cars had the famous Pennsy Trackphone antenna for phone service. To add one to the Atlas car you’ll need the KATO antenna (part _# 805601).
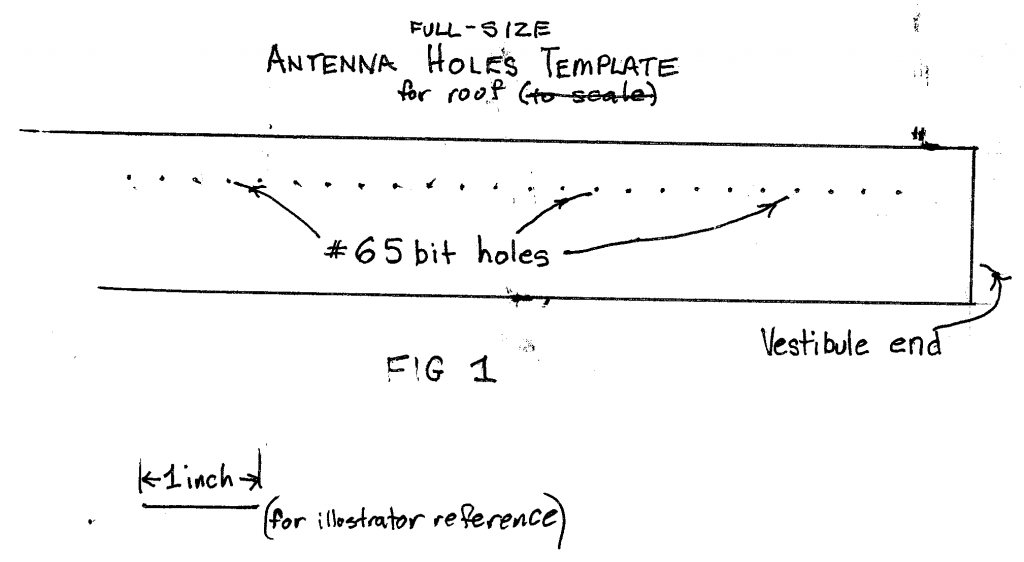
Print out the template, sizing it to match the 1 inch reference key. Tape it to the top of the Atlas roof in the position shown. Make sure the line of template holes points is straight and exactly parallel to the roof edge. Use a #65 bit. You’ll be drilling on a curved surface but the antenna needs to be straight upright. After you barely start drilling, move the drill to a vertical position and continue all the way through the roof. You should wind up with holes straight up. Clean away the chips and shavings. There’s no need to touch up the holes because the antenna support feet are wider than the hole. But if you don’t have a black roof, paint it before you install the antenna.
INTERIOR
The original interior design now doesn’t match the new window configuration. Since in N scale you can’t see inside the car, I didn’t remake mine. However, if you’re interested in duplicating the prototype use the PRR prototype drawing.
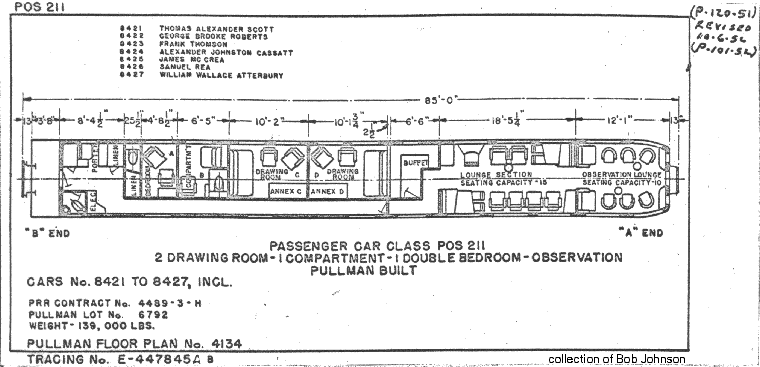
This plan comes courtesy of Robert Schoenberg’s excellent website for PRR equipment plans
http://prr.railfan.net/I used the original Atlas truck for the rear, but took out the factory wheels and put in Rapido 36” insulated metal wheels taken from truck set #102022 or #102023, available separately from Rapido. The front truck was a #1017 4-wheel Passenger truck from MTL, wheels replaced with the new 36” diameter wheels MTL recently came out with. Since the wheels are larger than the originals, they rub against the outside brake hangers of both trucks. You could file down each brake hanger, but since they are such tiny details not easily seen, I decided to cut them off.
I removed the dummy coupler at the rear and cut a notch in the body to body-mount a #1015 MTL coupler.
The body is Pennsy Tuscan, the roof and undercarriage black. The decals are
MICROSCALE decal set 60-893, Pennsylvania Lightweight car names 1947-68.
This set includes these names of the car series:
Thomas Alexander Scott
George Brooke Roberts
Frank Thompson
Alexander Jackson Cassatt
Samuel Rea
William Wallace AtterburyThe only name missing is that of the
James McCrae .
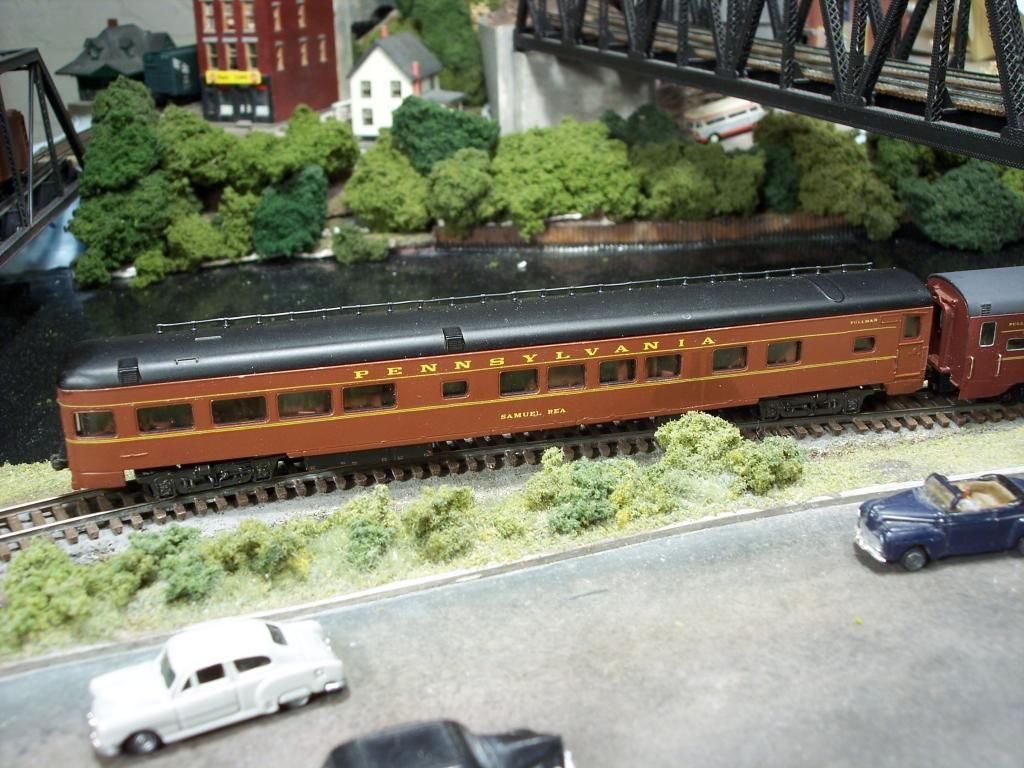
This is how mine turned out:
CONVERTING THE KATO “View”
For those of you not afraid to cut up KATO version of this car, which already has a roof antenna and 36” wheels, you could use the same body modifications. For the new window glass, use the glass from the sacrifice car to match the window molding size on the original.