Author Topic: N scale CPR/BCR Royal Hudson build thread  (Read 14382 times)

0 Members and 3 Guests are viewing this topic.

CNR5529

  • Crew
  • *
  • Posts: 631
  • Respect: +648
    • My Shapeways Store
Re: N scale CPR/BCR Royal Hudson build thread
« Reply #45 on: March 30, 2017, 02:15:00 PM »
+1
John, that project is looking great!

Really it would affect us more if the frame ends up too wide rather than too narrow. That said, I very much appreciate your insight and experience. Lets hope for both our projects' sake that once we dial in the scaling factor, the prints are consistent! I'll keep you posted with our results so we can collectively add to the confidence level...
Because why not...

craigolio1

  • Crew
  • *
  • Posts: 2453
  • Respect: +1773
Re: N scale CPR/BCR Royal Hudson build thread
« Reply #46 on: April 07, 2017, 03:19:12 AM »
+2
I know I havn't posted much but I swear I'm hard at work. Counting rivets. Soooooo many rivets.

You can imagine my excitement when Fredrick told me he had the tender underframes. For me that means it's time to get away from rivets for a bit, and design the speaker system. To best do that I need to do some real world testing. I come from a car audio back ground, (now I build home theatres and whole house audio systems as a part time gig). In my car audio days I built many a subwoofer enclosure. Fortunately we had published specifications, called Thielle/Small parameters which we could feed into a computer to spit out the optimum enclosure volume. Unfortunately these specs aren't published for our little speakers (not that I can find anyway) and the software used to calculate speaker enclosure volumes doesn't accept values as small as we are dealing with. This leaves us with trial and error.

We can, however, benefit from the subwoofers of days gone by as the theory scales down to enclosures of any size. Below are some givens that we can use to help design the system. There are volumes of books on this subject, and knowledge far more vast than mine, and what I'm including here is just a bit of basic theory:

Theory stuff:

An enclosure is a must. A speaker produces a wave off of the front surface of the woofer, however it also produces one off of the back surface. They are 180 degrees out of phase with each other.  If the two are allowed meet they cancel each other out and you get no bass. An enclosure prevents this. We've seen evidence of this recently in the locos that  @jdcolombo has built. All have sealed enclosures and all sound amazing.

The larger the enclosure (and the speaker) the lower the frequency response (usually).

Sealed enclosures create flatter response and are considered more "musical" and natural sounding. They are also the easiest to design and build.

For a given set of woofer specs the sealed enclosure will be one of the smallest you can build. 

Ported enclosures are usually louder over all, and have deeper bass extension due to the port being tuned to a lower frequency which boosts the volume at the bottom end of its frequency response.

Ported enclosures are also quite a bit larger than their sealed counter parts.

Adding another enclosure on the front of the speaker, in addition to the enclosure on the back, and porting them both tuned to different frequencies creates an even louder enclosure that produces loads of bass. It also blocks a lot of the high frequencies as they get trapped inside the enclosure and absorbed by it. This design is called a band pass enclosure.

Low frequencies are not directional. They radiate out in all directions which is why a lose woofer gets alot of its sound canceled out by its own rear wave. Higher frequencies don't do this. They are very directional. With our trains we're actually not really dealing with bass. Our little speakers only extend down to about 300hz which is more the mid-bass, or low mid-range area of the spectrum. Still low enough to need an enclosure though. 

Every speaker system should have a cross-over network. A cross over filters out frequencies that are beyond the range a speaker can play. In a worst case scenario, left unfiltered, these frequencies can damage speakers.  Removing them reduces distortion and directs the power only to frequencies that the speaker can actually play, increasing efficiency as well as sound quality. This is most important with lower frequencies as they cause the most distortion and do the most damage.

Boring theory complete.

Design Considerations:

When we are dealing with model trains, especially N scale, we don't really have the luxury of fine tuning the speaker enclosures as we're usually just trying to fit in what ever we can, if there is even room for an enclosure at all. The Royal Hudson has quite a lot of space in the tender. Not having the ability to design an enclosure on spec, I decided to use the bigger is better method. I calculated the space needed to run wires, and allow room for the structure of the tender, and came up with an enclosure that used up much of the rest of the available space between the trucks.

We ordered multiples of the tender frames so I could build multiple examples and do proper side by side comparisons of each installation to see what sounds the best.

I have five test subjects. All will use a sealed enclosure design.
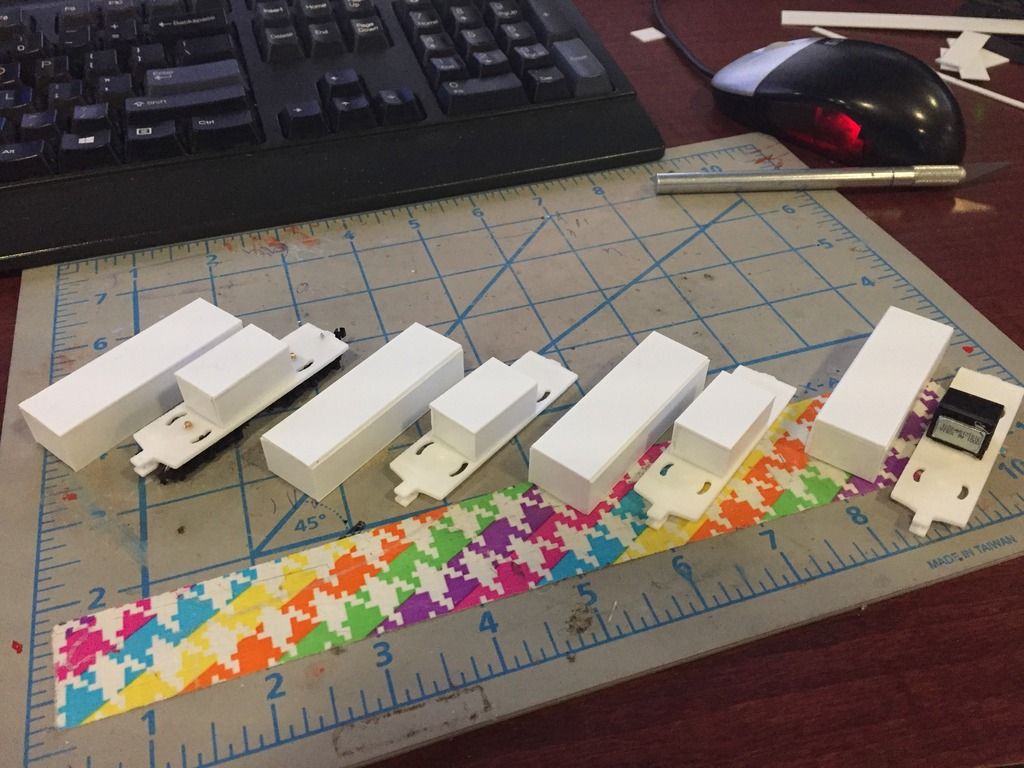


Test case 1:
Zimo Sugar Cube in the matching enclosure. Woofer firing through the floor.

Test Case 2:
Zimo Sugar Cube in the maching enclosure. Playing into the tender cavity, with sound escaping through the holes where the electrical pick ups come through the floor.

Test case 3:
Knowles/Fox in a custom built enclosure. Woofer firing through the floor.

Test Case 4:
Knowles/Fox in a custom built enclosure. Playing into the tender cavity, with sound escaping through the holes where the electrical pick ups come through the floor.

Test case 5:
ESU oval speaker in a custom made enclosure. Woofer firing through the floor. This is the largest of the speakers in this test and is too large to fit any other way.

I hear a lot of people saying that they feel the speakers sound better when they are played into the locomotive vs having the speaker play out unobstructed, like through a fuel tank for example.  What I think is happening here is that the loco shell is acting a bit like the band pass enclosure I described above. Our little speakers are really heavy in the high end of the sound frequency spectrum. Trapping the sound inside the loco blocks a lot of these highs, reducing their volume so your brain hears a sound that's more in balance with the weaker bottom end. We hear this as better sound with more bass. This is why I've included this style of installation in my tests.

Equipment I'll use for the tests:

Test Tones: I have test tones on my computer that play specific frequencies that I can choose.

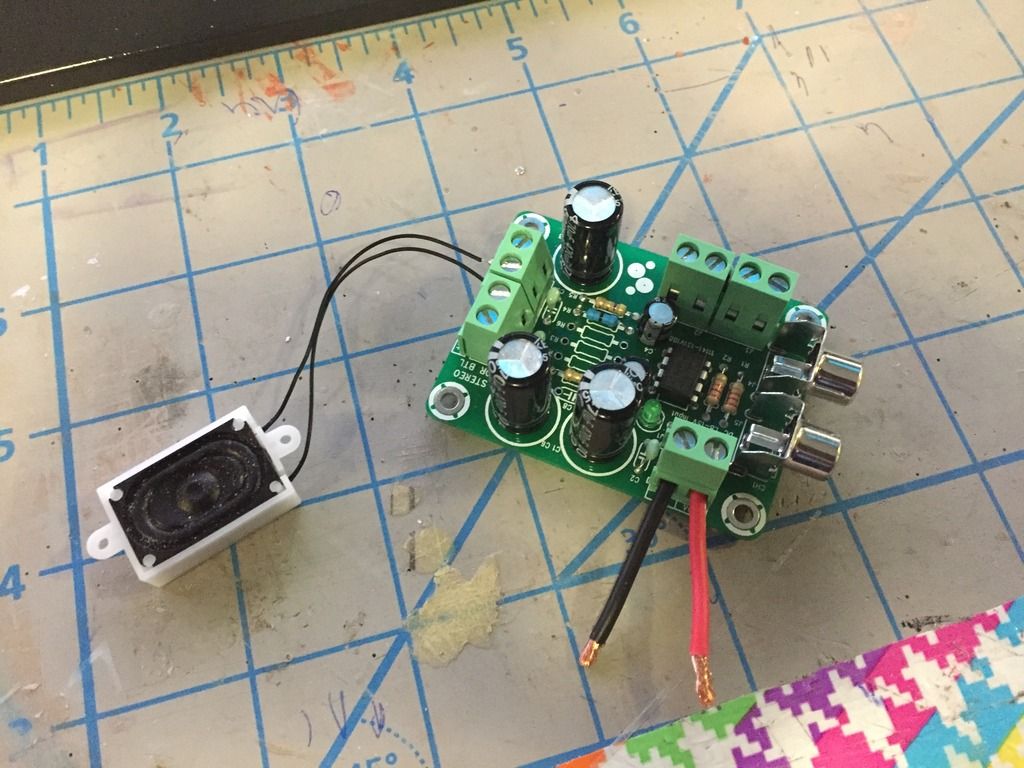
Amplifier: I bought a 1 watt headphone amplifier kit on line which can produce roughly the same amount of power as the ESU decoders we plan to use.


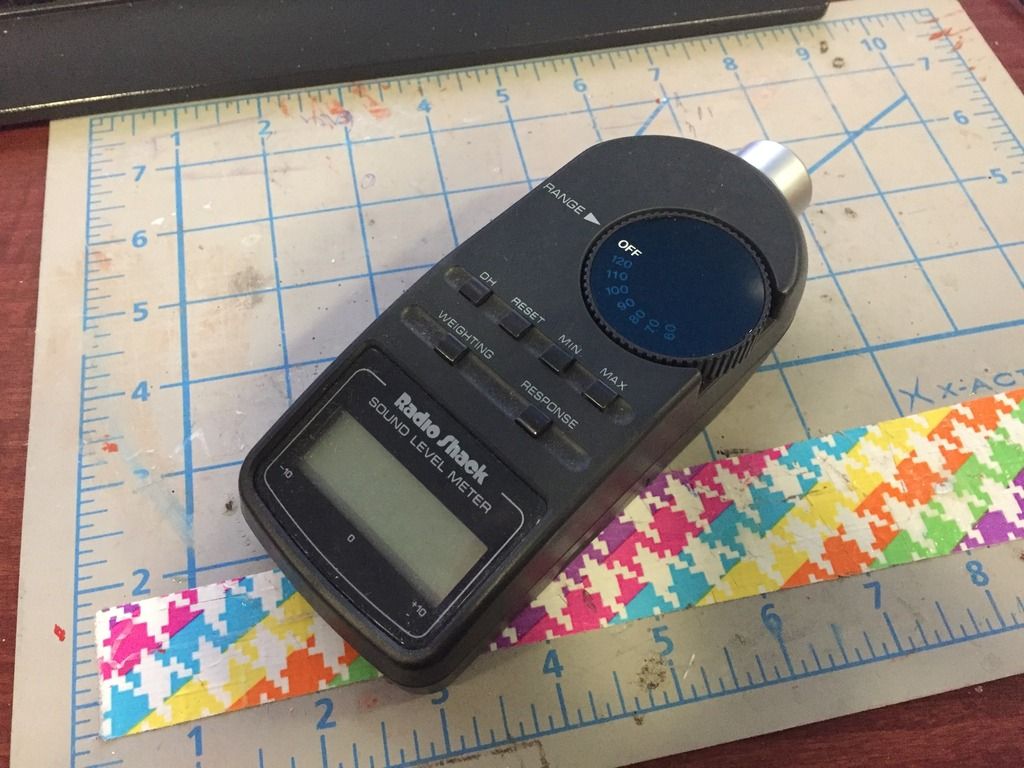
Sound Pressure Level (SPL) meter. This will be placed a specified distance from each speaker installation and measure the volume of the test tones in decibels (dB).


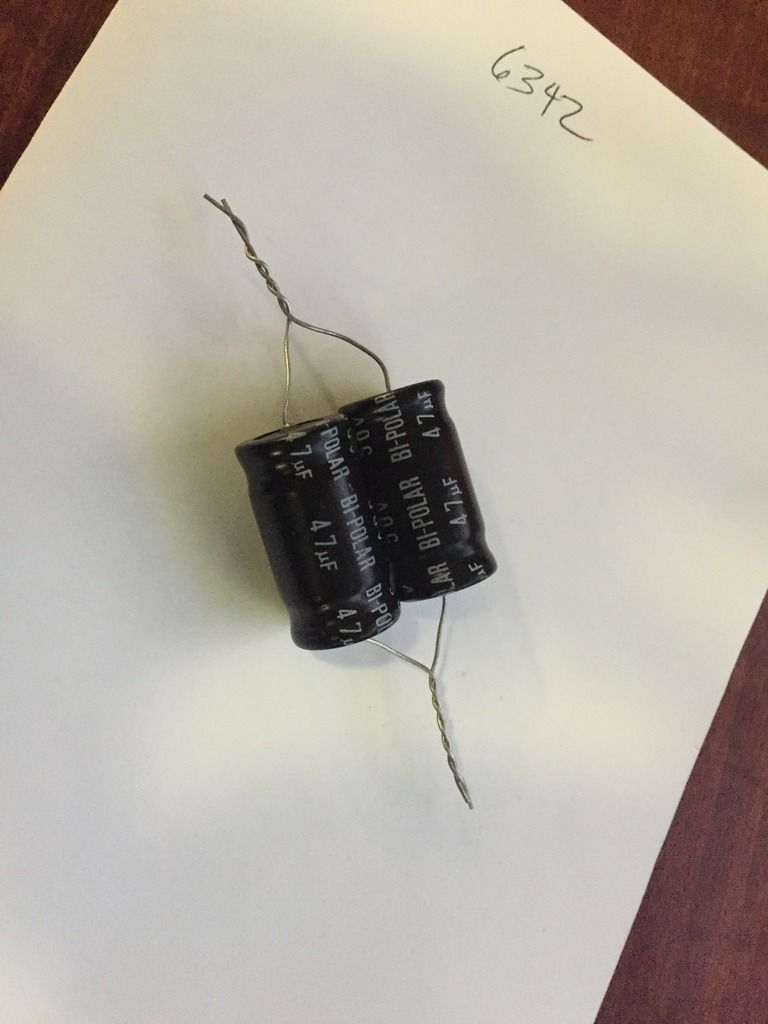
Bipolar Capacitors: here we have two 47uF caps wired in parallel which adds up to 94uF. 94uF of capacitance creates a cross over that will filter out any low frequencies below 204.9 Hz, at 6dB per octave. This means they cut out all of the distortion causing energy that you'll never hear anyway as the speakers can't produce it. They have to be bipolar caps because in its electrical form, sound is A/C.  These 50v caps are obviously way too big to fit in a loco but if they are found to improve the quality of sound and reduce audible distortion I can work on finding smaller package sizes. A quick look found some on eBay in a 16 volt,  6.3mm x 11mm package which we could fit in the tender. Unless 16v would explode.... @peteski ?


How I plan to do my tests:

The speakers will be installled in identical enclosures (with the exception of the Zimo) and whether they need the the exterior shell to direct the sound or not, it will be installed on each mock up for the purpose of uniformity.

Each tender mock up will be placed in the exact same location, in relation to the SPL meter, and subjected to the same test tones at the same volume level. They'll also all be on trucks and track since this affects how the sound is reflected off of the surface under the tender. By doing this I can measure the volume of each test tone and create a graph of the frequency response of each installation. The idea is not to find the one that is the loudest, but the one that has the flattest response and most importantly, the lowest frequency response.

Finally, I'll connect each one up to a LokSound decoder so we can switch between each and decide with an actual steam sound file which sounds the best. We can do lab tests until the cows come home but ultimately what matters is what we think actually sounds the best with steam sounds.

Once testing is complete, Fredrick can incorporate that enclosure into the frame design.

Up next, test results.

Craig.
« Last Edit: April 07, 2017, 04:06:07 AM by craigolio1 »

CNR5529

  • Crew
  • *
  • Posts: 631
  • Respect: +648
    • My Shapeways Store
Re: N scale CPR/BCR Royal Hudson build thread
« Reply #47 on: April 07, 2017, 07:45:29 AM »
0
On this week's episode of Pimp my Ride, TRW Edition: Tuning the tender to maximize dat BASS  :D

Cant wait to hear the results!
« Last Edit: April 07, 2017, 07:52:50 AM by CNR5529 »
Because why not...

craigolio1

  • Crew
  • *
  • Posts: 2453
  • Respect: +1773
Re: N scale CPR/BCR Royal Hudson build thread
« Reply #48 on: April 07, 2017, 02:37:46 PM »
+2
Indeed. It's already got white walls. We can replace the lead and trailing trucks with Dayton wire wheels and put a wet bar and roulette wheel in the cab.

It occurred to me that I have a much more accurate measurement system than the Radio Shack SPL meter. For Home Theaters I have software called Room EQ Wizard (free if anyone wants to play with room  acoustics). I also have a high quality calibrated microphone. Now this mic is a omnidirectional mic, made to collect sound from a whole room, but it should work as long as the room I'm measuring in is very quiet. If it works this will be ideal as the mic has very flat frequency response and will there for provide a more accurate picture of the frequency response of the speaker systems.

This is my mic:


The calibration results for it:


And a sample screen of the software showing the signal generator:


This is all way over kill as Fredrick and I will in all likely hood just sit down at the end and say, "Which one do you like? Yeah? Me too. Ok that one then", but as his signature says, "because why not?"

Craig

CNR5529

  • Crew
  • *
  • Posts: 631
  • Respect: +648
    • My Shapeways Store
Re: N scale CPR/BCR Royal Hudson build thread
« Reply #49 on: April 07, 2017, 02:58:20 PM »
0
So what you are really saying is now we need to build an anechoic chamber.  :D

Also, the calibration cert is out of date. Unacceptable...
Because why not...

peteski

  • Crew
  • *
  • Posts: 32952
  • Gender: Male
  • Honorary Resident Curmudgeon
  • Respect: +5340
    • Coming (not so) soon...
Re: N scale CPR/BCR Royal Hudson build thread
« Reply #50 on: April 07, 2017, 08:09:40 PM »
0
Craig, I'm not an acoustic engineer but I understand the basics and I also am familiar with electronics.  This means I'm knowledgable enough to be dangerous.  :D

In my opinion, you are over-designing and over-engineering your N scale sound transducer. I think that when using such small speakers and enclosures (limited by the size of out models), you can't work miracles.  The wavelength of the low-end audible frequencies (bass) is so large that most of the speaker enclosure designs aren't really useful with our tiny speakers and enclosures.   I also don't think that the low frequencies sent to the speakers cause much distortion. Those "sugar cube" type speakers have a softly-suspended speaker "cone" with relatively long travel.  An airtight enclosure will dampen the speaker con's travel.  Most modelers also don't' have their volume cranked up very high.  Too bad that you don't have an oscilloscope handy to see of and how much clipping occurs at the speaker.

The Tsunami decoders had a software-based equalizer in the decoder, so you could reduce the low frequencies electronically. But that feature is  not available in other sound decoders. 

Finding a bi-polar cap to fit in an N scale engine (to use as a high-pass filter) will be a challenge (due to the cap's physical size).  But you can roll-your-own bipolar cap from 2 standard electrolytic caps.   You need 2 standard electrolytic caps of identical value and hook them in series connecting them using their negative leads.  So the remaining 2 leads are both positive. Now you have a bipolar cap. Its capacitance is half of each cap's capacitance but the working voltage is twice the rating of a single cap.

Example:  you have two 220uF 10V electrolytic caps. Hook them up in series byy tying their negative leads together and now you have a 110uF 20V bipolar cap.  Most decoders use class-D amps and I wouldn't expect the output voltage to be more than  few volts below the track voltage (so around 10V)  If it is a push-pull amp then maybe 20V. But  I don't think you will ever see that much voltage because with 8 ohm speaker, if the amp was supplying 10 V to that speaker, there could be 1.25 Amps passing through the speaker which would be dissipating 12.5 Watts of power. Not the 1W or 2W that the decoder amps are capable of.  You could probably get away with using 6.3V rated electrolytic caps (which gives you a 12.6 V rated bipolar cap) in the speaker circuit.

But since you are having fun - there is no harm done with going overboard a bit. I'll enjoy watching your progress and seeing what you come up with (and whether the quality of the sound is improved enough to make this exercise worthwhile.

BTW, I haven't forgotten the ditch light challenge - I bought some MOSFET transistors and now I just need the time to come up with a prototype circuit.  But I spend all my free time surfing online forums. :D
. . . 42 . . .

craigolio1

  • Crew
  • *
  • Posts: 2453
  • Respect: +1773
Re: N scale CPR/BCR Royal Hudson build thread
« Reply #51 on: April 07, 2017, 10:00:15 PM »
0
Peteski,

I have no doubt that you may be correct in that all of this effort may turn out to be for not. But it will be fun.

Thanks for the info about the series caps. I remember wiring a crossover for tweeters in grade 11 using polarized caps but I couldn't recall if there were diodes or anything like that involved.

I think that I have forgotten the ditch light challenge. What was I after there? Was I asking you how to split functions into multiples using another function to trigger a transistor, like a shift key so to speak?

Edit: and PS a lot of this extra effort is to mock Fredrick's incredible attention to detail. No I'm not building a freekin' anechoic chamber to measure the frequency response. (I think he's only partially joking.) Measurments will be taken with my two yappy dogs constantly barking in the back ground, which isn't a problem as they will be uniformly barking for all tests.
« Last Edit: April 07, 2017, 10:34:29 PM by craigolio1 »

peteski

  • Crew
  • *
  • Posts: 32952
  • Gender: Male
  • Honorary Resident Curmudgeon
  • Respect: +5340
    • Coming (not so) soon...
Re: N scale CPR/BCR Royal Hudson build thread
« Reply #52 on: April 07, 2017, 10:33:19 PM »
0

I think that I have forgotten the ditch light challenge. What was I after there? Was I asking you how to split functions into multiples using another function to trigger a transistor, like a shift key so to speak?

Yes, that was it - controlling the ditch lights state with a combination of a single function key and either of the headlights.  So with a 3-function decoder you could still use front and rear ditch lights.
. . . 42 . . .

CNR5529

  • Crew
  • *
  • Posts: 631
  • Respect: +648
    • My Shapeways Store
Re: N scale CPR/BCR Royal Hudson build thread
« Reply #53 on: April 07, 2017, 11:32:06 PM »
0
Yes, that was it - controlling the ditch lights state with a combination of a single function key and either of the headlights.  So with a 3-function decoder you could still use front and rear ditch lights.

Forgive my ignorance in this topic as I dont know the full background, but why not just change the decoder to a 4 or even 6 function decoder and remap the functions to be both driven by a function key and direction?
Because why not...

craigolio1

  • Crew
  • *
  • Posts: 2453
  • Respect: +1773
Re: N scale CPR/BCR Royal Hudson build thread
« Reply #54 on: April 08, 2017, 02:17:45 PM »
0
Riiiiiiiihht. Hey yeah get to work in that! As you can tell I'm losing sleep over it.

Fredrick, as you know I'm addicted to lighting. The idea was to take a four function decoder like a Loksound Select Micro where you could have front and rear light , and front and rear ditch lights, and change that to using one function for the ditchlights at both ends, with the direction of them triggered by the head light in use at the time. Which would free up a function for class lights, controlled in the same manor.

The Intermountain HO scale SD40-2 have something funky going on. They have directional headlights, ditch lights and all three colours of class lights on on both ends of their BCR locos. They use the Loksound decoder. I want to know what they did.

Thread drift.

Craig.

Edit, sorry. The Loksound decoders only have four functions. No six function available.
« Last Edit: April 09, 2017, 09:50:14 AM by craigolio1 »

CNR5529

  • Crew
  • *
  • Posts: 631
  • Respect: +648
    • My Shapeways Store
Re: N scale CPR/BCR Royal Hudson build thread
« Reply #55 on: April 08, 2017, 06:30:58 PM »
0
Hmmm, I would be curious to see how it is arranged as well...
« Last Edit: April 08, 2017, 06:35:10 PM by CNR5529 »
Because why not...

CNR5529

  • Crew
  • *
  • Posts: 631
  • Respect: +648
    • My Shapeways Store
Re: N scale CPR/BCR Royal Hudson build thread
« Reply #56 on: April 09, 2017, 09:57:01 PM »
0
PS a lot of this extra effort is to mock Fredrick's incredible attention to detail. No I'm not building a freekin' anechoic chamber to measure the frequency response. (I think he's only partially joking.) Measurments will be taken with my two yappy dogs constantly barking in the back ground, which isn't a problem as they will be uniformly barking for all tests.

Ok, I guess no anechoic chamber then. But make sure to get your dogs calibrated.

And yes, just joking...    ;)
Because why not...

Cajonpassfan

  • Crew
  • *
  • Posts: 5393
  • Respect: +1961
Re: N scale CPR/BCR Royal Hudson build thread
« Reply #57 on: April 16, 2017, 05:39:38 AM »
0
I know I havn't posted much but I swear I'm hard at work. Counting rivets. Soooooo many rivets.

You can imagine my excitement when Fredrick told me he had the tender underframes. For me that means it's time to get away from rivets for a bit, and design the speaker system. To best do that I need to do some real world testing. I come from a car audio back ground, (now I build home theatres and whole house audio systems as a part time gig). In my car audio days I built many a subwoofer enclosure. Fortunately we had published specifications, called Thielle/Small parameters which we could feed into a computer to spit out the optimum enclosure volume. Unfortunately these specs aren't published for our little speakers (not that I can find anyway) and the software used to calculate speaker enclosure volumes doesn't accept values as small as we are dealing with. This leaves us with trial and error.

We can, however, benefit from the subwoofers of days gone by as the theory scales down to enclosures of any size. Below are some givens that we can use to help design the system. There are volumes of books on this subject, and knowledge far more vast than mine, and what I'm including here is just a bit of basic theory:

Theory stuff:

An enclosure is a must. A speaker produces a wave off of the front surface of the woofer, however it also produces one off of the back surface. They are 180 degrees out of phase with each other.  If the two are allowed meet they cancel each other out and you get no bass. An enclosure prevents this. We've seen evidence of this recently in the locos that  @jdcolombo has built. All have sealed enclosures and all sound amazing.

The larger the enclosure (and the speaker) the lower the frequency response (usually).

Sealed enclosures create flatter response and are considered more "musical" and natural sounding. They are also the easiest to design and build.

For a given set of woofer specs the sealed enclosure will be one of the smallest you can build. 

Ported enclosures are usually louder over all, and have deeper bass extension due to the port being tuned to a lower frequency which boosts the volume at the bottom end of its frequency response.

Ported enclosures are also quite a bit larger than their sealed counter parts.

Adding another enclosure on the front of the speaker, in addition to the enclosure on the back, and porting them both tuned to different frequencies creates an even louder enclosure that produces loads of bass. It also blocks a lot of the high frequencies as they get trapped inside the enclosure and absorbed by it. This design is called a band pass enclosure.

Low frequencies are not directional. They radiate out in all directions which is why a lose woofer gets alot of its sound canceled out by its own rear wave. Higher frequencies don't do this. They are very directional. With our trains we're actually not really dealing with bass. Our little speakers only extend down to about 300hz which is more the mid-bass, or low mid-range area of the spectrum. Still low enough to need an enclosure though. 

Every speaker system should have a cross-over network. A cross over filters out frequencies that are beyond the range a speaker can play. In a worst case scenario, left unfiltered, these frequencies can damage speakers.  Removing them reduces distortion and directs the power only to frequencies that the speaker can actually play, increasing efficiency as well as sound quality. This is most important with lower frequencies as they cause the most distortion and do the most damage.

Boring theory complete.

Design Considerations:

When we are dealing with model trains, especially N scale, we don't really have the luxury of fine tuning the speaker enclosures as we're usually just trying to fit in what ever we can, if there is even room for an enclosure at all. The Royal Hudson has quite a lot of space in the tender. Not having the ability to design an enclosure on spec, I decided to use the bigger is better method. I calculated the space needed to run wires, and allow room for the structure of the tender, and came up with an enclosure that used up much of the rest of the available space between the trucks.

We ordered multiples of the tender frames so I could build multiple examples and do proper side by side comparisons of each installation to see what sounds the best.

I have five test subjects. All will use a sealed enclosure design.
...

Once testing is complete, Fredrick can incorporate that enclosure into the frame design.

Up next, test results.

Craig.


Yea, this maybe overkill, but just fascinating overkill; I love it! :D
I've been playing with tender speakers firing forward into the loco cab through an opening in the front of the bunker and so far, it's promising. The intent of course is to move the sound forward and have it diminish earlier as the loco moves by. My most successful install by far has a forward firing speaker in a large 20K gallon brass tank, although i suspect the sound quality is as much a function of the size of the enclosure; in this instance, the entire brass shell screwed down tight serves as a sound chamber and I also think the heavy brass containment diminishes any potential for vibration. It would be quite interesting to see/hear the difference between a down firing and forward firing install in a controlled environment using identical components.... hint hint :facepalm:
Another thought: this part really belongs in the DCC/sound forum, no? I almost missed it.
Fun stuff, Otto K.
« Last Edit: April 16, 2017, 06:15:31 AM by Cajonpassfan »

craigolio1

  • Crew
  • *
  • Posts: 2453
  • Respect: +1773
Re: N scale CPR/BCR Royal Hudson build thread
« Reply #58 on: April 16, 2017, 10:49:58 PM »
0
That's a very interesting idea to project the sound forward into the cab.

A favourite trick of mine (and many other installers) when a client doesn't have space behind a couch for rear speakers, is to put them on the floor beside or behind he couch facing up to the ceiling. The sound has to get to the ceiling and reflect down before it reaches the listeners ears traveling upwards of 12 ft. This tricks the listener into imagining a much larger room.

I think your idea follows the same principal and is worth investigating. Leave it with me. And thanks for the suggestion!!

Craig

craigolio1

  • Crew
  • *
  • Posts: 2453
  • Respect: +1773
Re: N scale CPR/BCR Royal Hudson build thread
« Reply #59 on: April 18, 2017, 12:29:23 AM »
0
Ok so I've finished building the enclosures I wanted to build, the speakers are all mounted and I would have been ready for testing but I forgot my soldering kit so I can't get that done tonight.

I have an Oval ESU speaker mounted facing through the floor. Its enclosure ends are integral to the body sides as it was too wide to have a separate enclosure with in.

The other through the floor speaker is a Knowles/Fox.


The next set up is for speakers facing forward into the tender body. Both a Knowles/Fox and a Zimo Sugar Cube will be tested in this manner.


And finally, on Otto's ( @Cajonpassfan ) suggestion, I've fashioned a cab mount from a scrap pile loco cab that will align with a cut out in the front of the tender. You can see that modification on the tender body on the left in the photo above. Having interchangeable bodies will allow both the Knowles/Fox and the Sugar Cube to be tested in this way as well.


All of the enclosures and speakers were sealed with silicone and the bodies will be held in place with a two sided tape seal to allow for swapping during testing.

Once I get the speaker wires soldered on I'll be good to go.

Craug
« Last Edit: April 18, 2017, 12:46:31 AM by craigolio1 »