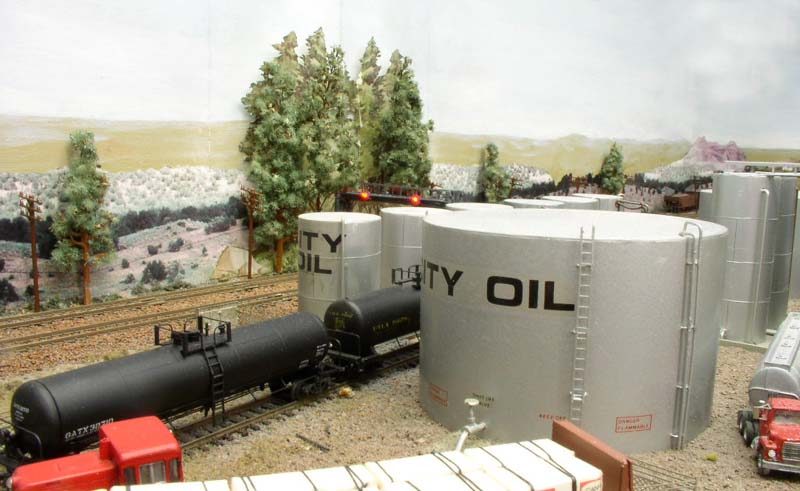
One tip Ed - whatever you find, simply cut the hills, buildings, whatever out of the shot with a sharp Exacto and mount it to an appropriately-colored sky backdrop. Getting sky areas to lay flat without bubbles was impossible what I tried it. And you can 'layer up' various hills, scenes, etc with lots more joints if you don't have to worry about joints in the sky.
The trick I used on this one - which is a mix of real photos and painted - was ONE hi-res photo I had of the Darling (Winona) AZ medium-brush scenery with scattered trees, with the cinder cone in the background.
First one - actual photo - full 11", printed on matte photo paper at home. Second one, flipped in Photoshop horizontally so that it lined up perfectly with #1, razor cut the cinder cone out. Third one, number 1 again with the cinder cone cut out. Fourth one, same as #2. So now I got four feet of 'nonspecific' backdrop that lines up perfectly for color, all printed off the home printer, and set in place on the painted one with rubber cement, so in case I have to pull it in the future I still can. I've done this same stunt pretty much the whole way around the layout to various degrees. I overlay buildings, trees, whatever, to make it look like they just aren't reflipped images.
This is a mirror shot, so the cinder cone in the background is actually off to the left, but you get the idea.

So, in your case, you can fish around for images and make up more of a collage of what you want, and it works as long as you don't use sky.