Author Topic: Ballard Why v2.0  (Read 13673 times)

0 Members and 1 Guest are viewing this topic.

x600

  • Crew
  • *
  • Posts: 446
  • Respect: +199
Ballard Why v2.0
« on: May 19, 2014, 03:10:01 AM »
-1
This is going to be a big and complex project and there is a bunch of skilled and knowledgeable modelers involved.
I thought it would be fun to share the project here. I have enjoyed following progress on many of the layouts shown here and have picked up some
good ideas on several of them. My hope is that someone might benefit from our work, in return. I know Ntrak modular railroading is not everyone's cup o' tea,
but there are many things that carry over to home layouts, so no NTRAK bashing please  :D

A little back story first.

The original Ballard Why was designed and built by several charter members of Mt. Rainier N-Scale in the early 90s, to bring trains from the Ntrak
main lines into a staging/setup yard. It has been part of our layout that has traveled to 2 NMRA nationals, 3 N-Scale National conventions, and shows in 5 Western states and
one Province. The design of the Why and it's accompanying Hazelton Yard is the product of many hours of thought, and countless hours of work. The Why has undergone changes,
and improvements over the years, but is starting to show it's age, and some of it's shortcomings just can't be improved on the current benchwork. You can only scrape up road bed
a finite number of times.

So on to the new!  New Design, New Ideas, New Materials, and New Components.
During the process, please feel free to make suggestions, or comments.  Our club motto is: NITGFMRNS
"Nothing Is To Good For Mt. Rainier N-Scale" so if you have a better idea on some part, We'll at least listen.
Way to much discussion has already been wasted on the current design idea, and 20 years of trial and error has gotten us to this point.
Some snowballs are already rolling and can't be stopped, but maybe we can avoid future problems with some help.
If you would like to see some pics of the layout in action, visit our website at mrns.org .

I'll start with the current status, and then like a bad sitcom, we'll travel back in time to show you how we got here.
First, the last photo I took.

This shows the proposed track alignment.
The basic benchwork can stay the same, but before I cookie cutter the top, I can make adjustments to the track and get a vision of what the scenery might look like.
I still have to get the West Why up to this point so I can level everything and work on sub roadbed, risers, etc.
There is time to make adjustments to track.

Greg O.

Philip H

  • Crew
  • *
  • Posts: 8931
  • Gender: Male
  • Respect: +1667
    • Layout Progress Blog
Re: Ballard Why v2.0
« Reply #1 on: May 19, 2014, 09:23:53 AM »
0
Greg,
Nice to see Mt. Rainier represent!  I saw the original several times at shows in the PNW - I was in Seattle 2002-2005 working for the Corps of Engineers - so I'm intrigued by how this will all play out for you guys.

That aside, the track layout you show below is definitely and interchange, but not a wye as the leg going into the yard only curves in from one side of your main.  If you are after a real wye that can go in both directions, then I suspect we'll see a leg on adjoining module.

Philip H.
Chief Everything Officer
Baton Rouge Southern RR - Mount Rainier Division.


GN Fan

  • Crew
  • *
  • Posts: 71
  • Respect: 0
Re: Ballard Why v2.0
« Reply #2 on: May 19, 2014, 05:54:19 PM »
0
Phillip, You are only seeing 1/2 of the wye.  The other side will be a mirror image of what you are seeing.
Tom
MRNS

delamaize

  • Crew
  • *
  • Posts: 2411
  • Gender: Male
  • Prairie Line Native
  • Respect: +557
Re: Ballard Why v2.0
« Reply #3 on: May 19, 2014, 10:08:52 PM »
0
Watching this closely....

Greg, if you guys want some help on work party nights, shoot me a message with dates and times, and I can wonder out, given I am not working for the ambulance, or on duty with the FD.....
Mike

Northern Pacific, Tacoma Division, 4th subdivision "The Prarie Line" (still in planning stages)

x600

  • Crew
  • *
  • Posts: 446
  • Respect: +199
Re: Ballard Why v2.0
« Reply #4 on: May 20, 2014, 02:53:35 AM »
0
You are correct Phillip, This is the east leg of the wye, there will be a west leg on the adjoining module. Also It would not be to far out of the realm of
our clubs humor to name a wye that wasn't, a wye, but this is a wye. The official name is the Ballard Why. You'd have to spend more time in Seattle to get the Ballard joke :D
We also have a set of oNe trak junctions called O.K. Why? and Why Not? Inside joke, but not a very good one. I will try to spell it wye when referring to the actual track, and Why when referring to the modules.
Just to make sure everyone pays attention. 8)
Mike, thanks for the offer, I may take you up on that. I'm not far from you, north of 183rd, west of I-5, I'll let you know.

To go back to the beginning, it took a whole bunch of discussion to arrive at the need for, and the plan to replace the Ballard Why.

1) The frame and sub roadbed are showing almost 20 years of travel.
2) The 12"r 2.5% grade to the Green Line have been an operational problem for years. One oops and trains stringline in the tunnel. We usually find 1 or 2 cars in the tunnel after a show.
3) The shallow angle of the crossings from the Red, Yellow and Blue lines have always been our biggest issue. A few years ago we installed hand laid movable point diamonds. This was a vast improvement over
the Peco crossings that were fiddled with and replaced several times. The new movable point crossings solved one problem, but because the plywood sub roadbed was no longer flat, it created new problems.

So the new plan became:
 1) New frame and sub roadbed using the best materials, and hopefully, the best methods of construction possible.
 2) Eliminate the loops and tunnels up to and down from the Green Line.
 3) Replace the shallow diamonds with Peco Double Slip Switches, there by eliminating several switches in the process.
 4) The old modules must remain available until the new ones are complete, meaning all new components and scenery.

It was decided that instead of dimensional lumber for the frame, that we would use commercial grade 3/4" plywood for the frame. One of our members had access to 3/4"-13 ply sanded Birch at wholesale cost
and access to a panel saw to rip the plywood into 5 1/2" X 8' strips. SO.....
On Easter Sunday at 9:00 am, a 55 Chevy Nomad pulled up in my driveway and dropped off  the plywood.
As soon as I had the chance, a few days later, I made this

The original Why Modules were 6' long and 36" wide. Since the loops to the Green line have been designed out, the new modules only needed to be 24" wide, except where they enter the yard.
Having a wide bench top at the yard allows for a wide radius both from the lower main lines and the Green Line.
We agreed that the frame will be "L" shaped, and to add strength and rigidity, the frame will be  slot jointed at the leg of the "L".
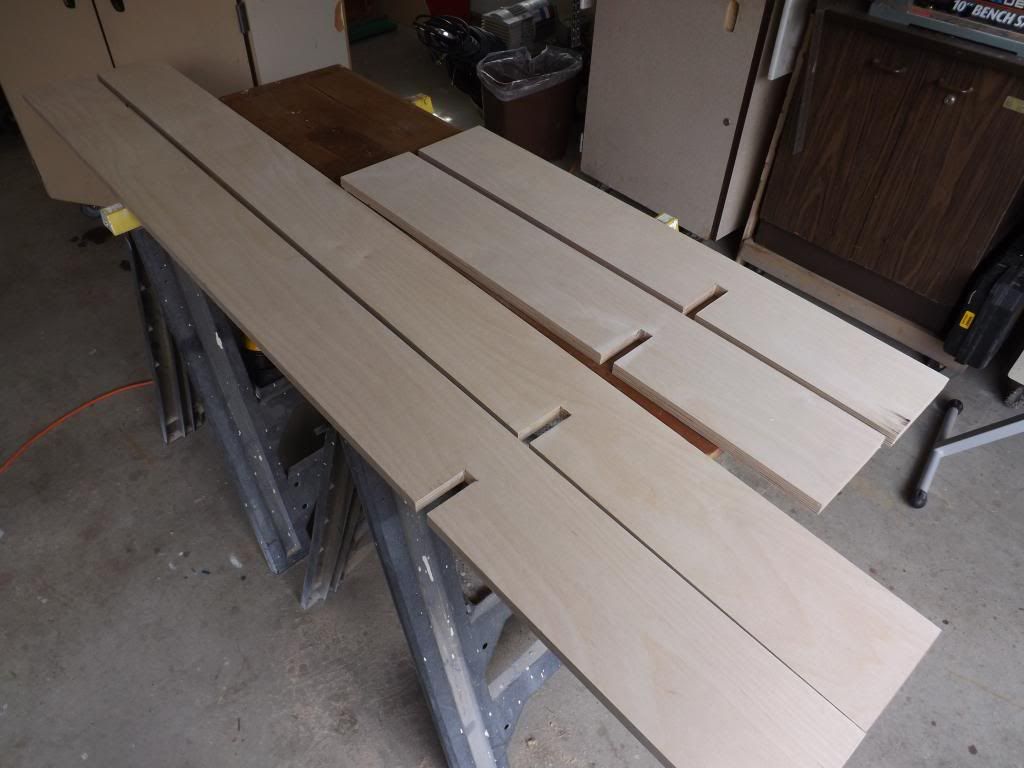
This is the 6" back of the frame and the 3" leg of the "L"
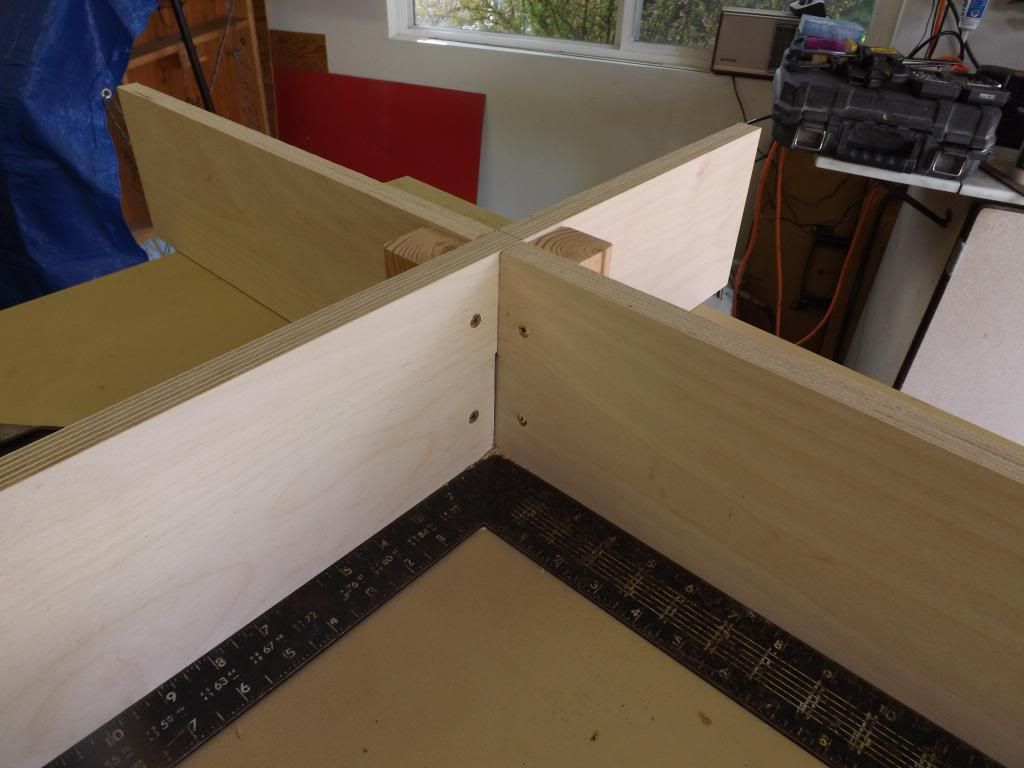
The joints were glued in the slots and glue blocks were used to keep the corners square.
Here is the joint with the 2" X 2" glue blocks in place.
I used corner clamps to hold the corners in place while gluing and screwing the corners of the frame.
These are cheap ones from Harbor Freight. I use them quite a bit and the really help. Better than a third hand.
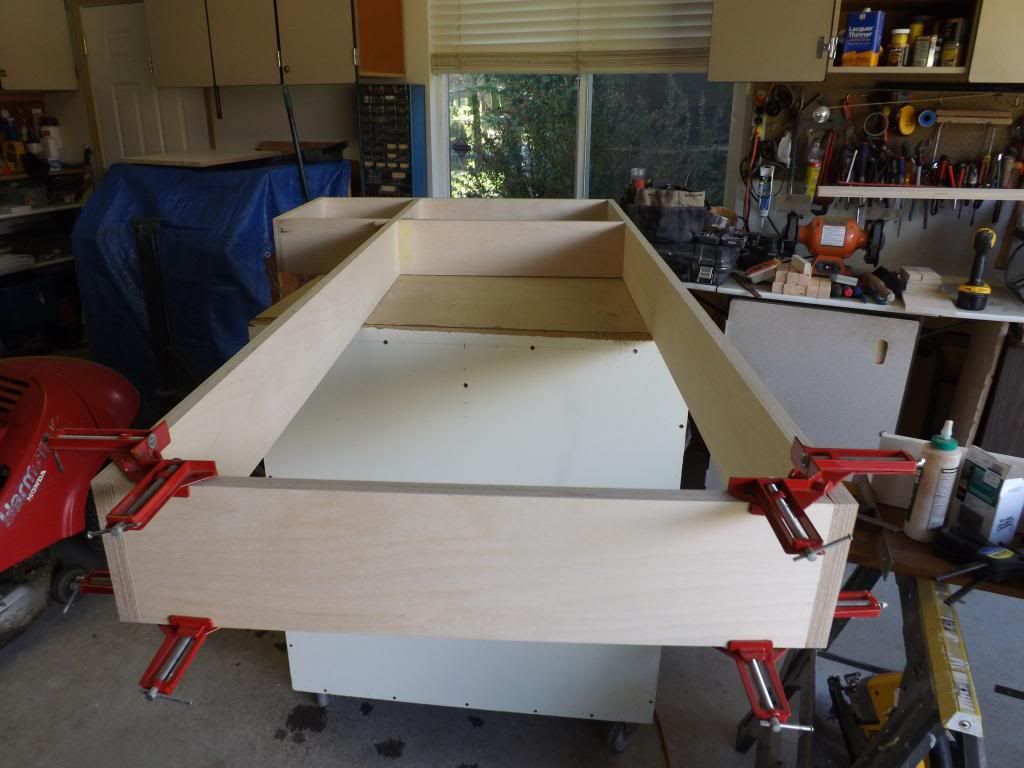
Another picture of the frame assembly using the corner clamps. This cross member was located so as not to interfere with the switch machines.
I checked first!
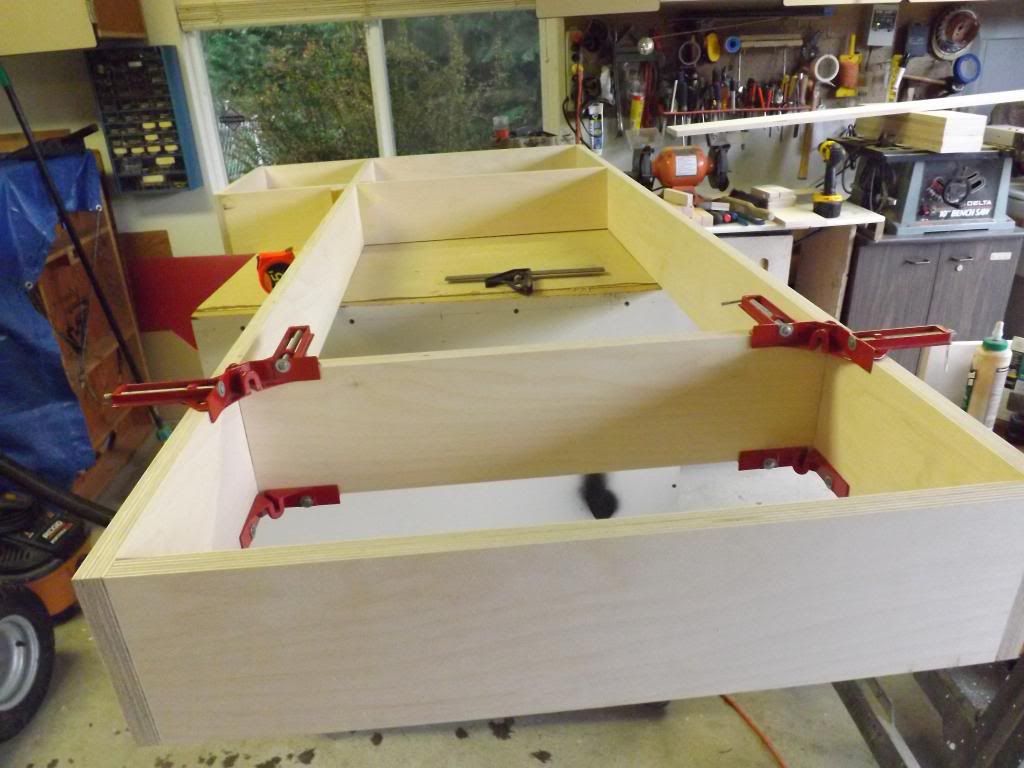
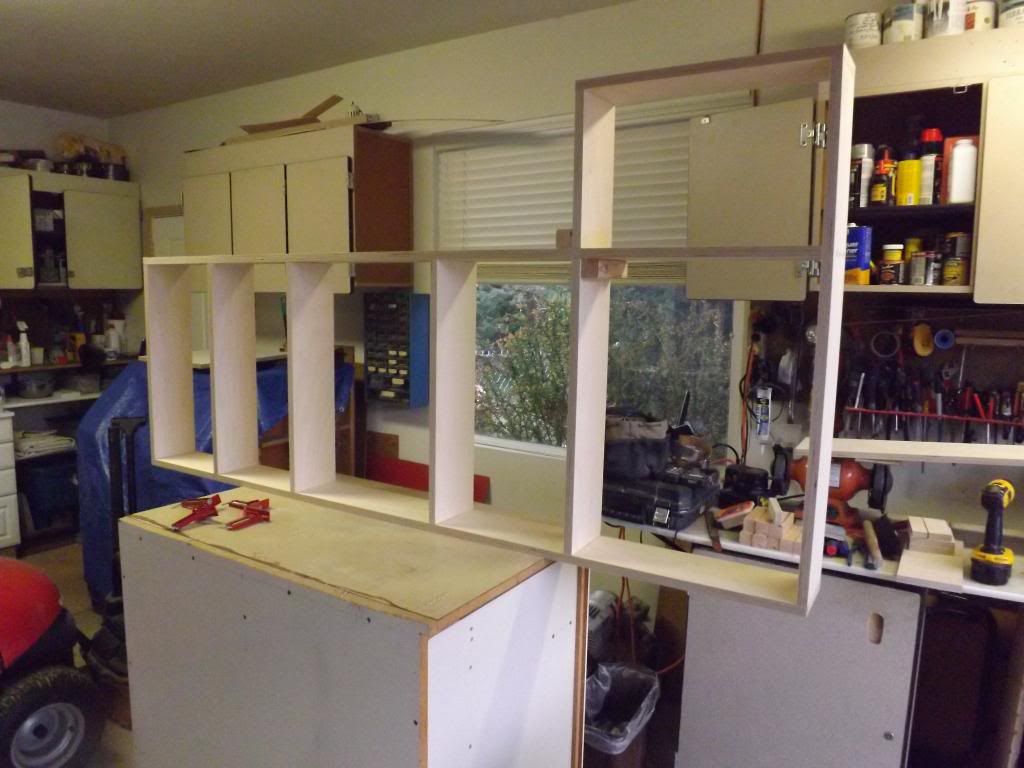
The next pic shows the completed frame.
Notice that one of the glue blocks was placed on what would be the outside of the frame. :facepalm:
Proof that even I make mistakes :lol:


Stay tuned, more to follow......

Greg O.


GaryHinshaw

  • Global Moderator
  • Crew
  • *
  • Posts: 6367
  • Respect: +1917
Re: Ballard Why v2.0
« Reply #5 on: May 20, 2014, 07:16:02 AM »
0
Nice work, and nice shop!  I wish I had a garage for tools like that.  :facepalm:

Philip H

  • Crew
  • *
  • Posts: 8931
  • Gender: Male
  • Respect: +1667
    • Layout Progress Blog
Re: Ballard Why v2.0
« Reply #6 on: May 20, 2014, 08:48:48 AM »
0
Greg,
I have a Free Ballard bumpersticker from Archie's on my truck . . . from the old store . . . I think I get it  8)
Philip H.
Chief Everything Officer
Baton Rouge Southern RR - Mount Rainier Division.


x600

  • Crew
  • *
  • Posts: 446
  • Respect: +199
Re: Ballard Why v2.0
« Reply #7 on: May 20, 2014, 09:40:00 PM »
0
Yes, Philip, you DO get it. Now if you can picture an old Volvo with an UF DA Bumper sticker and the right turn signal on while traveling up 15th Ave then you now have the entire picture. :D

Thanks, Gary. I are a profreshanul carpenter, so I just can't help it. Some times I just want to sell it all and maybe make donuts or scones.

So after getting both module frames done, I layed out and cut the tops from 1/2 Sanded plywood. I was able to get both tops out of a single sheet with very little waste.
I fastened the tops to the frame with screws temporarily so I could use the "factory" edges of the plywood to make sure the frames stayed square while I finished the cross braces and the legs.
I also added glue blocks to the corners to hold the frame square when the top is removed.

The legs are 2X2 select pine. The club standard for leg adjusters is eyebolts. I used the larger 5/16ths  X 4  and "T" nuts because these will end up heavier than a standard module.
The  T nuts are drilled and screwed onto the leg bottom.
« Last Edit: May 20, 2014, 10:01:44 PM by x600 »

Philip H

  • Crew
  • *
  • Posts: 8931
  • Gender: Male
  • Respect: +1667
    • Layout Progress Blog
Re: Ballard Why v2.0
« Reply #8 on: May 20, 2014, 10:40:30 PM »
0
Yes, Philip, you DO get it. Now if you can picture an old Volvo with an UF DA Bumper sticker and the right turn signal on while traveling up 15th Ave then you now have the entire picture. :D

That's what I DROVE to Ballard to get the sticker - a '74 in white with a grey interior (maintained by Ballard's own  X Ray Auto).  Or I did until its oil pump cracked up going into SEATAC one day.

That aside, what sort of plans do you have for scenting the top?  When I was out there earlier this year I noticed the yard in Auburn by the GSA warehouses had expanded.  Might offer some inspiration . . .
Philip H.
Chief Everything Officer
Baton Rouge Southern RR - Mount Rainier Division.


x600

  • Crew
  • *
  • Posts: 446
  • Respect: +199
Re: Ballard Why v2.0
« Reply #9 on: May 20, 2014, 11:30:39 PM »
0
Scenting the top? Axe? High Karate?One of those tree car fresheners? :P

Philip H

  • Crew
  • *
  • Posts: 8931
  • Gender: Male
  • Respect: +1667
    • Layout Progress Blog
Re: Ballard Why v2.0
« Reply #10 on: May 20, 2014, 11:37:21 PM »
0
Well it IS Ballard, so eau de dead fish might be appropriate - or drunk Norwegian trying to keep up with a Dane - but I meant scenicing not scenting.
Philip H.
Chief Everything Officer
Baton Rouge Southern RR - Mount Rainier Division.


x600

  • Crew
  • *
  • Posts: 446
  • Respect: +199
Re: Ballard Why v2.0
« Reply #11 on: May 21, 2014, 01:57:20 AM »
0
OK that makes more scents. OOOOOh, see what I did there?
Scenery is a bit down the road, but that's what's great about being in a club. I'll pass it on to the electrical crew and they'll pass it on to
Jim Younkins. It should come back looking like the Pacific Northwest. Now I want to hurry this up :D
Here is a pic of the leg adjuster


Greg O.
« Last Edit: May 21, 2014, 02:13:04 AM by x600 »

auburnrails

  • Crew
  • *
  • Posts: 39
  • Respect: 0
Re: Ballard Why v2.0
« Reply #12 on: May 21, 2014, 03:19:33 AM »
0
Can I pass my scenery on to Jim Younkins as well?  lol 

Seriously looking forward to this change for you guys.  I've admired your modules for years.

-Dave

x600

  • Crew
  • *
  • Posts: 446
  • Respect: +199
Re: Ballard Why v2.0
« Reply #13 on: May 21, 2014, 11:47:59 PM »
0
Thanks, Dave. I'm sure he could be bought for a vast amount! We hope to have them up and running by the GTExpo show in Nov or the History museum in Dec.
Greg O.

x600

  • Crew
  • *
  • Posts: 446
  • Respect: +199
Re: Ballard Why v2.0
« Reply #14 on: May 26, 2014, 03:09:57 AM »
0
I got a few things done this week. I managed to get the frames done on both modules, and get them to the same point.
It's a little bit of a challenge doing mirror image modules, as when you finally complete a task on one, you realize that you
have to move everything over and do it again.
Got the modules together and thought it would be a good idea to drill some cable holes in the frame at the location of the control panel
before I screwed the tops back on.

Since the legs are cross braced together, I did the leg pockets like this so there was some room for them to expand a little.

I realized since the frame was 5 1/2", I needed to make some slots for the Ntrak clamp location.
Laid the slot out per the manual, and drilled some holes in the corners of the slot.

Cut to the hole with a jig saw and hit the edges with a sander.

I was able to get both sections leveled and clamped to the yard throat module.
From there I got all the switch locations, curves and track centers marked.

When I was marking the cut lines for the cookie cutter roadbed, I started to make some mistakes
and get sloppy, so I figured it was time to quit for the day.

Besides, supper was ready.
The big challenge is to figure out the "ramp" coming in to the yard.
I'm just not completely sure how I'm going to accomplish the task, but there's still time for that.
Here's where I left them, leveled, clamped and laid out. Next will be to get the cut lines down, remove the tops and
cut them, then get everything back on in the right places.


Greg O.