I had problems posting this as a reply to the other thread, so I'll start another.
Okay, here's some pictures of the decoder an coupler jobbies...
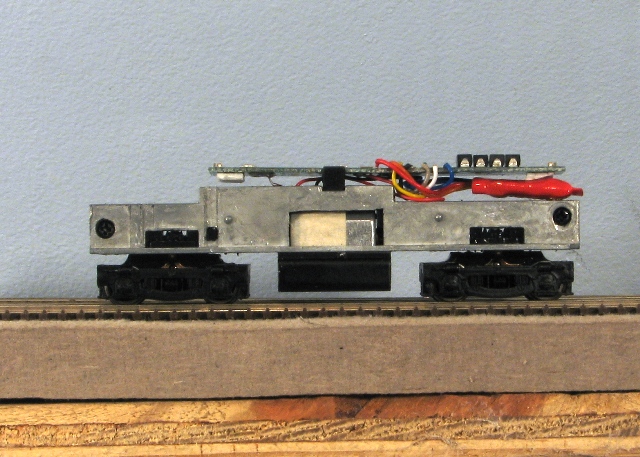
As I said before, the decoder install is a no brainer. It took about 10 minutes. The only thing you have to be careful of is when you're soldering, don't get a blob across two of the terminals. If you have a thin pencil style iron, it's no problem. Just tin the wire, put a dot of flux on the terminal, and zip zap. you're done. The decoder stowes under the light board under the long-hood end of the engine. Although, you might be able to keep the weight in place and put the decoder in the short hood. You can run the wiring under the light board, but that might interfere with the frame wipers, which you can see on the left under the board. This was easy. Now the couplers... not so easy.
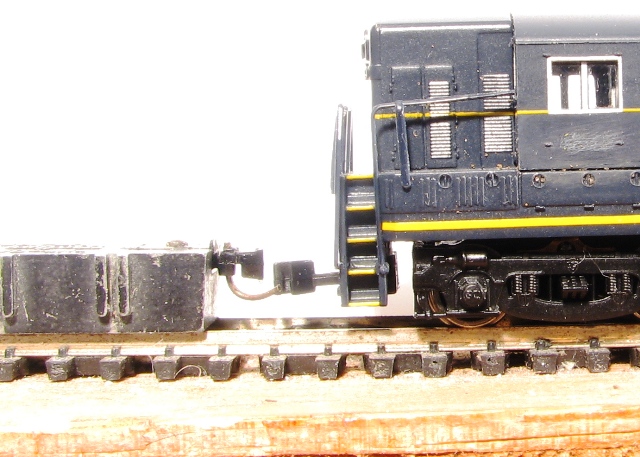
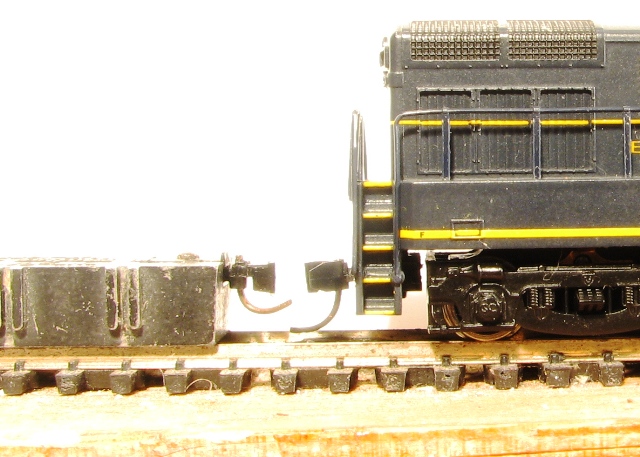
As you can see, we have a coupler height problem. The factory coupler runs low. It also sits in an oddly designed pocket that is not easily adapted to either a MT or Accumate coupler. I tried both, and they end up either sticking out further than the Bachmann coupler, or dangling loosely without a way to properly center them. So I got out the surgical tools...
After assembling an MT 1015 and robbing an Accumate from a hopper car, I determined that the MT coupler would provide the easiest fit. The problem is that the Bachmann coupler pocket mounts with two screws on either side, and there's no pin in the middle, or any "meat" on the shell to drive a screw into. I came up with this Rube Goldberg rig...
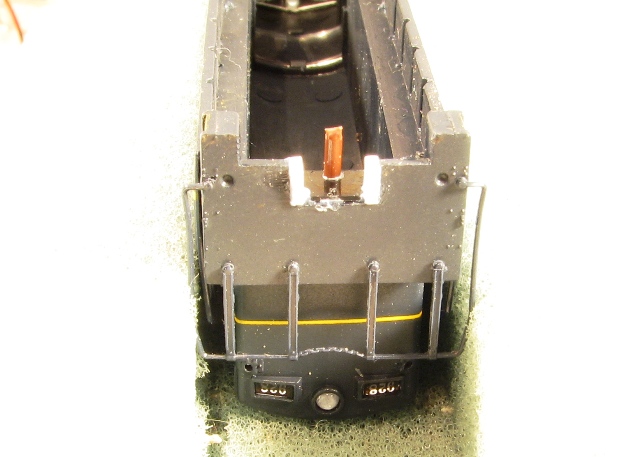
I used my dremel to deepen the opening in the pilot by about 1/16." This takes care of the height problem. The white bits are .030 styrene to create a "T" shaped opening to fit the 1015 box. The brown pin is part of the MT sprue that holds the coupler parts. I left part of the main sprue to make a T shape. You might be able to see it better in this view...

I filed the main sprue flat so it would have a good surface to bond to the shell. The black piece is a stock MT spacer that also comes in the 1015 package. Here's a cross-section:

It's important that you use the right kind of plastic cement to mount this, though. The MT parts are ABS plastic, which is slippery. I first tried Testors Liquid cement with no luck, but when I used Plastruct Plastic Weld, it bonded instantly, and holds like a one-piece casting. You could try using CA super glue, but I don't think it bonds well to ABS. The reason you want a strong bond is that you have be able to remove at least one of the coupler assemblies in order to get the shell on or off the chassis. To get the coupler closer to the pilot, the 1015 box projects farther into the shell than the Bachmann gizzy, and it interferes with the mechanism when you try to snap it into the shell.
Here's a look at the whole assembly. The coupler box is a little crooked... one of those things you don't notice until you're uploading the pictures...
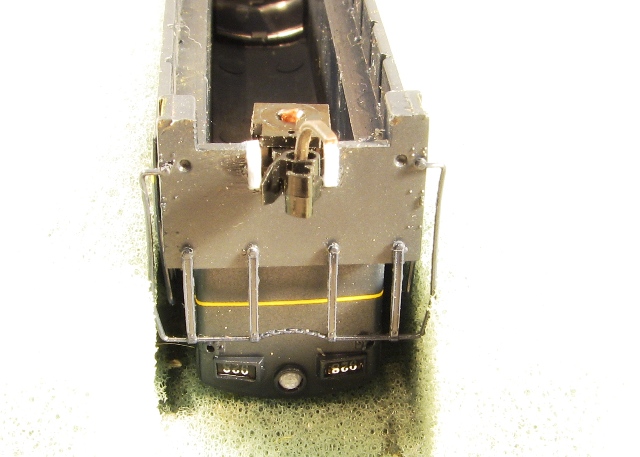
The 1015 box fits perfectly, and a little bit snug over the sprue pin. I have to do a little bit of fine tuning as you can see, but this little gerry rig works quite well, and got me the results I was looking for.
It would be a whole lot simpler if Bachmann would just use the same coupler mount that Atlas, Kato, Life Like and Intermountain use. C'mon Bachmann... Resistance is futile!!
Next, we tackle the paint scheme. Stay tuned.
Lee